• How To Keep Remote Construction Teams Motivated and Productive

    This story was originally published by on the Bluebeam Blog.

    COVID-19 has forced many workplaces to embrace remote working. However, for some employers, working from home and self-isolation directives could potentially devastate business viability. Developing and enabling work-from-home opportunities has come with distinct challenges, particularly as many employers are exploring this territory for the first time. While frameworks, policies and procedures can be developed through a logic-based approach, ensuring your workforce is productive and motivated can be more challenging.

    The rise of remote working in the construction industry

    Global consulting firm McKinsey believes hybrid working arrangements will continue beyond the COVID-19 pandemic. Australian workers have demonstrated this in their widespread exodus from capital cities. 

    In its paper titled “What’s next for remote work: An analysis of 2,000 tasks, 800 jobs, and nine countries,” the McKinsey Global Institute estimates that about 1 in 5 members of the Australian construction workforce could work between three and five days remotely each week.

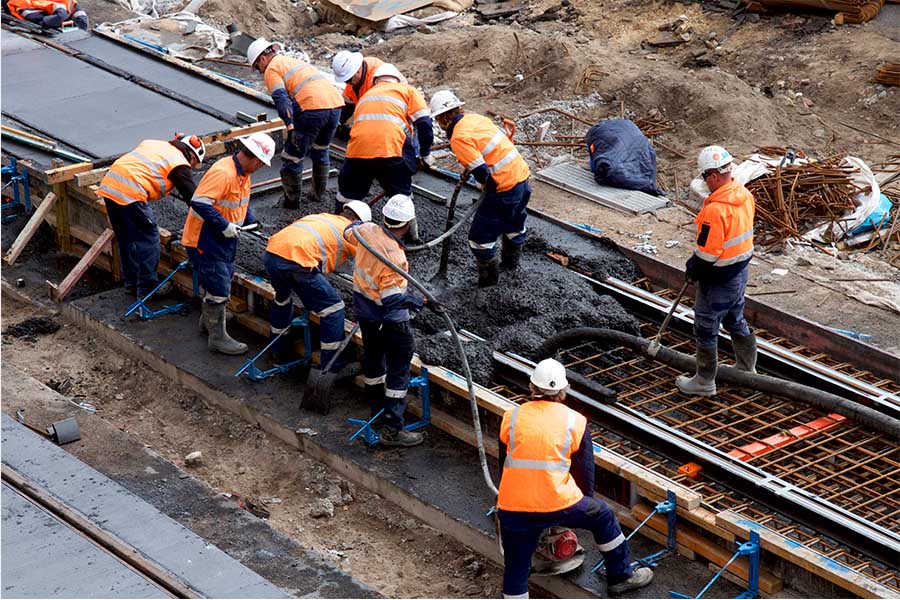
    The opportunity to work remotely depends on various factors, including the nature of particular occupations. The varied roles in the industry mean companies may need to tailor policies to suit different job functions. For example, marketers may more easily achieve a hybrid or full-time work-from-home arrangement, while tradespeople will be required on-site.

    New technologies and digital connectivity are imperative to bridge the divide between team members and the functions of the business, not only to achieve tasks but as part of a broader focus on maintaining and improving motivation and productivity.

    Factors that can affect employee motivation and productivity

    Whether working on-site or remotely, workplace culture is central to your team’s performance, and positive organizational culture begins with leadership. The relationships between managers and their team is a significant driver of workplace satisfaction, alongside meaningful work.

    “Motivation depends on balancing what is meaningful with what is manageable.” – Adam Grant.

    The mismatch between what science knows and what business does  predominantly focusing on rewards and punishment in terms of workplace motivation  has been researched for decades. Consistently, research has revealed that instead of the carrot and stick approach, the building blocks of an engaged and productive workforce should focus on opportunities to embed intrinsic motivation.

    While we may choose roles for professional opportunity and economic reward, our performance is driven by organizational culture and commitment to autonomy, mastery and purpose. Working with a manager who does not communicate well or offer clarity or with a team who doesn’t believe in the end goal is demoralizing and can lead to poor performance. Simple issues, such as inadequate tools or a lack of technology, also act as roadblocks to performance and motivation.

    Tips for keeping remote teams motivated and productive

    With today’s teams increasingly dispersed, developing and implementing ways to maintain and build motivation and productivity is more important than ever.

    Our top ways to future-proof your workforce include:

    1. Prioritize team collaboration and connection

    Collaboration and connection begin at a leadership level. If you build this into your immediate reporting structure, the effect will cascade throughout other teams.

    Embed both informal and formal collaboration into regular team meetings. To foster collaboration and participation, each team member could take turns leading weekly catch-ups.

    Factor in opportunities to brainstorm challenges and lead by example. Bringing a problem to the table for the team to solve encourages lateral thinking and teamwork and demonstrates you value your team members’ contributions.

    2. Build relationships with your team members

    If you have a reputation for being hard to reach in the office and an arm’s-length boss, you will find it difficult to establish good relationships when managing from a distance. Good leaders understand and demonstrate good communication, including building rapport, listening, and clearly articulating goals and expectations.

    Regular one-on-ones with team members, including informal chats and task-specific meetings, break down barriers and build trust and communication. The greater the level of trust, the more likely it is that your team members will be proactive in picking up the phone or sending an email when a challenging problem or potential opportunity lands on their desk. Such trust also means team members have greater confidence in using initiative and taking the lead in progressing work and adding value to their project.

    Create opportunities for team members to work outside their core scope to grow their expertise and contributions. This can help support succession planning and improve staff loyalty and retention.

    3. Arm your team with the tools they need to collaborate and build performance.

    “Give ordinary people the right tools, and they will design and build the most extraordinary things.” – Neil Gershenfeld

    There are many tools ready to be tapped into to build motivation and productivity across teams. Some will be role-specific – such as Asana for collaborating across the business and Xero for accounting. The whole organization can collectively use other generic tools – for instance, Zoom and Microsoft Office’s cloud-based 365.

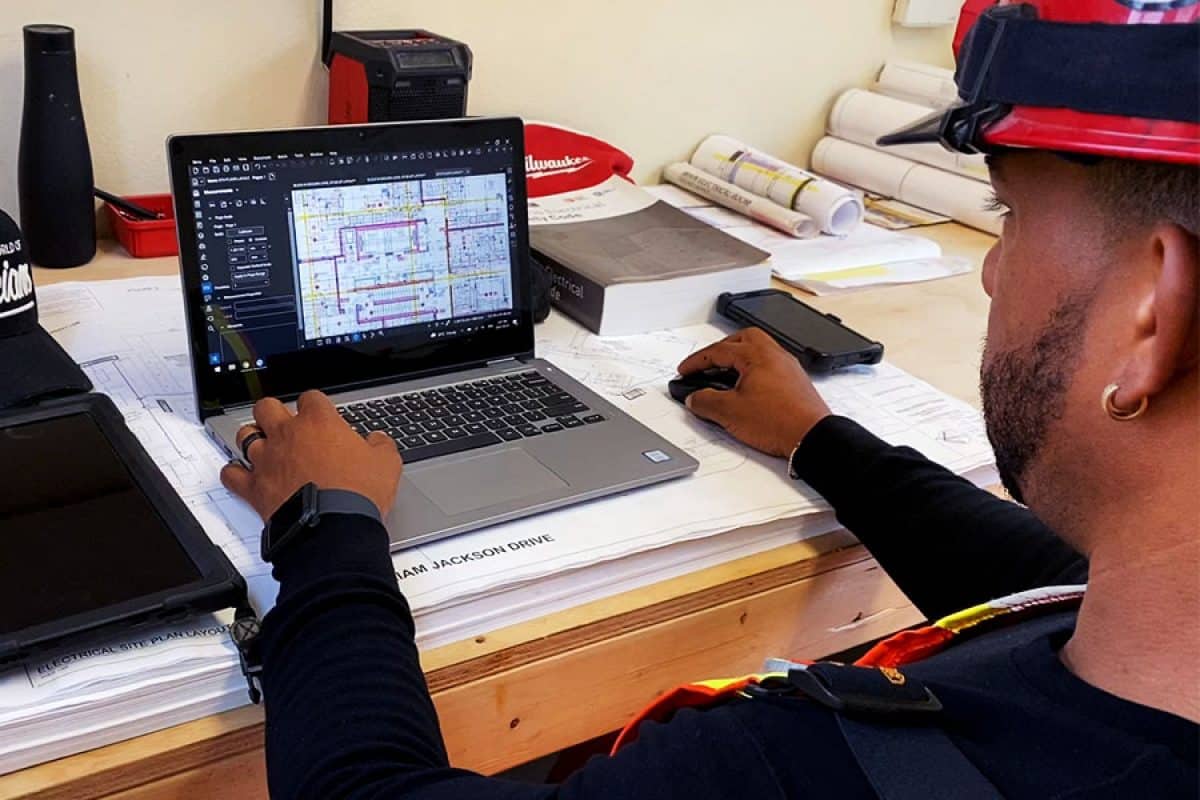
    Industry-specific tools are critical for construction businesses seeking to build a diverse workforce that supports remote team members. This includes tools such as Revu that enhance sharing information in real-time, keeping teams on the same page through the design process.

    4. Recognize and celebrate success

    Most team members contribute their expertise as part of a much bigger job or project. Keeping the team in the loop of the project’s progression, completion and success helps them stay connected to the bigger picture while building a sense of belonging and achievement. Sharing outcomes and lessons learned also helps build improvements in the future.

    Remote team members are valued contributors to all teams. Ensuring you find ways to connect them to the broader team and embedding in practices to motivate and engage your people will deliver better outcomes for your business as a whole.

    Motivation is not a one-size-fits-all approach. And for the construction industry, it’s critical to understand the purpose of your approach and how it will enhance outcomes. This is central to your strategy to ensure your staff feels connected and valued and that your business uses tools to streamline work and improve collaboration.

    Batch Hyperlink Will Blow Your Mind

    This story was originally published by  on the Bluebeam Blog.

    Imagine pointing to an entire folder and subfolders of drawings and bringing the section cuts, elevations and plan notes to life (from 2021).

    One of the most challenging objectives when transitioning from paper documents to digital is overcoming the comfort we developed flipping through a set of physical drawings. There’s just something intuitive about keeping a finger on the plan sheet while you quickly jump back and forth looking at the sections or detail sheets.

    After all, our fingers have been saving pages since we were first introduced to coloring books as children. It can also be difficult to navigate through digital plan sets if they are not created properly.

    In addition to using AutoMark to update digital page labels, possibly the most powerful tool to ease document navigation is Batch Hyperlink in Bluebeam Revu. I’m always excited to show this to experienced users who don’t know this tool exists. To be fair, it is only available in the Extreme version of Bluebeam Revu. If you have Revu Extreme and don’t know about Batch Hyperlink, get ready for an eye opener!

    So, what is Batch Hyperlink and what does it do? Imagine pointing to an entire folder and subfolders of drawings and bringing the section cuts, elevations and plan notes to life. When you’re looking at a plan and want to look at a section cut on a different sheet, you simply click on it and you’re there.

    You can use the Previous View Button to quickly jump back to the plan sheet.

    You don’t even have to place your finger on those pages. Remember those times you thought, “If I only had a few more fingers?”

    As a bonus, if your cover sheet has a Sheet Index, you’ll notice that it has come alive with links to every page in the set.


    If you work with small-format fabrication drawings where the drawing number is actually the piece mark number, you could also use Batch Hyperlink. In the case of steel fabrication, you might have 11×17 drawings with a mark number and bill of materials.

    All these assembly mark numbers are then referenced on an erection plan or elevation. Revu will find those mark numbers as if they are section cuts and connect each piece on the plan to the sheet with the fabrication drawing.

    As with every tool in Bluebeam Revu, there are several creative ways to use Batch Hyperlink.

    Default Hotkeys: What’s the Pattern?

    This story was originally published by  on the Bluebeam Blog.

    Bluebeam has a document that shows Revu’s hotkeys for various features, located here.

    Starting with the basic hotkeys, we can type single-letter commands mainly for drawing tools. Most of these are intuitive, with “r” for rectangle, “l” for line, “e” for ellipse, etc. But once we run out of letters in the alphabet, we have to get a little more creative. Snapshot can’t be “s,” because stamp is “s”—therefore snapshot uses “g” (think of grab or get snapshot if it helps). Cloud is “c,” so callout moves to “q”—which is easier to understand with a Boston accent.

    All of these simple drawing hotkeys have default settings that come preloaded when you install Bluebeam Revu. For example, pressing “r” for rectangle will draw a red rectangle with a line thickness of 1. Pressing “l” for line will draw a red line segment with a line thickness of 1.

    Default drawing hotkeys can be reformatted however you like each time by using the “Properties” tab. If you have a format that you use frequently, you can draw the object, format it, then while it is selected, click “Set as Default” from the “Properties” tab.

    Now, every time you draw that object, it will default to what you set up. If you later desire to change it, just redraw, reformat and click “Set as Default” again. Revu will remember this default every time you use the program.

    In addition to the many one-key hotkeys, there are far more combinations once you consider modifier keys (i.e., ctrl, alt, shift). These are somewhat loose associations, but will speed up the memorization and implementation of most hotkeys:

    Shift:

    Many of these hotkeys exist because we only have 26 letters to work with. So drawing a curve (or arc) can’t be “c,” because cloud is “c,” so “shift + c” draws a curve. The pen tool uses “p,” so we have to use “shift + p” to draw a polygon and “shift + n” for polyline. These items are easily learned with some regular use.

    The shift modifier is one you’ll use heavily for markups. AutoCAD has “ortho” and “polar” modes that modify the way that you draw objects on the fly, and Revu uses “shift” to achieve similar functionality and more. For example, “r” draws a rectangle, but “r + shift” draws a special kind of rectangle: a square.

    Holding “shift” while drawing a line makes it snap to 45 degree increments. Holding “shift” while drawing an ellipse draws a special ellipse: a circle. “Shift” also forces markup stretches using the handles to stay at 45 degree or 90 degree increments, depending on the markup—but that’s not the focus of this article.

    Ctrl:

    These follow the standard Microsoft Windows hotkeys where “ctrl + c” is copy, “ctrl + v” is paste, “ctrl + x” is cut, etc. A very powerful function Revu offers is to hold “shift” while pasting something so that it will paste in exactly the same place on the page from where it was copied. So if you have something you want in the same place on every page, you can copy it and then press “shift + ctrl + v” to paste it in the same position.

    For those like myself in structural engineering, I can copy a post on the third floor plan of a drawing set and then paste it in exactly the same place on the second floor plan to trace objects and loads down floor to floor. I can copy a shop drawing review stamp or page number and then paste it in exactly the same spot on the next page.

    Some non-standard hotkeys using the “ctrl” key are moving objects to the front or back or affecting the view of the page (e.g., “ctrl + h” splits the view horizontally between two documents).

    Alt:

    These hotkeys are for opening the various tabs. I find it easier to right click one of the tabs and select which ones I want to see. Then I keep the most pertinent ones open while I work and only open less commonly used tabs, like Studio in Revu, once in a while. As an engineer, I live in the properties and measurement tabs.

    For big projects, the layers tabs help me navigate busy plans, and the bookmarks tab help me navigate long calculation packages. The toolbox tab is where I store my pre-drawn markups for detailing and plan work.

    Shift + alt:

    The measurement hotkeys live in this domain, such as measuring length, area, volume, angles, etc. For example, “shift + alt + l” measures length.

    Ctrl + alt:

    These hotkeys are used for aligning and flipping objects. Objects can be flipped vertically or horizontally, and aligned with other objects’ tops, bottoms, left edge, right edge or center in either direction.

    Ctrl + shift:

    These commands generally affect the document itself, rather than the content within the document. You can rotate the page or pages, insert a blank page, close tabs, flatten the document and much more.

    Ctrl + shift + alt:

    The Bluebeam team has pitied your mortal five-fingered hands. There are no hotkeys that require three key modifiers. Whew!

    Obviously, there are lots of functions that don’t perfectly fit in one category or another, but these are generally infrequently used. This article should help you get up to speed on learning the many hotkeys and functions that Bluebeam Revu offers. I find that the things I practice day to day in Bluebeam are very intuitive, and I hope you will too.

    How Roofing Contractors Increase Efficiency with Bluebeam Revu

    This story was originally published by  on the Bluebeam Blog.

    It’s been fun over the past couple of articles highlighting ways concrete and framing contractors are using Bluebeam Revu.

    To continue with this series highlighting specialty contractors, I want to focus on the roofing contractor. Let’s look again at a few creative ways Revu is being used in the industry.

    Whether you’re roofing single-family homes, multi-family residential or large commercial properties, this article will focus on ways we measure flat and sloped quantities on drawings. Perhaps more important, these tools will allow us to safely measure existing roofs when we don’t have drawings and little to no access on-site. If this gets you thinking about possibilities, check out my article, “How Roofing Contractors Capture Hard-To-Get Measurements Using Bluebeam Revu,” where I go into greater technical detail.

    Using satellite imagery

    I live in a northwest suburb of Minneapolis, a part of the country that sees all sorts of crazy weather, including tornadoes, wind and hail—not to mention a good amount of snow. Several years ago, a hailstorm damaged many homes in our area. When the insurance adjuster came out to take measurements of our roof, he was scared to go on the roof and made no effort to hide his fear.

    I gladly followed him around drawing the roof faces with ridgelines and valleys until we came to the back half of the house. We live in a split-level house with a walk-out basement, so the roof is two stories on the back side. He affectionately called it the “scary side.” Needless to say, he was the one drawing at that point while I looked for damage to report.

    What I wanted to do was invite him into the house, where I could easily get a roof layout from a satellite image online.

    Looking at mapping applications or apps like Google Earth, a contractor could quickly enter the project address and zoom to an aerial view. Often, these applications provide a bar scale somewhere on the image. Make sure you include this scale when capturing the screenshot. Opening the image in Bluebeam Revu, we’re able to use the bar scale, parking spaces or a known building edge to calibrate the image to the correct scale.

    Versatile Revu features

    With a properly scaled image, we can now use the area measurement tools to trace the outline of the building along the soffit or parapet. In different areas, we might use the Cutout tool to remove material for a rooftop unit or other special conditions. Obviously, the same workflow is easily done if drawings are provided; I just wanted to mention a workflow where we might be able to eliminate a site visit, travel time, coordinating roof access and nasty winter conditions.

    What about residential projects with sloped roofs?

    The same process can be used to collect the square footage of the roof layout. In this case, however, you can add an 8/12 pitch to the area measurement and Revu will do the math for you, updating the square footage. Revu also has great tools for measuring facia, soffits and sloped ridge and valley materials.

    In the case where drawings are outdated or not available at all (and aerial images also aren’t available), we still have options for collecting field information. Revu allows us to start a fresh new PDF of any size. You can include an engineer grid to help draw to scale as you measure. If you need measurements to be a little more precise, there are Sketch To Scale tools where you can draw the exact length and shape.

    With the versatile markups in Revu, you can record any roof penetrations, piping or curbs needing special materials or labor. If you do this regularly, create a PDF template with your company title block. Use Form Fields for project information.

    Whether you quantify square footage, squares for shingles or need the number of sheets of plywood, formulas can be embedded to collect all the important information quickly and accurately—and maybe even help avoid the “scary side” of the roof.

    If you’re a roofing contractor working on residential or commercial construction, or an insurance adjuster dreaming of working safely from home, hopefully I’ve sparked some new ideas to increase accuracy, efficiency and safety to your current workflows.

    5 Top Tools To Help Onboard Your Team With Construction Software

    This story was originally published by  on the Bluebeam Blog.

    One of the concerns people cite when it comes to digital transformation in their organizations is around onboarding teams without disrupting ongoing construction projects and processes.

    Our own research bears this out. According to a survey we carried out with DCW Connect earlier in the year, one in three construction businesses actively avoid investing in technology because of perceived challenges around training and change management.

    In our experience, this can be overcome through a robust communications plan that engages teams every step of the way and demonstrates how the tool will help the organization meet its objectives (more on this here).

    Of course, it helps if you have a construction technology provider that is a good cultural fit for your business and has the processes and tools in place to help you to get up and running as soon as possible.

    Here are five ways in which Bluebeam makes this transition as easy as possible:

    Tool 1: Plugins and integrations

    To help simplify the transition period, Revu supports a variety of plugins and integrations. This allows users to continue with legacy tools where needed and integrate Revu with their wider software stack.

    They divide into three key areas:

    • Plugins for AutoCAD, Revit, Navisworks, Sketchup and more support the collaboration between architects or engineers in the office and contractors and subcontractors in the field, so everyone has access to the right data at the right time (read more).
    • Integrations designed to simplify the transition between other software providers and Revu. Whether you’re working with other BIM technologies or need to connect to your project management solution, check out our list of active integration partners here.
    • Integrations supporting business operations, such as our SharePoint integration, which helps with better document and file management, keeping everything in one place and limiting risk.

    Tool 2: Deployment configurator

    The Revu Configuration Editor is designed to help IT teams roll out Revu to their organization in a standardized way and is part of the Deployment Packages (MSI).

    It is an optional tool that allows you to easily configure scripts for your Revu MSI deployment, MSP patch update or create scripts for post-installation deployments of custom assets, such as profiles, tool sets, hatch patterns and line styles.

    As a best practice, we highly recommend using this configuration tool for creating all your deployment scripts, which can be used with your deployment tool or other method of choice. You can also still create deployment scripts manually (more on this here).

    This video has more about how it all works.

    Tool 3: Profiles

    Profiles provide an easy way to store your favorite toolbars, menus and other display settings so that the tools you find most useful are readily available each time you open Revu.

    Profiles can also be used to shape the user interface of Revu for particular job functions within an organization. For example, a simplified interface for users who view, but don’t need to edit, PDFs can be created by turning off most of the toolbars and tabs within Revu, maximizing viewing space (more on customization here).

    Once set, profiles can be easily shared and amended when required. We’ve seen customers create a set of core profiles designed to support different functional team needs. Once exported and shared, these core profiles can still be tweaked by users if they want to turn other toolbar items back on to suit their personal preferences.

    Tool 4: Tool Chest and tool sets

    The Tool Chest allows you to store all your markups in tool sets and share them with anyone. It comes pre-loaded with several collections of industry-standard markups to help get you started. But we know every organization is different, so when ready, try creating your own tool sets either with individual or grouped markups. Your custom tools sets can be exported, saved locally to your machine, imported or shared, so no matter where your teams are operating from, everyone uses the same tools and markups. You can even share your custom tool sets with other build teams outside your organization to ensure standardized markups from project start to finish.

    This quick video guide offers more details.

    Tool 5: Training resources

    One of the key components of any rollout is a wealth of training resources that can be accessed at any time within your organization. No matter if your team prefers self-study videos or virtual guided training courses, Bluebeam has you covered.

    Some of our most popular resources are listed below:

    If you need further help and support with your rollout, you can get in touch with your local Bluebeam team here.

    How Framing Contractors Can Best Use Bluebeam Revu

    This story was originally published by  on the Bluebeam Blog.

    In my last article, we covered the features in Bluebeam Revu that all concrete subcontractors should know. I started the piece saying I’m a firm believer that every specialty contractor could benefit from implementing Revu. To continue with this series, I want to highlight the next subcontractor on site, the framing contractor.

    Let’s look again at some creative ways Bluebeam Revu is being used in the industry.

    It’s the framing contractor’s turn to show off and again prove my theory that every specialty contractor could benefit from implementing Revu in their everyday workflows.

    Whether you’re timber framing single-family homes, multi-family residential or steel stud commercial tenant improvement, this article applies to you. If you’re interested in seeing the more technical side of these workflows in action, check out my article.

    Material Takeoffs: With the complexities of wood framing, estimating would be difficult without some degree of guesswork. Not only do we have different nominal lumber for different wall thicknesses, but we also have different products like glulam, LVL, timbers, Versa, BCI rafters and I-joists with different series, as well as CDX plywood and OSB. With all of those comes a library of sizes, shapes and thicknesses.

    Do we base on averages for square footage or measure the linear footage of walls? If our material takeoffs are too low, the project is on hold waiting for supply shortages. If it’s too high, we have an owner assuming you’re hauling the lumber they paid for to the next job. Also, when material arrives, how do I know what goes where?

    With the flexibility of Revu, we can build custom tools with formulas embedded to not only get the length of material needed for the facia board, but that same markup could calculate the sub-facia and number of outlookers as well.

    Starting with the end in mind, takeoff tools can be built to calculate several materials at the same time, like an assembly. This allows a chance to embed industry know-how and ensure materials aren’t overlooked. Obviously, you can imagine this method easily translates into the pre-construction of wall panels or modularized construction by applying mark numbers to the panel assemblies.

    How to Use Revu to Create Successful Bids

    This story was originally published by  on the Bluebeam Blog.

    With smart PDFs now being generated as part of bid packages thanks to a variety of digital tools within the marketplace, end–users can now use technology to boost the visual appeal, accuracy, and overall value of bid packages.

    Bluebeam Revu can actually make use of those smart PDFs by making sure that it allows estimators to take off quantities accurately,” said Deepak Maini, a qualified mechanical engineer with two decades of experience. “The tools that you’ve got available in Bluebeam Revu, the accuracy of picking regions, the accuracy of visually searching items, and the standardization potential make it a great asset to making a successful bid package.”

    Three keys to a successful bid

    • Accuracy of the scale of the sheet
    • The right set of customizable and standardized digital tools
    • Accurate cost values associated with materials and labor

    Quantity takeoffs and accuracy

    Now a noted guest lecturer at the University of Technology Sydney (UTS) and University of New South Wales (UNSW), Maini, the current national technical manager for Cadgroup Australia, advocates for paperless bid packages and credits Revu as a crucial piece of the puzzle.

    “In the Australia-New Zealand market, and actually in the global market as a whole, the climate is very competitive,” Maini said. “The process of taking off quantities within today’s market needs to be accurate and needs to be fast. And that’s where Bluebeam Revu plays a massive role. With it, the estimator can take off quantities on one job and then quickly get onto the next job without wasting too much time.”

    “There’s absolutely no comparison between Revu and paper,” Maini continued. “We are talking about projects going in hundreds of millions of dollars and billions of dollars as well, which means that you’ve got these PDF sheets getting delivered to you, which are not two or three sheets. You’ve got 100-150 sheets getting delivered and that’s why taking off quantities using an accurate process is really important.”

    Digital collaboration with Bluebeam

    Ensuring scale can also be achieved within the sophisticated calibration capabilities in Revu. This is crucial when receiving documents as you don’t have to rely on the imagery to be accurate in scale, which could be a huge issue for estimation.

    “In Revu, we calibrate the sheet and we find out what scale the objects are at, and then when we are taking off the quantities, it ensures that we use the right scale and we get the right measurements,” Deepak said.

    Standardizing

    Being able to consistently takeoff accurate quantities is essential to completing bid packages in a timely and accurate manner.

    “This is again where Bluebeam Revu is absolutely fantastic,” Maini said. “I create certain specialized and takeoff tools, I can then have them sitting in my own custom toolset, and then I can distribute the toolset within my own team, which means that everybody who’s taking off the quantities will have the same display of quantities. ”

    Cost values can also be plugged into Revu, allowing instant dollar projections for the project. “As you take off the quantities, it gives you the dollar value of that quantity right there in front of you,” Maini said. “You can have that displayed as a table on the sheet, which means that you can straight away find out how much it’s going to cost you.”

    The ability within the digital tools in Revu to drive accuracy and consistency among estimators allows firms the flexibility to more accurately staff projects, without the risk of lesser experienced estimators using a process of their own, which might hinder the accuracy of the quantity takeoffs and the success of the bid as a whole.

    An Electrician’s 4 Favorite Bluebeam Revu Features

    This story was originally published by DOMONIC DIAZ-WESTON on the Bluebeam Blog.

    Every construction trade plays a different role in each construction project. As a result, they are likely to find different values in the myriad tools and features available in Bluebeam Revu.

    Kaaron Lee-Wah, an electrician in Toronto, is no different. To him, Revu has become essential ever since his boss asked him to explore how to completely digitize his company’s electrical drawings from paper. Revu has allowed him to use tools in the software that make his job more efficient, helping him to save time on previous paper-based tasks.

    These are the Revu features that are unquestionably Kaaron’s favorite:

    Tool Chest“This allows you to create custom icons to help identify and create a clean and easy layout for your guys in the field to follow along. When it comes to electricians using Bluebeam, there are many different panels, circuits and devices that we have to account for and include on our drawing. With Tool Chest, you can create icons, color whatever size you need it, all in a matter of seconds—and they look very professional.”

    Calibrate“The Calibrate feature is pretty dope, where you’re able to upload a PDF version of any drawing—whether it be mechanical, architecture, electrical, even landscape—and you can customize that calibration to that specific scale. So, drawings come in many different scales, and other software have a hard time picking up and reading that scale of a drawing. But Bluebeam has a great feature, the Command + M tool, that can measure it, and you’re able to customize and calibrate any drawing or PDF you upload into Bluebeam, which gives you access to finding whatever measurement that you need—whether it be in millimeters or meters or feet—all off the custom calibration once you upload it into your Bluebeam Revu.”

    Overlay“It’s kind of similar to Snapshot, but with Overlay you’re able to grab the entire page itself and overlay it on top of a second set of drawings, and then that can help you identify or troubleshoot any issues with architecture and electrical drawings.”

    Snapshot“I find with Snapshot you’re able to now copy a section—let’s say the electrical drawings—and bring them over to the architectural drawings if you want to overlay for a certain reason. So, what we do in the electrical trade is I’ll take a Snapshot of the electrical drawings of let’s say a unit in a condo, and I will overlay it on the architectural drawings, which show you more detail—wall sizes, how long a wall is, how deep the wall is. It’s an amazing feature, and it comes in clutch every time.”

    Watch on YouTube https://www.youtube.com/watch?v=zAkD-l8v_m8 

    How Concrete Contractors Can Best Use Bluebeam Revu

    This story was originally published by Troy Degroot on the Bluebeam Blog.

    I’m a firm believer that every specialty contractor could benefit from implementing Bluebeam Revu in their everyday workflows. For this article, I’d like to highlight a concrete contractor’s position from bid to built.

    There are a few important objectives we find in any construction project. I’d like to walk through how Revu meets those requirements. If you’re interested in learning more about how these can be done in Revu, have a look at “5 Ways Concrete Contractors Get the Most Out of Bluebeam Revu.”

    Every company is different in how it approaches projects. In this article, I want to highlight the possibilities so you can see where Revu fits and what customizations may be required to make it fit your unique needs.

    Let’s look at those project objectives.

    From the first time you open the request for proposal (RFP), there are things a project manager starts to think about even before they open the drawings—and even more as the plans rollout.

    Project Location: Do we have crews in the project location, or do we need to accommodate for travel expenses? While Revu may not have a “location cost” built into the available tools, it is possible to develop these. Perhaps you want to have a pulldown menu with specific cities or areas where you perform work regularly. Along with the locations in a pulldown, you could also associate a percentage markup to account for that area based on historical project data.

    Pour Dates and Schedule: Do we have crews available to meet dates and project phases? For large development projects with phases, we can use the Spaces feature in Revu. Simply draw a Space shape around an area of work and name it “Phase II.” By doing so all the slabs, curbs, etc., will be categorized in the markups list under the Phase name. This makes it easier to allocate crews, materials and equipment based on the specific requirements of each phase. We can also track the progress using the built-in Status column where crews can mark each day’s progress on what slabs, walls or foundations were completed.

    Equipment Required: Just like labor availability, we need to consider equipment availability for things like forms, trucks, curb or cross pan machines. Creating custom tools in Revu, you can place a symbol within a “Phase” indicating what equipment is required. You can even allocate a rental price per day for the equipment cost estimate.

    Estimate: There are great measurement tools included in Revu allowing you to calculate area of slabs, volume of isolated pad footings or linear footage of strip footings. The versatility of Revu and our ability to customize tools opens the door to personalizing your markups and what data is generated. We can differentiate types of pours by color, linestyle and hatch patterns, or even add labels to display a description right on the drawing. We can also add parameters like design mix, hand vs. machine, or whether fiber mesh or WWF is required. In some cases, we could even estimate the rebar required or the number of trucks need to be scheduled based on cubic yards.

    Finish Requirements: We need a clear understanding of finishes like construction/control joint layouts, stamped design, smooth or broomed, color stained or saw cut requirements. Applying different colors or hatch patterns to the markups will clearly identify those areas in a clear and visual way for the estimator and the crew in the field. A custom line tool representing saw cuts allows you to trace them on plan and quickly apply labor and equipment costs based on a linear footage collected in the markups.

    QA/QC: As a final walk through you can do a punch list noting any damage cause by other trades. You can easily incorporate images or video documenting these damages and what it will cost to fix them.

    Revisions and Scope Changes: Every project has delays for weather, site and utility prep. Often projects have design changes as well and we need to not only stay current but also track and communicate scope changes. These can often change cost and pricing as the scope begins to creep after the original estimate. Revu also has tools called Document Compare and Overlay Pages that will look at two drawings and quickly point out the differences. Document Compare is going to automatically draw clouds around all the changes. Overlay Pages is like the old light tables we used to place physical drawings over one another and see what was different. After finding the changes, your takeoff markups can quickly be stretched or moved rather than starting over. At that point, you have tangible evidence of scope changes for cost updates.

    After reading these objectives and possibilities, you could have one of three responses. One, this article helped evaluate Bluebeam Revu as a solution. Two, you already use Revu, but the article sparked ideas on how your current use could improve. Or three, we confirmed you’re already getting the most out of your software investment.

    What a “Free” Document Management Tool Costs Your Business

    Many free content management solutions are available in the market today, such as SharePoint, Box, Network Shares, and even USB external drives. Organizations recognize the need to capture their electronic documents online and use these tools to fill the need. While providing basic functionality, free applications can cost your business more money and time than a dedicated engineering document management system (EDMS). 

    While seeming to be a cost-effective solution, the reality is these “free” tools are missing a considerable amount of standard EDMS functionality. Here are just a few examples:

    • Document control
    • Workflow automation
    • Full change management

    This lack of features can cost money to your organization and cause lost knowledge with staffing turnover and retirement.

    Where “Free” Document Management Tools can work and their Limitations

    Some businesses can have success using document management solutions such as SharePoint, Box, and other file share applications if they fall into the following categories:

    • Only require basic document management functionality
    • Small or mid-sized organization
    • No need to collaborate across different departments or external sources

    These tools tend to work as sizeable digital filing cabinets, allowing groups to share and save documents in an accessible space and provide the following benefits for non-technical documents:

    • Provide users the ability to save, share, and search for files across the business
    • Cloud-based sync storage of files
    • Mobile device access to documents
    • Easy management of landing pages, libraries, and lists

    Where “Free” Document Management Tools Fail Engineering Requirements

    While these “free” tools fill a niche role, they do not provide a complete solution required by an Enterprise-class organization that requires structured, controllable document management.

    A “free” tool can assist organizations that utilize a basic linear workflow for generic documents, but technical documents and drawings require a malleable workflow. Technical documents usually are highly regulated with a control process in place.

    Technical documentation also comes with the following challenges:

    • Normally unstructured data set
    • Used across multiple systems and teams
    • Difficult to access due to change management locks and file type diversity

    These factors make engineering documentation tough to manage, access, and control. When you add in other systems, such as a CMMS tool, it is challenging to monitor this information within the limitations of a free tool.

    Getting this wrong can have a significant impact and reverberating effects throughout multiple teams. In document-heavy facilities (i.e., power plants, factories, etc.), technical information must be accurate and available to avoid downtime and maintenance issues, leading to lost revenue. Businesses trying to shoehorn these free tools into their typically experience the following problems:

    • Increased costly downtime
    • No integration available between other systems such as CMMS
    • Increased complexity of change process management
    • Concurrent engineering challenges with technical documents
    • Lack of communication tools across multiple sites and departments
    • Lowered efficiency due to missing EDMS functionality

    The True Value of Meridian EDMS

    A robust engineering document management solution (EDMS) like Meridian is required to help organizations manage their technical data and avoid the pitfalls of “free” tools. While having an initial higher cost, EDMS solutions provide a considerable value when looking at the overall picture. Here are a few benefits gained by using a dedicated EDMS:

    1) Document Exchange

    Larger projects bring the challenge of sharing documents with multiple departments and teams. These documents can be lost or delayed when being pushed through the review cycle. An example of this is an AutoCAD file with external references. Drawings referenced by the target document can be ignored or lost during a typical workflow unless tightly tracked throughout the process.

    Meridian solves this issue by tracking these secondary technical documents with built-in functionality. Free tools such as network shares or Dropbox do not cover these scenarios, leading to lost or duplicated work.

    2) Extra IT Maintenance Costs

    While a “free” tool can seem cost-effective, it often strains IT resources assigned to manage them. Typically, the IT resource tasked with maintaining this tool is responsible for many other systems and lacks the proper training.

    The Meridian SaaS offering provides all maintenance, support, and upgrades which removes the added workload from your IT resources.

    3) Work Order Efficiency

    While “free” tools can help a smaller business execute on work orders, they become a hindrance to a larger organization with multiple teams and facilities. Work orders can be challenging to locate across multiple disparate systems with inadequate search tools, which can lead to the following:

    • Safety concerns
    • Multiple document copies spread over different systems
    • Technicians using obsolete document versions
    • Inaccurate data due to lack of document control tools

    With a dedicated EDMS like Meridian, your organization can refer to a single source of truth that features purpose-built document control. Technicians will gain access to the latest document version that is found easily using robust search capabilities. All technical documents related to an asset can be located quickly via a tag scanner or the surrounding metadata via the advanced search. Streamlining this process will have an immediate impact on work order costs and resource availability.

    4) Lower Operating Costs

    Using “free” tools alongside legacy pen and paper document solutions incur costs associated with printing and logistics. When you need to get a hard copy into the hands of a critical resource on time, this can impact your budget. Not only can this cost your business money, but it also wastes effort if the package does not contain all the required documents.

    The Meridian solution will allow your teams to move critical data into a single system with high online availability. Moving to an EDMS will allow your resources to access the latest complete document packages on many IoT platforms (i.e., mobile devices, tablets, PCs). Manual labor is heavily reduced via the automation capability of the tool, saving many hours in labor costs.

    Sometimes “Free” is Expensive

    The actual cost of a “free” or legacy tool can surprise an organization. By not using a purpose-built application to manage your technical documents, you can end up costing your business time, efficiency, and money in the big picture.

    If your business is interested in unlocking the power of a dedicated EDMS, don’t hesitate to get in touch with the SolidCAD Meridian team.