As promised in my last blog, here are some tips and tricks that I often use to convert mesh body to a b-rep or t-spline body in Fusion 360.
Tip #1:
Converting a mesh body to a b-rep or t-spline body in Fusion 360 requires some knowledge on mesh elements. At the moment, the current limit for number of mesh elements for Fusion 360 is roughly 10,000. Meshes with greater than 10,000 elements will cause the performance of Fusion 360 to suffer and Fusion 360 may not be able to convert them to solid bodies.
Tip #2:
When using the “Convert” command to convert a mesh into a T-Spline body an error might occur such as detailed in the picture below.

This is because Fusion is better equipped to handle Quads as opposed to Triangles or Polygons. Quad meshes cannot be created in Fusion. To create a quad mesh, Use 3DS MAX or Autodesk Recap Photo. To convert triangulated mesh to Editable Poly with 3DS Max before inserting into Fusion 360, use these steps:
Import triangulated mesh into 3DS Max
- Apply Subdivide (WSM) with “Display Subdivision” turned OFF
- Use “Collapse To” to Collapse the mesh
- Convert the Collapse mesh to Poly mesh
- Apply “Quadrify All”
- Export and Insert the Quad Mesh into Fusion 360
Tip #3:
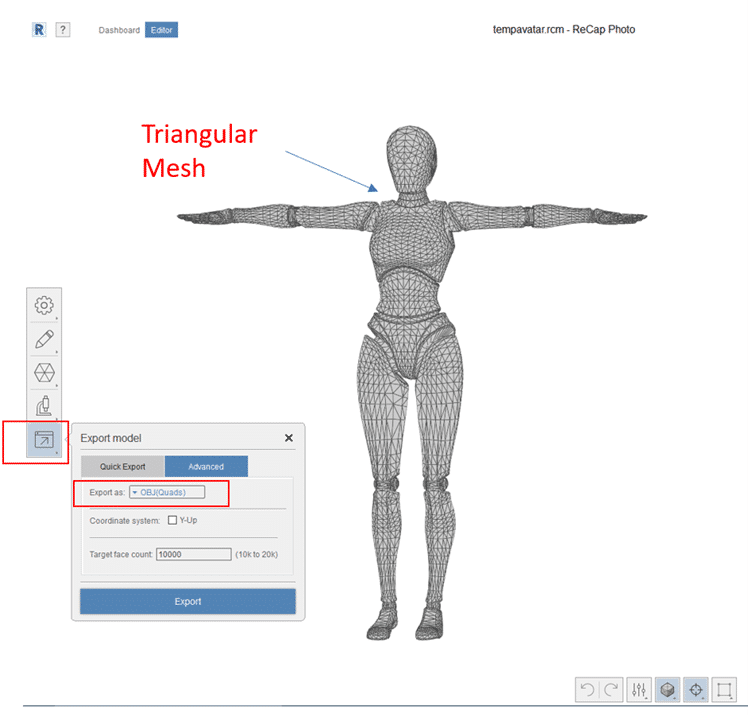
You can create or convert quad mesh using ReCap Photo. ReCap Photo can create mesh from a series of photographs. Photogrammetry is not an exact process. The mesh generated from the pictures will seldom, if ever, be perfect. Typically, some cleanup is required. Use ReCap Photo to simply highlight and delete unnecessary surfaces. You can also use the Slice and Fill command makes it easy to preserve the desired portion of the mesh while ensuring a watertight result. The final step in ReCap Photo is to export the mesh as OBJ(Quads). Traditional meshes are made up of triangles. The Quad mesh is made up of four-sided patches. The image shows how to export mesh to OBJ(Quads).
Tip #4:
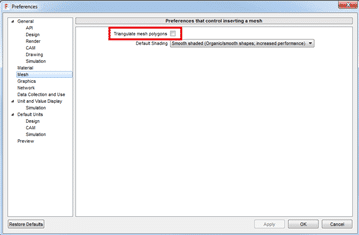
In your Fusion 360 preferences, you will need to ensure that the “Triangulate mesh polygons” flag is not enabled. Only quad meshes can be converted to t-spline bodies and enabling this flag will convert imported quad meshes to triangular meshes.
Tip #5:
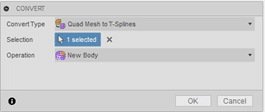
To convert a quad mesh to t-splines, you must be working in the Direct Modeling environment. After ensure the preferences above are set up correctly, right click the mesh body you would like to convert to t-splines in the browser and select “Convert”.
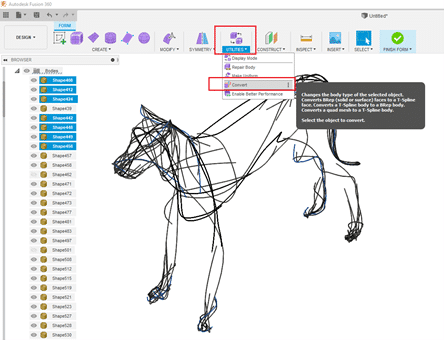
The “Convert” dialogue will then allow you to convert a quad mesh to t-spline body.
Tip #6:
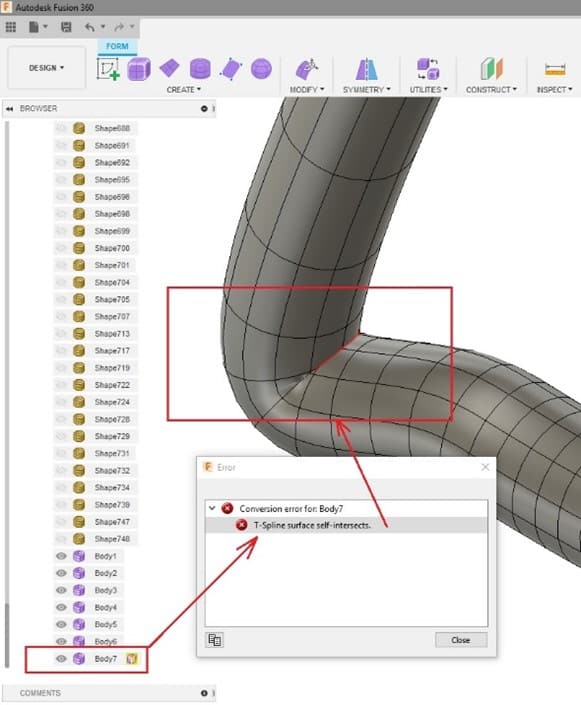
Some conversion may produce error due to surface self-intersects. These errors are often highlighted very well in Fusion 360. The self-intersected T-spline will not be able to become solid body if not treated. You can use Edit Form to move vertices, edges or faces of the T-Spline to clear out self-intersected area.
Tip #7:
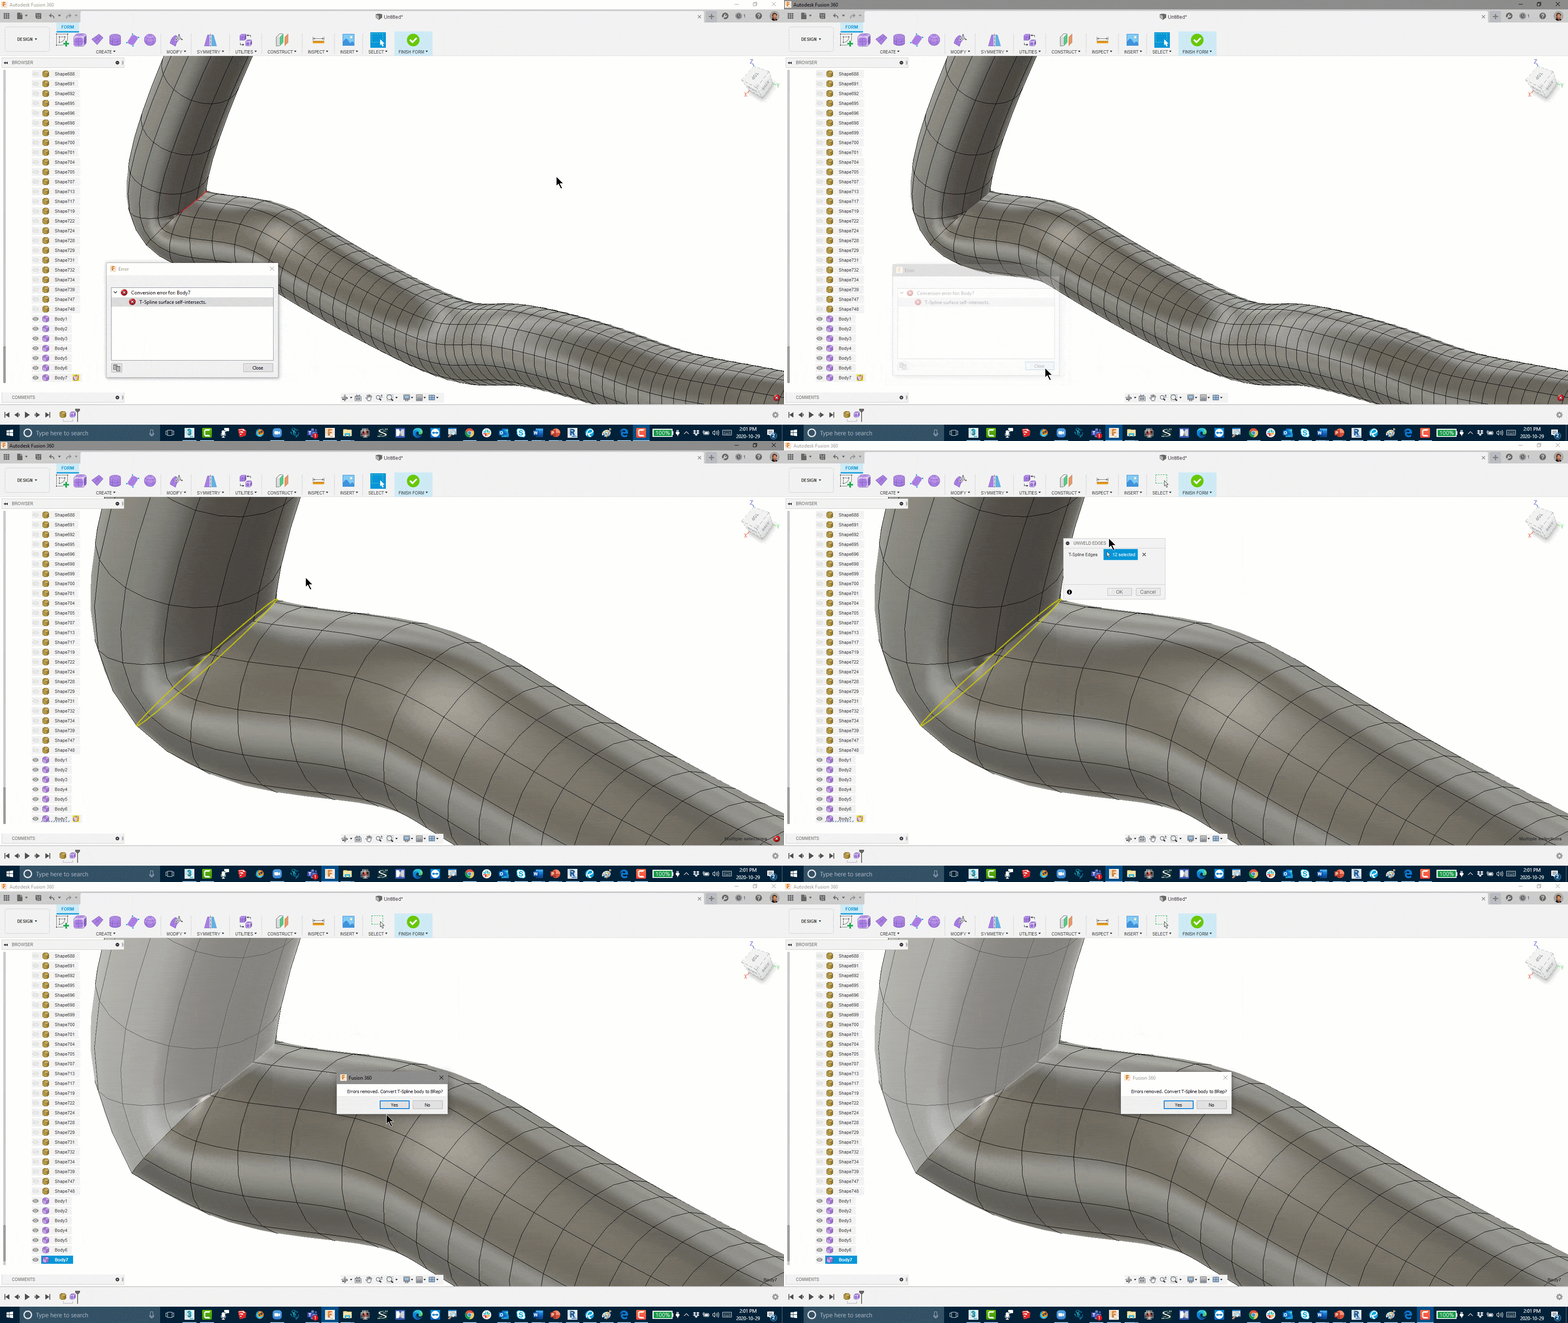
To fix surface self-intersects quickly, you can double click the edge ring and use UnWeld Edges to separate the T-Spline to remove self-intersected T-spline.

Tip #8:
Finally, learn some tricks from Autodesk Fusion 360 site will speed up your mesh to Solid conversion process. Here is my top 7 tricks which may be useful for you
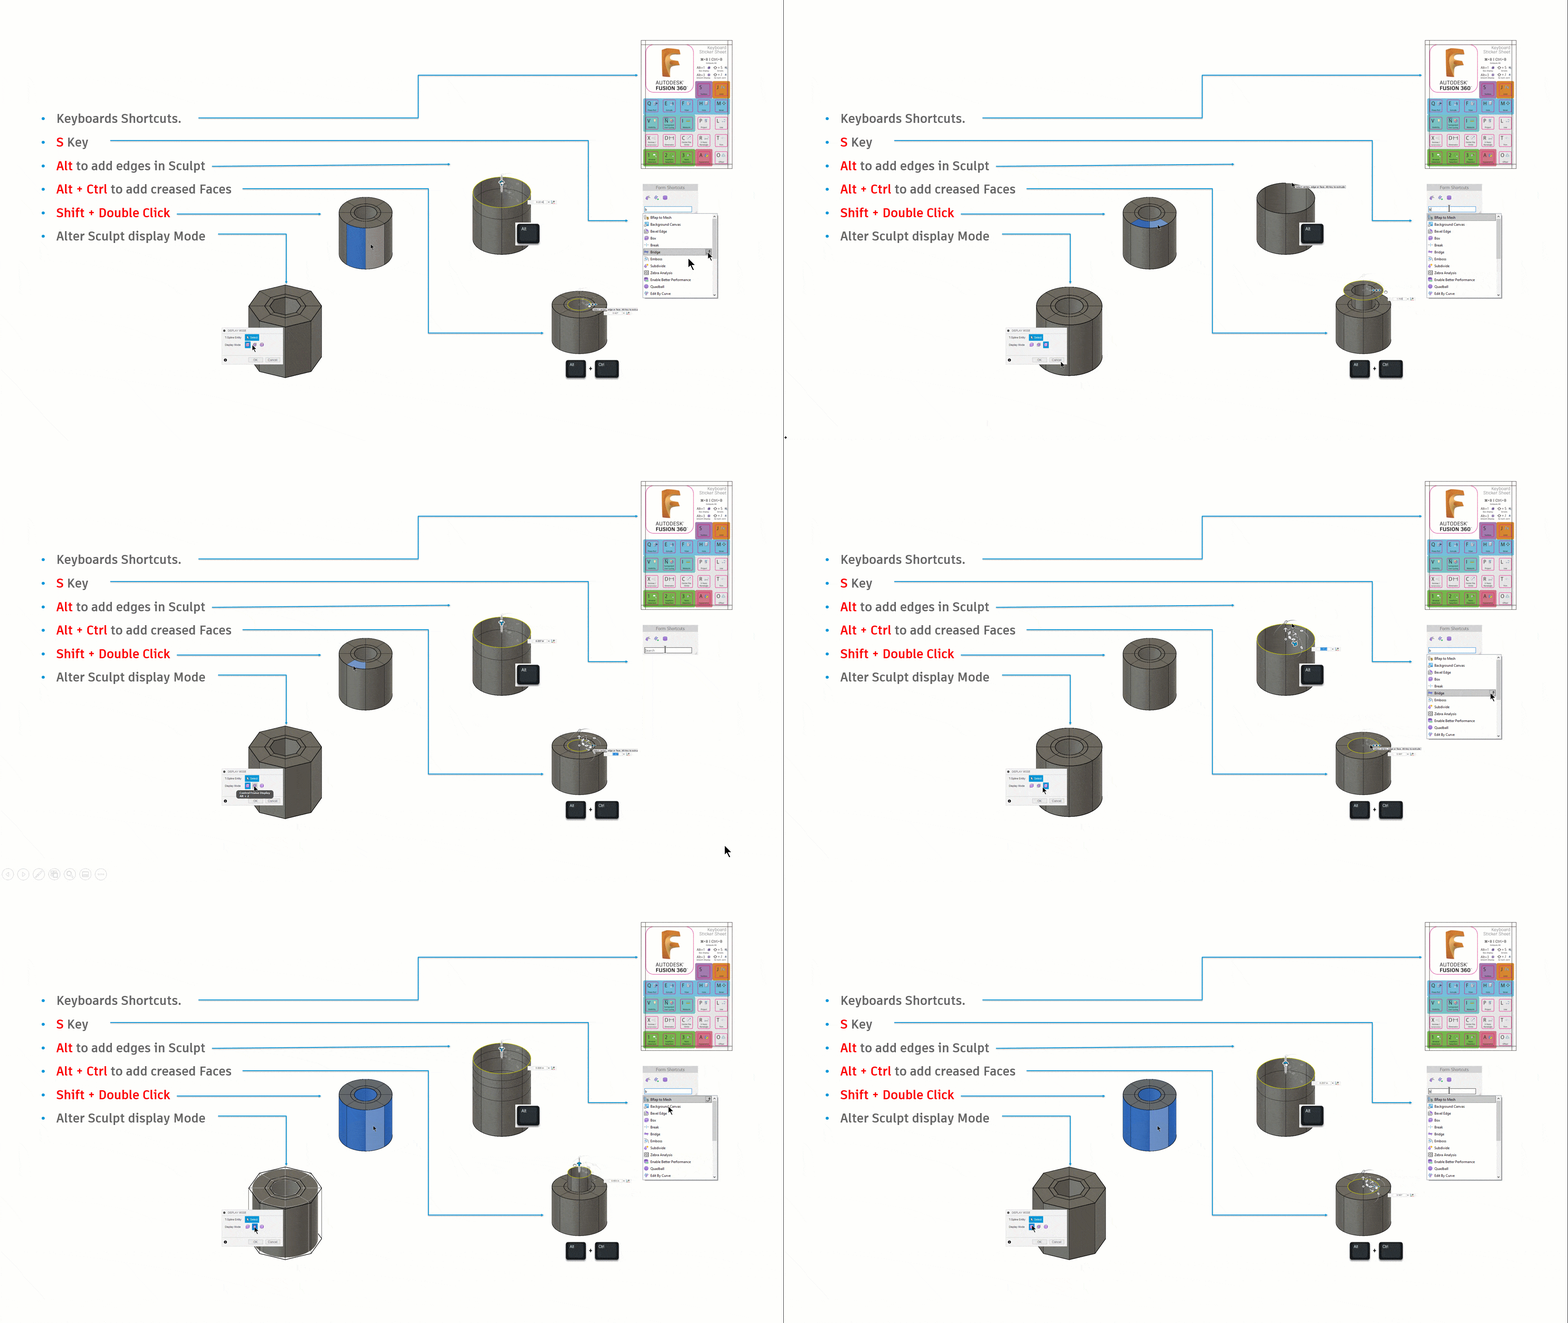
- Learn some fusion shortcut – there are many Fusion shortcut image which you can download.
- I love the “S” key where you can search and add your favorite command to your shortcut.
- Hold down the “Alt” key while moving, rotate or scale will add extra edges to the model
- When add new edges; Fusion, by default will add uncreased faces to the model. By holding down Alt + Ctrl, you can force Fusion to add creased Faces.
- To select a ring of faces, select a face then hold down the Shift key and Double Click a next face.
- Alt+1, 2 or 3 will display form in different mode.
- Finally, learn to identify between components and bodies if you want to turn a multi bodies part to an assembly.
 Until next time…


