fbpx
  • Overcoming the Challenges of Implementing PLM in Small to Medium Enterprises

    Product Lifecycle Management (PLM) is a game-changer for businesses, especially for small and medium enterprises (SMEs). It’s all about managing your products efficiently from the drawing board to the customer’s hands. But, let’s be honest, implementing PLM isn’t always a walk in the park for SMEs. They face real challenges, from tight budgets to the daunting task of making big changes to how they operate.

    Yet, the benefits of getting PLM right are too significant to ignore. It can streamline operations, boost product quality, and even speed up time to market. This blog dives into what SMEs stand up against when adopting PLM and how they can successfully navigate these challenges. We’ll look at practical strategies, cost-effective solutions, and real success stories to show that, despite the hurdles, PLM can be a powerful tool for growth and innovation in the SME sector.

    Challenges Faced by SMEs in Adopting PLM

    Implementing Product Lifecycle Management (PLM) in small and medium enterprises (SMEs) isn’t always smooth sailing. Here are the main roadblocks they often run into:

    Limited Resources: One of the biggest hurdles is simply not having enough – whether it’s money, time, or staff. PLM can be a significant investment, and for SMEs watching every penny, this can be a tough pill to swallow.

    Resistance to Change: Changing how things have always been done can meet with pushback. For SMEs with tight-knit teams, convincing everyone to adapt to a new system can be challenging.

    Complexity of Solutions: PLM software comes with a lot of bells and whistles. For teams without a tech specialist, figuring out which solution fits best can feel like navigating a maze.

    Integration Issues: SMEs already use a variety of tools and systems. Finding a PLM solution that plays nicely with existing setups is crucial but not always easy.

    Tackling these challenges head-on is essential for SMEs to unlock the full potential of PLM. Up next, we’ll explore strategies to navigate these hurdles and make the PLM journey as smooth as possible.

    Strategies for Successful Implementation

    Overcoming the hurdles of PLM adoption might seem daunting, but with the right strategies, SMEs can navigate these challenges successfully.

    Conduct a thorough needs assessment before diving into PLM. It’s crucial for SMEs to understand exactly what they need from a PLM system for their business. With limited resources, it’s crucial to identify specific business processes that need improvement and any gaps in current systems. Typical needs SMEs have for PLM include Bill of Materials (BOM) management, change management (such as engineering change orders), project management, and quality management.

    Figure 1- Map your business processes to pinpoint PLM needs, ensuring a tailored fit for your company’s workflow.

    Consider using a phase-by-phase implementation for PLM. Trying to do everything at once can be overwhelming. Break down the PLM implementation into manageable phases, starting with the most critical areas. This approach reduces disruption and makes the transition smoother for everyone involved.

    Figure 2-Implement your PLM with a strategic, phase-by-phase approach, prioritizing core business processes for maximum efficiency.

    Invest in training for PLM. One of the best ways to overcome resistance to change is through comprehensive training. Ensure that everyone knows how to use the new PLM system effectively. This not only eases the transition but also helps in realizing the benefits of PLM faster.

    Get professional assistance in implementing PLM. Not all PLM solutions are created equal, especially for SMEs. Look for a partner, specifically PLM specialists that understands the unique challenges faced by smaller businesses and offers scalable, user-friendly solutions. A partner that provides strong support and training for implementing PLM can make the process a whole lot faster and smoother to finish and is well worth the investment.

    Look towards leveraging cloud-based solutions. Cloud-based PLM can be a game-changer for SMEs, offering flexibility, scalability, and cost-effectiveness. These solutions reduce the need for heavy upfront investment. Maintenance and updates are automatically pushed by the developers as well.

    By tackling PLM implementation with these strategies, SMEs can turn the tide in their favor, ensuring a smoother adoption process and a quicker path to realizing the benefits of PLM.

    Cost-Effective PLM Solutions

    For SMEs, finding a PLM solution that fits both their needs and their budget is key. Here’s a list of items to consider when finding a cost-effective PLM solution:

    • Consider “Service-as-a-Software” (SaaS) PLM Options: Subscription-based SaaS models are ideal for SMEs looking for flexibility and cost control. These models often include regular updates and maintenance, reducing the need for in-house IT support. SaaS PLM solutions ensure that SMEs can benefit from the latest features without additional costs.
    • Look for Scalable Solutions: Choose a PLM system that can scale with your business. Initially, you might only need basic functionalities like BOM management and document control. However, as your business grows, you may require more advanced features such as project management and quality control.
    • Assess the Total Cost of Ownership (TCO): Beyond the initial purchase price, consider the long-term costs associated with implementing and maintaining the PLM system. This includes training, support, customization, and upgrades. Go for solutions that offer a clear and predictable TCO, allowing for better budgeting and financial planning.
    • Utilize Built-In Templates and Tools: Some PLM systems come with pre-configured templates and tools tailored to specific industries. These can significantly reduce the time and cost associated with customizing the system to fit your business processes. Look for PLM solutions that offer these out-of-the-box resources to streamline implementation and minimize costs.

    Figure 3-Fusion Manage comes with a complete template solution to either fully adapt or partially.

    By considering these factors, SMEs can find PLM solutions that not only meet their technical and business needs but also align with their financial constraints. Cost-effective PLM adoption is within reach, enabling SMEs to leverage the benefits of PLM technology to drive growth and competitiveness.

    Case Studies Demonstrating the Impact of PLM on SMEs

    D-Wave, a leader in quantum computing, partnered with SolidCAD to implement a scalable, cloud-based PLM system. The initial focus was on core functionalities like BOM and change management.

    The results were significant: enhanced team collaboration, streamlined workflows, and a flexible system that grew with the company’s needs. This implementation not only improved D-Wave’s project delivery times and product quality but also set a foundation for sustained innovation and growth.

    The Role of PLM in Streamlining New Product Development

    Introduction: The Importance of NPI in Product Development

    In today’s fast-paced and competitive market, the ability to innovate and bring new products to market swiftly is not just an advantage; it’s a necessity for growth. For product and manufacturing managers, the pressure is on more than ever to not only keep up with the pace but to lead the charge.

    New Product Introduction (NPI) process is pivotal element that can spell the difference between success and failure for product launch. NPI is the comprehensive process of bringing a new product from concept to market, encompassing design, development, testing, and launch phases. As businesses strive to outperform competitors and satisfy ever-evolving customer demands, the role of NPI emerges as a critical process where efficiency, speed, and innovation converge. Yet, navigating the complexities of product development, from conceptualization to launch, poses a formidable challenge. This is where Product Lifecycle Management (PLM) steps in, transforming the NPI process from a daunting task into a streamlined, strategic asset that propels companies towards success.

    PLM’s Role in NPI

    Product Lifecycle Management (PLM) is managing the entire lifecycle of a product from inception, through engineering design and manufacture, to service and disposal, by integrating people, data, processes, and business systems. While NPI focuses specifically on the process of bringing a new product to market, PLM encompasses a broader strategy managing the entire lifecycle of a product, from initial concept through to its ultimate disposal, including the NPI phase.

    PLM in NPI

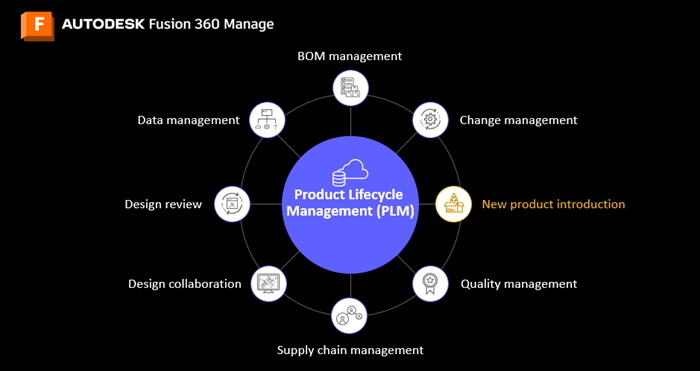
    Figure 1: PLM in NPI – The entire map is PLM, encompassing every aspect of a typical business’ processes. NPI is a component of PLM that is typically the starting point of your development of a new product or project.

    PLM serves as the backbone for NPI, providing a robust framework that revolutionizes how companies manage product data, foster cross-functional collaboration, and ensure compliance with industry standards as shown in Figure 1. By centralizing product information in PLM, it enables all stakeholders, from engineers to marketers, to access up-to-date data, ensuring that decision-making is based on the most current information. This centralizing of product information not only streamlines the NPI process but also significantly reduces errors and redundancies, accelerating the time-to-market.

    Furthermore, certain PLM software such as Autodesk’s Fusion 360 Manage, have collaborative tools that break down silos between departments, enhancing communication and coordination across various teams in your NPIs. These tools include task management, BOM management, automated notifications, Gantt charts to display project progress and more. This synergy is vital for aligning goals, refining product designs, and ensuring that every aspect of the product introduction is synchronized.

    Strategies for Effective NPI Using PLM

    Utilizing the NPI process in PLM is pivotal for companies aiming to streamline their product development and launch processes. To maximize the effectiveness of PLM, several best practices are essential. Firstly, establishing a centralized database for product information is critical. This repository becomes the single source of truth for all data related to the product, from initial design sketches to final specifications, ensuring consistency and accessibility across the organization.

    Integrating PLM with other enterprise systems, such as Enterprise Resource Planning (ERP) and Customer Relationship Management (CRM) systems, further enhances effective use of NPI. Such integration ensures seamless information flow across different business processes in their respective software solution, facilitating better decision-making and reducing time-to-market in your NPI process. For instance, ERP is typically used to manage supply chain. Thus, integrating PLM with ERP allows for real-time visibility into the supply chain, aiding in materials planning and financial forecasting and connecting it your product data such as the product BOM.

    To dive deeper into this, watch Autodesk’s webinar about utilizing PLM to bring your new products faster. The webinar explains how leveraging PLM software for project management and workflow automation is another best practice that can significantly impact the NPI process. This article by Autodesk further highlights the systems in PLM and briefly covers how NPI works alongside processes.

    Case Studies

    Reynaers Aluminium, a leading innovator in architectural solutions, demonstrates the remarkable benefits of integrating PLM into their New Product Introduction (NPI) processes. By adopting Fusion 360 Manage, Reynaers addressed critical challenges in product development, achieving remarkable outcomes. The customer story will go in depth of this transformation by adopting Fusion 360 Manage as their PLM solution and using it as a tool for various uses, including managing their projects with their product data.

    Conclusion

    Throughout this article, we’ve underscored the critical role of PLM in enhancing and streamlining NPI, from providing a centralized platform for managing product data to facilitating cross-functional collaboration with other business essential software such as ERP and CRM. The advent of PLM technology, particularly with the emergence of cloud-based solutions like Fusion 360 Manage, marks a significant evolution in the field. These modern PLM systems offer unprecedented flexibility and efficiency, enabling organizations to respond more dynamically to market demands and innovate at a faster pace.

    RGTECH

    Success Stories

    RGTECH

    RGTECH is a specialty precision machining company. Founded in Lévis, QC by experienced industry professional, Rémy Gagnon, RGTECH works closely with several industries including the medical, optic/photonic and electronic industries to provide high quality parts using cutting edge technology. Speed, precision, and quality is their mission.

    Supporting a New Business: Starting Strong with Fusion 360 & Machining Extension!

    The Challenge

    Although RGTECH is a new company in their industry, their founder and president, Rémy Gagnon is certainly not. With several years of experience working in the precision machining industry within the province, he was already very familiar with SolidCAD. Starting a machining business involved significant risks, both financially and technically. Knowing that he wanted to continue working with Autodesk products, he needed a trusted CAD/CAM software provider and reached out to our team to support his new business.

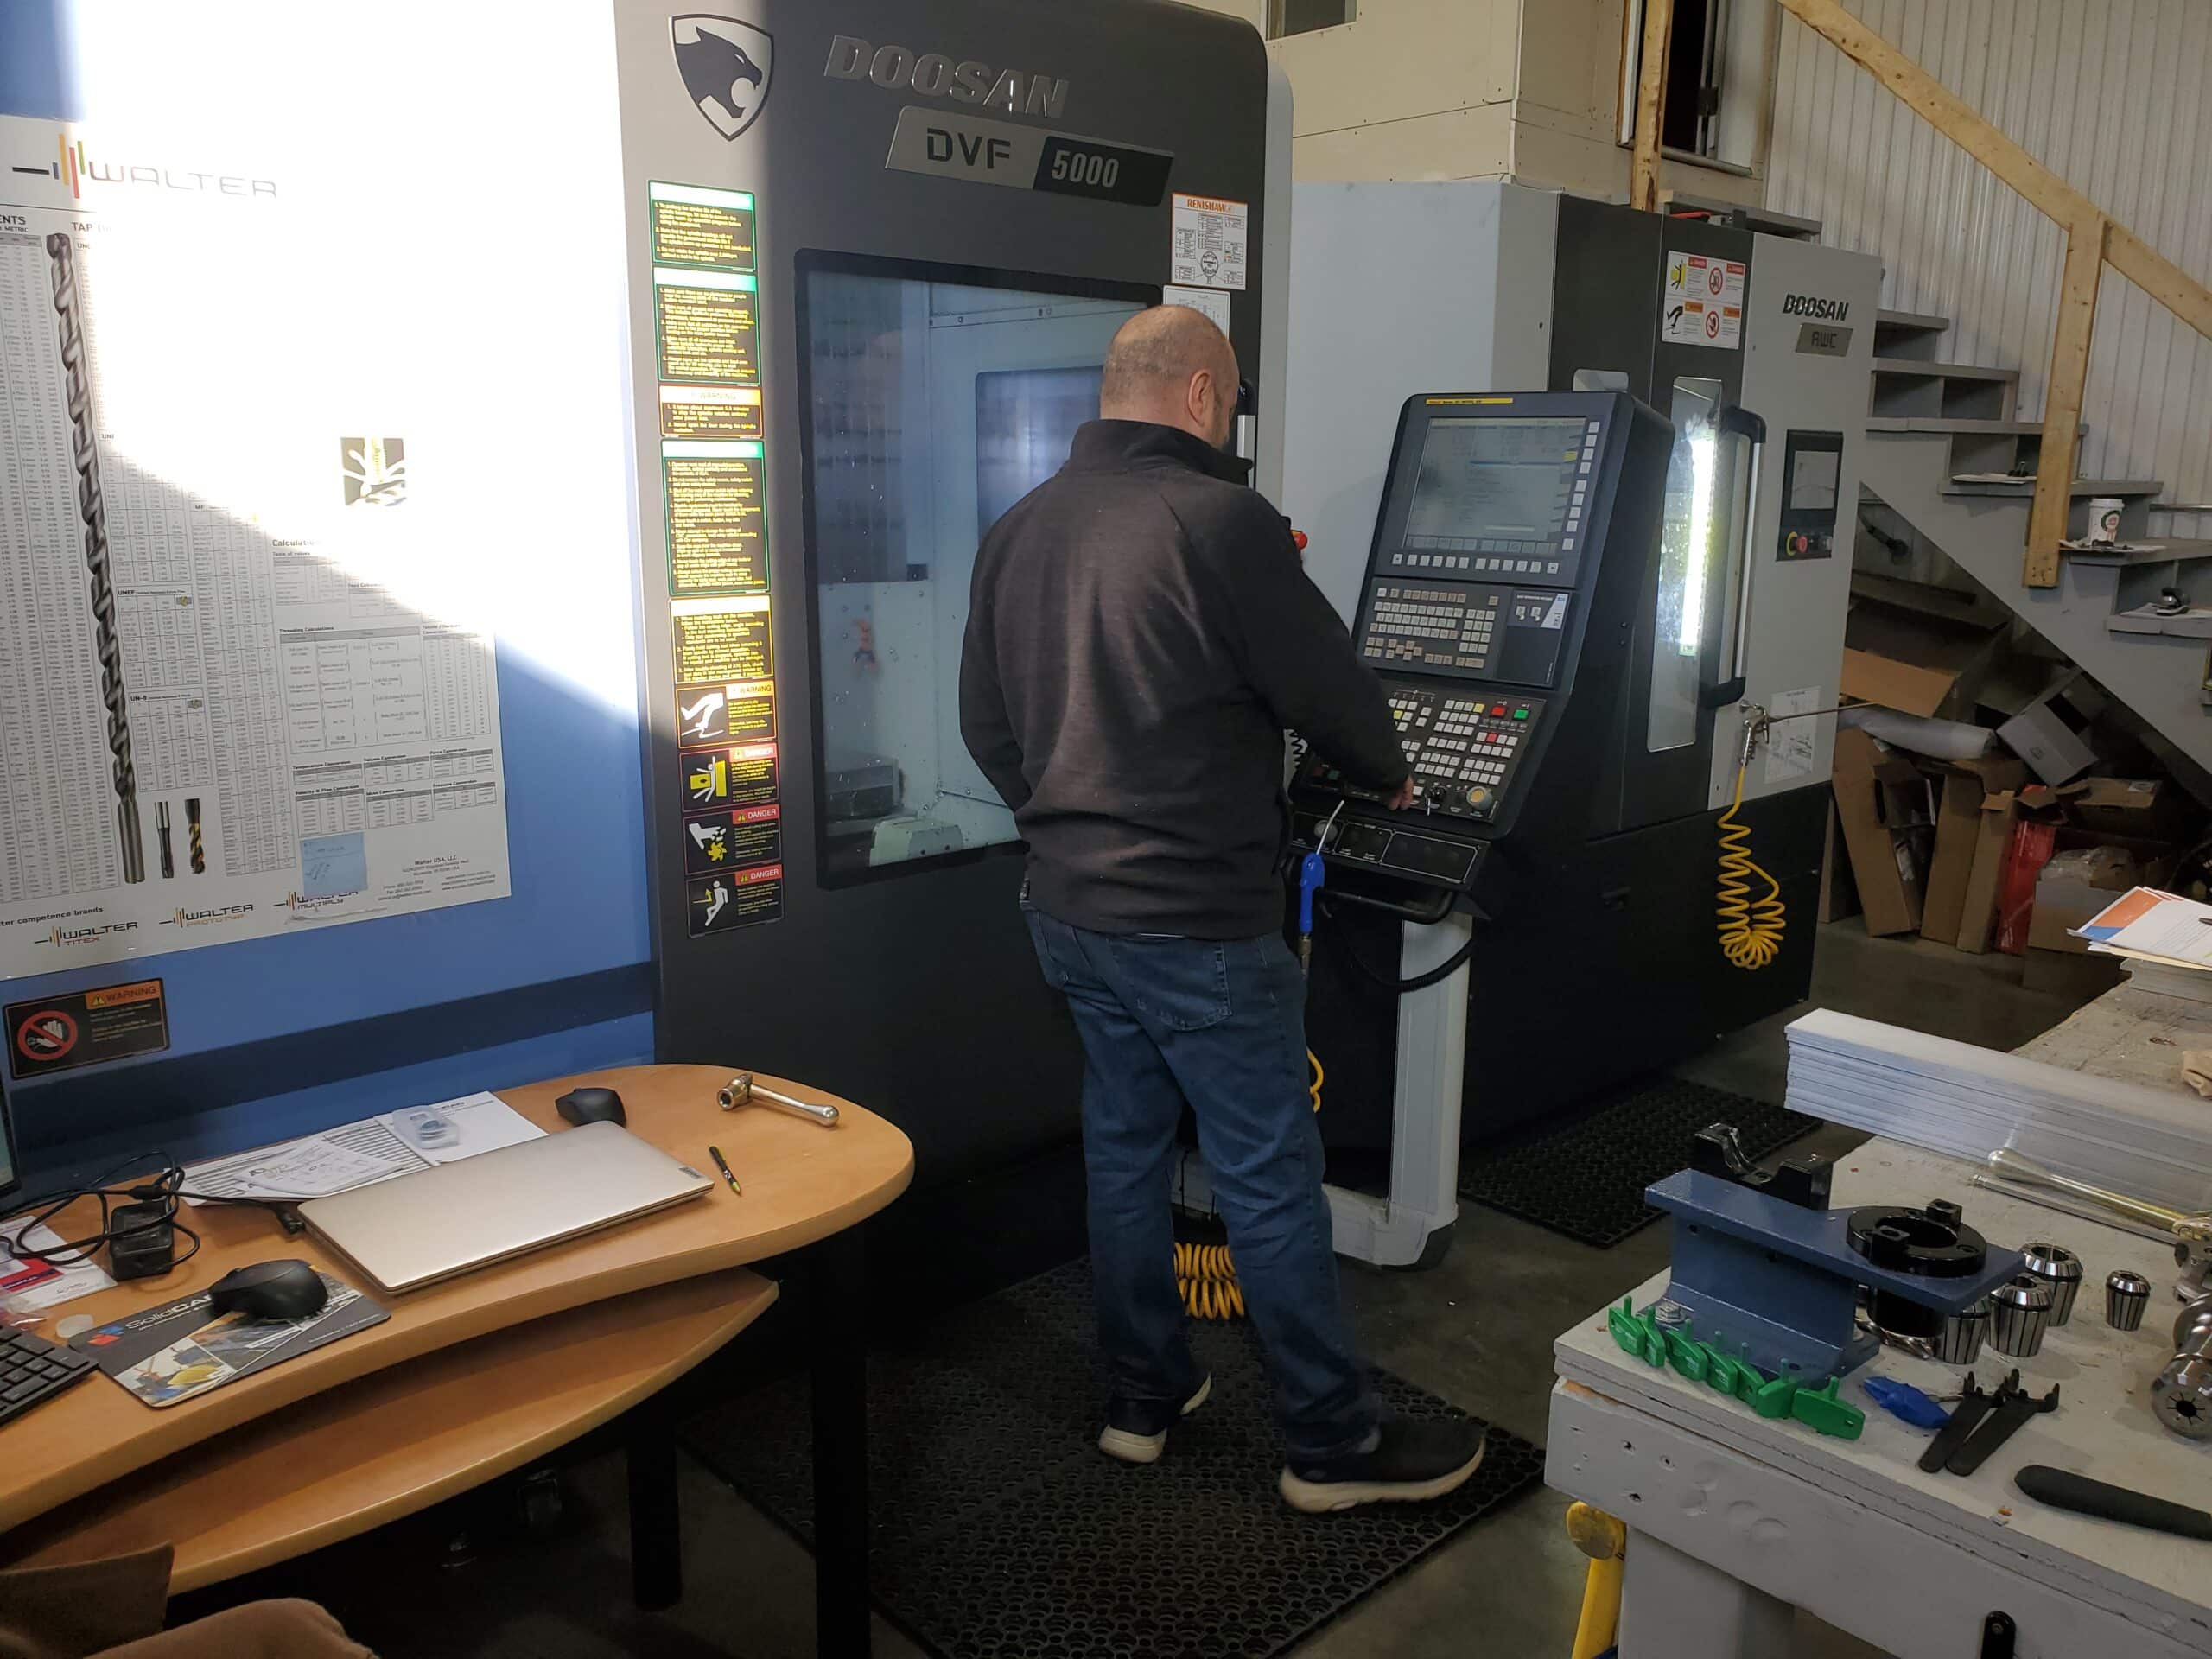
    What RGTECH needed most was to find a high-performance, flexible, and affordable CAM solution and to start production without delay in order to allow quick profitability of their new 5-axis CNC equipment with automatic table changer.

    The Solution

    After assessing their needs and understanding how costly any delays would be to the new company, our team suggested integrating Fusion 360 software with the Machining Extension, combined with customized 24-hour remote training, post processor and machine simulation required for the CNC equipment.

    Rémy explained that the reputation and knowledge of our technical team, the speed and flexibility to deliver services, and the accessibility of acquiring the software via subscription all played a key role in greatly reducing the costs and risks involved in this process.

    Vault Professional has allowed the company to easily manage all their design and engineering data and take control of their product development processes. Staff can work from data without worrying about out-of-date documents that could result in engineering errors or miscommunication between departments.

    The Results
    • Our team’s flexibility and availability in scheduling has allowed RGTECH to receive training on all new software without causing excessive delays
    • The speed of the implementation allowed RGTECH to carry out their first projects less than 1 week after the installation and commissioning of the CNC machine

    Testimonial

    SolidCAD is the partner to choose for success with your CAD/CAM software.

    The team not only has the expertise, their vast experience, and relationships with different sectors of the manufacturing industry keep them well versed in the cutting edge of technology. SolidCAD’s network of contacts with various stakeholders in the industry will be a huge advantage in the launch of your business or the upgrade of your manufacturing technologies.

    – Rémy Gagnon, President at RGTECH

    Products & Services Used

    Similar Projects

    Nectgen mold

    NextGen Mold

    NextGen Mold Technologies was founded in 2021, following the acquisition of Enterprise Mold. Based in Windsor, Ontario, they have quickly established a strong reputation in the injection mold industry. The wide array of equipment and…

    Circle 5

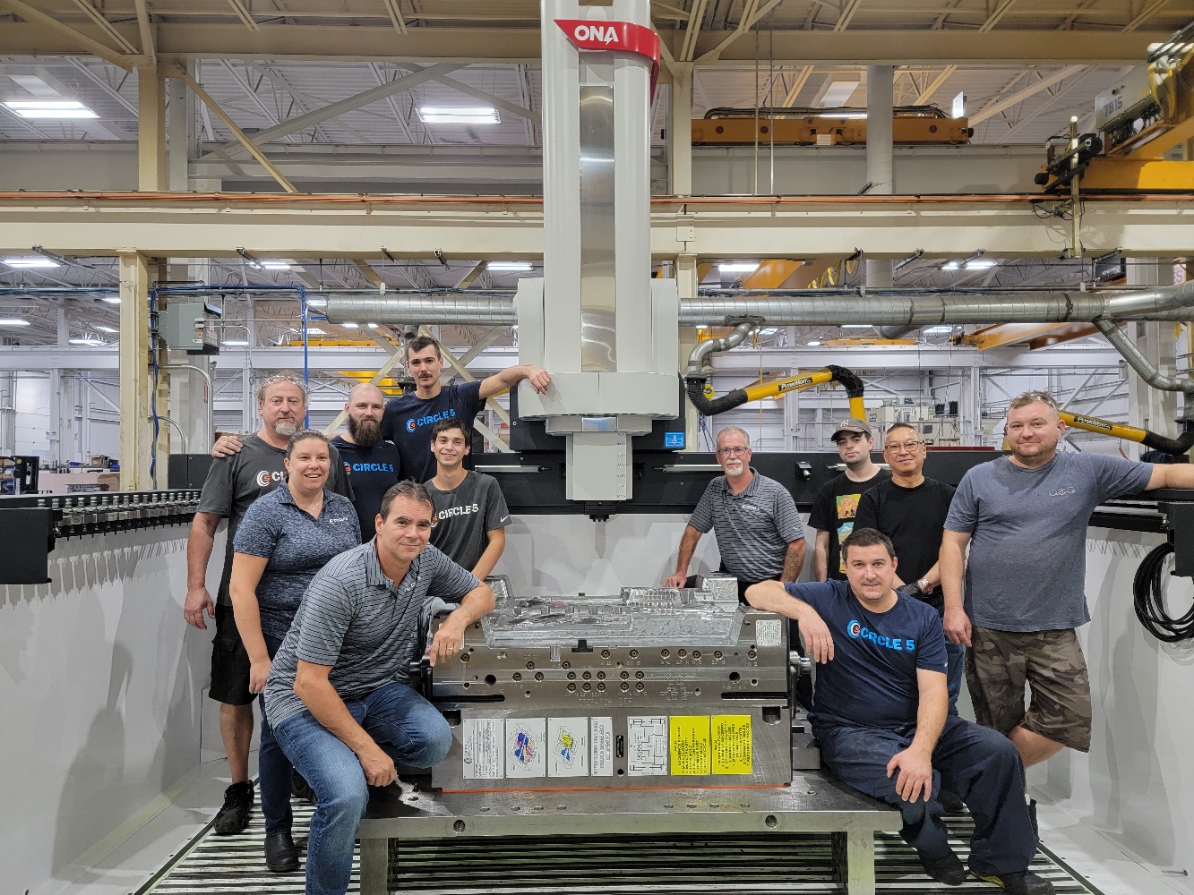
    Founded in 1987, Circle 5 has established itself as a leader in the manufacturing and prototyping industry. Their expertise in machining both ferrous and non-ferrous metals, combined with their state-of-the-art multi-axis CNC and EDM capabilities,…

    Procepack

    PROCEPACK is a firm specializing in the purchase and sale of packaging and process equipment. They serve customers from a wide range of industries from food and cosmetics to pharmaceuticals. They leverage their vast and…

    Bluebeam Transition to Subscription

    null

    Bluebeam Transition to Subscription

    Starting September 20th, 2022, Bluebeam is Moving from Perpetual Standalone Licensing to Subscription 

    New subscription packages:

    • Bluebeam Basics
    • Bluebeam Core
    • Bluebeam Complete

    Benefits of Subscription:

    • Work anywhere with Bluebeam Revu Desktop and Bluebeam Cloud
    • Better manage and administer licenses across entire organization
    • Global rights – use in any country
    • Access to Bluebeam Desktop Revu v21 & Bluebeam Cloud and future releases/updates
    • Bluebeam University included for free
    • Use work, home or in the field and on any device under one Bluebeam
    • Named-Users model – login with Bluebeam ID (BBID) or supported single sign-on (SSO) provider (Okta AD or Microsoft Azure AD)
    Policy Update: VALID ORDERS MUST BE SUBMITTED TO BLUEBEAM PRIOR TO
    JANUARY 31, 2023
     

    Bluebeam will allow Perpetual Paid Upgrades if active Maintenance is purchased. Existing customers without active Maintenance will NOT be allowed to purchase a Paid Upgrade to Perpetual ONLY. Customers without active Maintenance must purchase a Paid Upgrade and Maintenance simultaneously; they will then would be in the normal pool of customers with active maintenance.

    Customers must purchase active Maintenance with their Paid Upgrade to Revu 20. Once a customer upgrades to Revu 20, they will be able to add new Perpetual seats until September 30, 2023


    Contact your sales rep to learn more about the transition to subscription and available plans!

    Contact

    null


    Understanding Product Lifestyle Management (PLM): The Path to the Digital Future

    In my opinion, the most painful product lifecycle management (PLM) failures happen when companies struggle to understand the concept and implement it in their organization. This technology is made to help them. When I speak to companies, I hear things like – “We tried to organize ourselves, but PLM was such a complex idea. We decided to stay unorganized.” It hurts me to think about the failures of technology despite the powerful idea of PLM.

    I want to focus on explaining why you need PLM and how to identify if it can help support your product development and manufacturing operations. Understanding this will help you get prepared and organized for the digital future.

    CIMdata defined digitalization as “The business strategy best geared to extract real-world value from digital data”, whereas their definition of PLM refers to a “strategic business approach, NOT just technologies, a consistent set of business solutions”.

    I’ve noticed a growing interest in product lifecycle management and its benefits in the last year. As companies look to improve their product offerings, refine supply chains, and organize their business, PLM is one of the best tools to achieve these goals.

    When implementing PLM, your organization should be setting goals and KPIs regularily along the way. Our software will allow you to collaborate with SolidCAD and suppliers to integrate important data from their end as you assess each step in your process.

    As your organization goes through each of these stages, you should be collecting and entering data into your PLM software. We will help you streamline the process and allow you to eliminate tedious data re-entry. This means that your PLM software should smoothly integrate with your enterprise resource planning (ERP) system.

    You may be wondering why PLM is important for our digital future. Expected results for companies using PLM software include:

    Lower product costs:

    PLM is an iterative process that your organization will refine with each cycle, one of the most common goals is to lower production costs. This may seem intuitive for any company that engages in product development, but it’s important to point out that PLM achieves this by creating a more refined supply chain along with a streamlined production process.

    Greater product quality:

    In a similar artery to lowering product costs, product quality should increase as you foster the PLM process. Whether it’s finding more diverse materials or better parts at the right price, each cycle should push you to assess your sourcing, development, and production methods to improve your offerings.

    Faster time to market:

    This is a direct result of improving your supply chain along with manufacturing and logistics. PLM is not only a about single product throughout its lifecycle; it is a tool to have comparable data that allows you to streamline and improve the steps in your process.

    So, what does PLM currently offer? PLM provides a central repository of accurate information that geographically dispersed personnel can access. In a post-2020 world where more and more teams are working remotely, there’s undeniable value in this system that facilitates accurate data sharing and collaboration don’t you think?

    To summarize, here are the 5 main reasons that you will need PLM based on my knowledge and conversations with customers:

    1. Increased productivity: PLM facilitates the process of lifecycle management and drives improvements across the series of cycles for the given product. Implementing a scalable PLM platform increases employee productivity by consolidating designs, communications, workflows, and product data in a single place.
    2. Accelerated time to market: The smoother the workflow and the higher the productivity, the faster your organization will be able to bring products to market.
    3. Increased revenue: As you accelerate your time to market with PLM, you’ll also be reducing production costs. The intersection between those two actions will improve your margin and help you scale up your business. You can’t just think of PLM as a way of improving workflows; one of the most critical KPIs after a few cycles is how it is impacting your revenue.
    4. Accurate data sharing: PLM organizes your data, helps you keep track of it, and allows for sharing with the right stakeholders at the right time (both internal and external).
    5. Improved product quality: More accurate data and improved workflows are always going to lead to improved product quality. I believe, that is another contributing factor to increased revenue. Regardless of an organization’s position in the supply chain. That stands for both business and commercial transactions. As you refine your PLM steps and drive even minor improvements, you’ll see the difference in the product for sure!

    From a business development representatives’ point of view to you, I can assure you that lifecycle management issues can be found across small, medium, and large business. When it comes to growing and improving your company, PLM solutions are the digital future.


    Get in Touch:

    If you made it this far in reading, you’re probably ready to get started on the path to the digital future. Learn more on our website: https://www.solidcad.ca/products/autodesk-products/product-lifecycle-management/

    If you prefer to get in touch with us directly, please contact myself and my team at tanya.petraglia@solidcad.com for more information, or meet our team at upcoming events: https://www.solidcad.ca/product-lifecycle-management-events/


    Tanya PetragliaBusiness Development Manager – Helping customers connecting processes with PLM- Manage 360

    Autodesk Fusion 360 & Metallic Strip Animal Sculptures – Part 2

    As promised in my last blog, here are some tips and tricks that I often use to convert mesh body to a b-rep or t-spline body in Fusion 360.

    Tip #1:

    Converting a mesh body to a b-rep or t-spline body in Fusion 360 requires some knowledge on mesh elements. At the moment, the current limit for number of mesh elements for Fusion 360 is roughly 10,000. Meshes with greater than 10,000 elements will cause the performance of Fusion 360 to suffer and Fusion 360 may not be able to convert them to solid bodies.

    Tip #2:

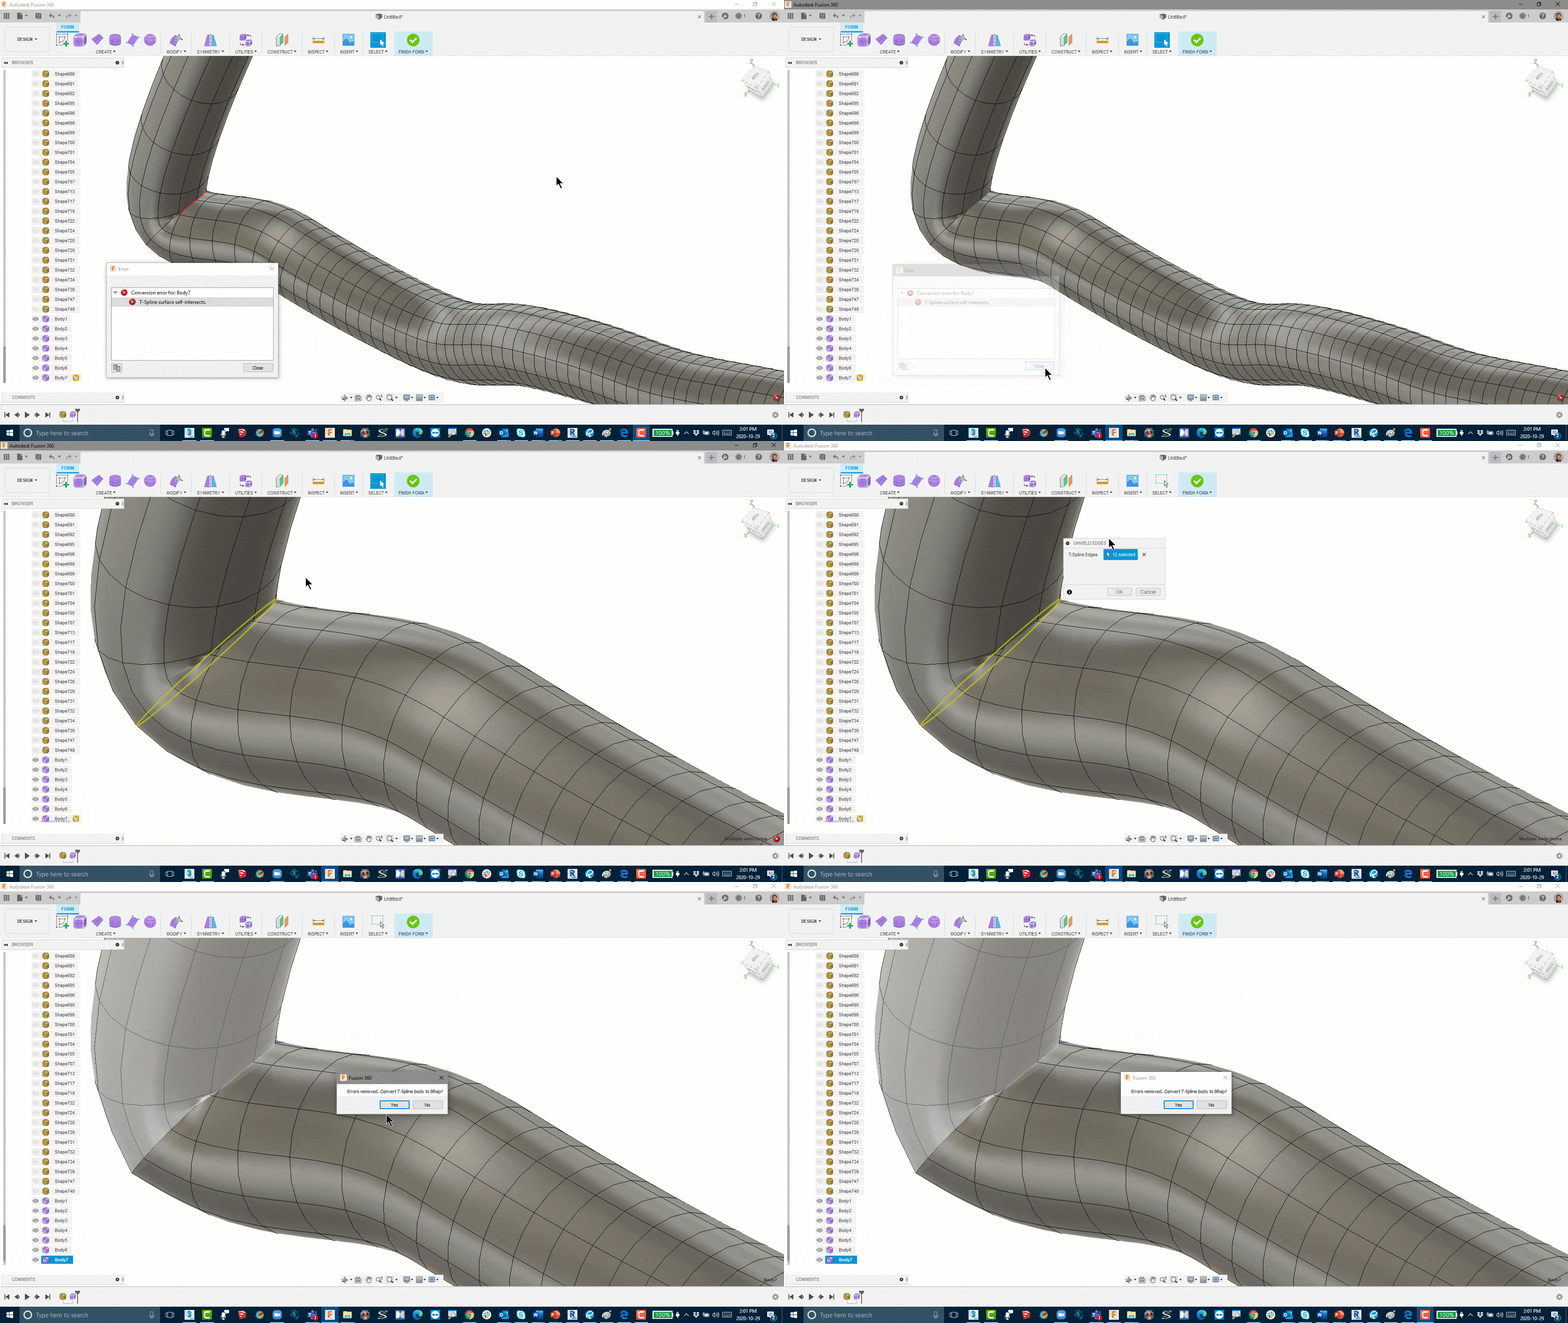
    When using the “Convert” command to convert a mesh into a T-Spline body an error might occur such as detailed in the picture below.

    This is because Fusion is better equipped to handle Quads as opposed to Triangles or Polygons. Quad meshes cannot be created in Fusion. To create a quad mesh, Use 3DS MAX or Autodesk Recap Photo. To convert triangulated mesh to Editable Poly with 3DS Max before inserting into Fusion 360, use these steps:

    Import triangulated mesh into 3DS Max

    • Apply Subdivide (WSM) with “Display Subdivision” turned OFF
    • Use “Collapse To” to Collapse the mesh
    • Convert the Collapse mesh to Poly mesh
    • Apply “Quadrify All”
    • Export and Insert the Quad Mesh into Fusion 360

    Tip #3:

    You can create or convert quad mesh using ReCap Photo. ReCap Photo can create mesh from a series of photographs. Photogrammetry is not an exact process. The mesh generated from the pictures will seldom, if ever, be perfect. Typically, some cleanup is required. Use ReCap Photo to simply highlight and delete unnecessary surfaces. You can also use the Slice and Fill command makes it easy to preserve the desired portion of the mesh while ensuring a watertight result. The final step in ReCap Photo is to export the mesh as OBJ(Quads). Traditional meshes are made up of triangles. The Quad mesh is made up of four-sided patches. The image shows how to export mesh to OBJ(Quads).

    create or convert quad mesh using ReCap Photo

    Tip #4:

    In your Fusion 360 preferences, you will need to ensure that the “Triangulate mesh polygons” flag is not enabled. Only quad meshes can be converted to t-spline bodies and enabling this flag will convert imported quad meshes to triangular meshes.

    Disable "Triangulate mesh polygons" in Fusion 360

    Tip #5:

    To convert a quad mesh to t-splines, you must be working in the Direct Modeling environment. After ensure the preferences above are set up correctly, right click the mesh body you would like to convert to t-splines in the browser and select “Convert”.


    convert a quad mesh to t-splines in Fusion 360

    The “Convert” dialogue will then allow you to convert a quad mesh to t-spline body.

    Tip #6:

    Some conversion may produce error due to surface self-intersects. These errors are often highlighted very well in Fusion 360. The self-intersected T-spline will not be able to become solid body if not treated. You can use Edit Form to move vertices, edges or faces of the T-Spline to clear out self-intersected area.

    fix conversion error in fusion 360

    Tip #7:

    To fix surface self-intersects quickly, you can double click the edge ring and use UnWeld Edges to separate the T-Spline to remove self-intersected T-spline.

    fix surface self-intersects quickly with UnWeld Edges in Fusion 360

    Tip #8:

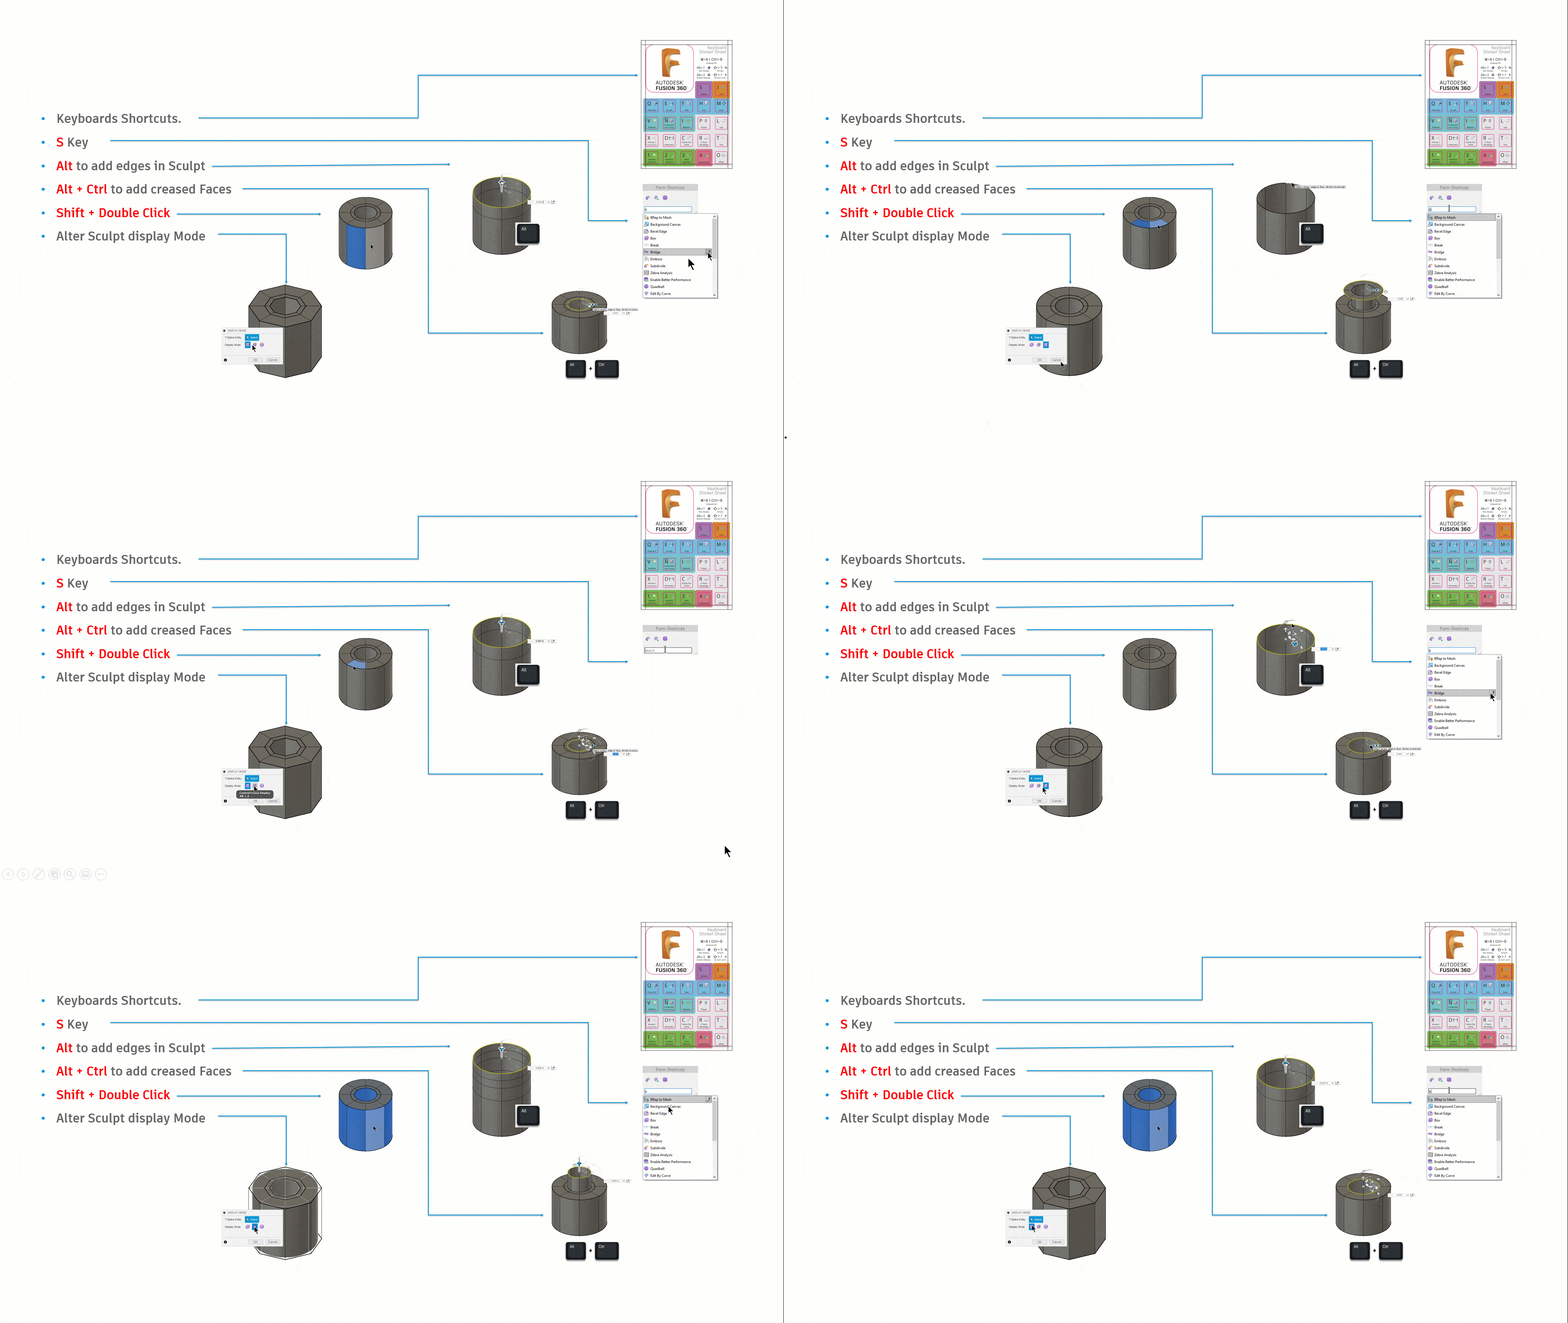
    Finally, learn some tricks from Autodesk Fusion 360 site will speed up your mesh to Solid conversion process. Here is my top 7 tricks which may be useful for you

    • Learn some fusion shortcut – there are many Fusion shortcut image which you can download.
    • I love the “S” key where you can search and add your favorite command to your shortcut.
    • Hold down the “Alt” key while moving, rotate or scale will add extra edges to the model
    • When add new edges; Fusion, by default will add uncreased faces to the model. By holding down Alt + Ctrl, you can force Fusion to add creased Faces.
    • To select a ring of faces, select a face then hold down the Shift key and Double Click a next face.
    • Alt+1, 2 or 3 will display form in different mode.
    • Finally, learn to identify between components and bodies if you want to turn a multi bodies part to an assembly.


    Fusion 360 shortcutsUntil next time…

    Autodesk Fusion 360 & Metallic Strip Animal Sculptures – Part 1

    Part 1

    I love sculptures and can spend hours at museums that devoted to sculpture. I also love structural Engineering and structural sculptures. Running into Artist Sung Hoon Kang‘s stunning animal sculptures that embody the movement, speed, and chaotic energy of the wind, fascinated me. You can take a look of his work here: Metallic Strip Animal Sculptures Radiate the Energetic Flow of Wind:  https://mymodernmet.com/kang-sung-hoon-sculptures/ Sung Hoon Kang‘s works got into in my head and made me think of how I can use Autodesk’s products such as Fusion 360 or 3DS Max to create/model these sculptures. I know Fusion 360 can combine organic shapes modelling, mechanical design, and manufacturing in one comprehensive package, but can it be used to create/model these kind of art works?

    The question stayed in my head until I found a possible solution by combining Fusion 360 and 3DS MAX. After finding the approach and workflow, I created the concept models of two metallic strip animal sculptures of a dog and a horse, and posted them on Fusion 360 Gallery. You can find and download my two metallic strip animal sculptures here:

    https://gallery.autodesk.com/projects/141060/fusion-360-for-art-work—-horse-metal-strips

    https://gallery.autodesk.com/projects/141004/fusion-360-for-art-work—dog-metal-strips

    Believe it or not, once you find a good workflow between 3DS MAX and Fusion 360, You can create these animal sculptures in 20 minutes or less.

    Here is how:

    Step 1Understanding Fusion 360 Freeform Tools

    You should know that Fusion 360 is not just an awesome freeform modeler; it is also a parametric modeler. Fusion T-Splines are a combination of NURBS and Subdivision modelling that was developed in 2003.The T-splines company was bought by Autodesk and was built into Autodesk’s Fusion 360. The T-Splines subdivision surface technology in the Freeform toolset make it easy to create completely smooth, curvature continuous, ‘Watertight’ NURBS surface models, that you can convert to Solid models.

    Fusion 360 Freeform tools are very helpful when you want to create an organic surface without having to spend lot of time planning and executing individual surface patches. T-spline surfaces are simple and intuitive, and it is really easy to iterate through a number of different options.

    Step 2Understanding 3DS MAX Polygon modeling

    Polygon modeling is more common with game design than any other modeling technique as the very specific control over individual polygons allows for extreme optimization. Usually, the modeler begins with one of the 3ds max primitives, and using such tools as bevel and extrude, adds detail to and refines the model.

    Fusion 360 loves Polygon modeling objects and it can quickly convert those objects into solids for you if needed.

    There are two kinds of mesh that you can import into Fusion 360; however, only mesh that came from Polygon objects can be converted to solids.

    To covert triangulated mesh to solid, it needs to be converted to Editable Poly before inserting into Fusion 360. These are the steps:

    • Import triangulated mesh into 3DS Max
    • Apply Subdivide (WSM) with “Display Subdivision” turn OFF
    • Use “Collapse To” to Collapse mesh
    • Turn Collapse mesh to Poly mesh
    • Apply “Quadrify All”.

    Step 3Understanding 3DS MAX Particle Flow

    Particle Flow is a versatile, powerful particle system for 3ds Max. It employs an event-driven model, using a special dialog called Particle View. In Particle View, you combine individual operators that describe particle properties such as shape, speed, direction, and rotation over a period of time into groups called events. Each operator provides a set of parameters, many of which you can animate to change particle behavior during the event. As the event transpires, Particle Flow continually evaluates each operator in the list and updates the particle system accordingly.

    Particle Flow provides several tools for determining where in the system particles currently reside, including the ability to change particle color and shape on an event-by-event basis. You can also easily enable and disable actions and events and determine the number of particles in each event. To speed up checking particle activity at different times during the animation, you can cache particle motion in memory. Using these tools, plus the ability to create custom actions with scripting, you can create particle systems of a level of sophistication previously unachievable.

    To create a Particle Flow, you need to place a PF Source and assign the PF source to an object. I used a dog model as an example to illustrate the use of PF source in this GIF image.

    Step 4Saving Particle Flow trails and Export them to AutoCAD

    You can make Particle Flow to generate animated Splines and save Particle trails. The animated Splines can be exported to AutoCAD format to be used for creating structural model or Poly mesh that will be turned into solids using Fusion 360.

    Step 5Creating Metallic strips from exported AutoCAD file

    The AutoCAD file can now be imported back into 3DS MAX. You can turn all the splines into Polymesh by simply turn on the ‘Enable in Viewport’ under Rendering option. In my example, I chose “Rectangular” option with Length =15mm and Width = 3mm

    At this stage, the model may require some modification for different strip thickness or clean up according to the artist’s design. Whenever you are ready, you can then export the entire MAX model out as a OBJ format to bring into Fusion 360 for fabrication.

    All Splines with rendering thickness property can now exported to OBJ format for Fusion 360 to convert to solids.

    Step 6Creating Metallic strips and complete the model in Fusion

    This step is very simple. There are various Insert commands you can use to insert other file formats. These options insert data into a current Fusion 360 design rather than opening the existing Mesh (STL or OBJ format), SVG, or DXF file. Refer to the following links for more information about inserting meshes, DXF, and SVG files into Fusion 360 designs: How to insert a mesh body into Fusion 360

    The next step is converting a mesh body to a b-rep or t-spline body in Fusion 360, the current limit for number of mesh elements is roughly 10,000. Meshes with greater than 10,000 elements will cause the performance of Fusion 360 to suffer and Fusion 360 may not be able to convert them to solid bodies.

    On my next blog, I will discuss and share with you some tips and tricks on how to convert mesh body to a b-rep or t-spline body in Fusion 360.

    You can also find me on AU 2020 by following this link and search for ‘Hung Nguyen’

    Until next time…

    Curious about the hype around Autodesk’s HSM CAM?

    Hey CNC’ers!

    Curious about the hype around Autodesk’s HSM CAM? And now you’re looking for more information and possibly a demonstration? Well, you’ve come to the right place! SolidCAD is not only Canada’s biggest reseller of Autodesk manufacturing solutions, but also the only Canadian Autodesk reseller with a dedicated team of CAM specialists.

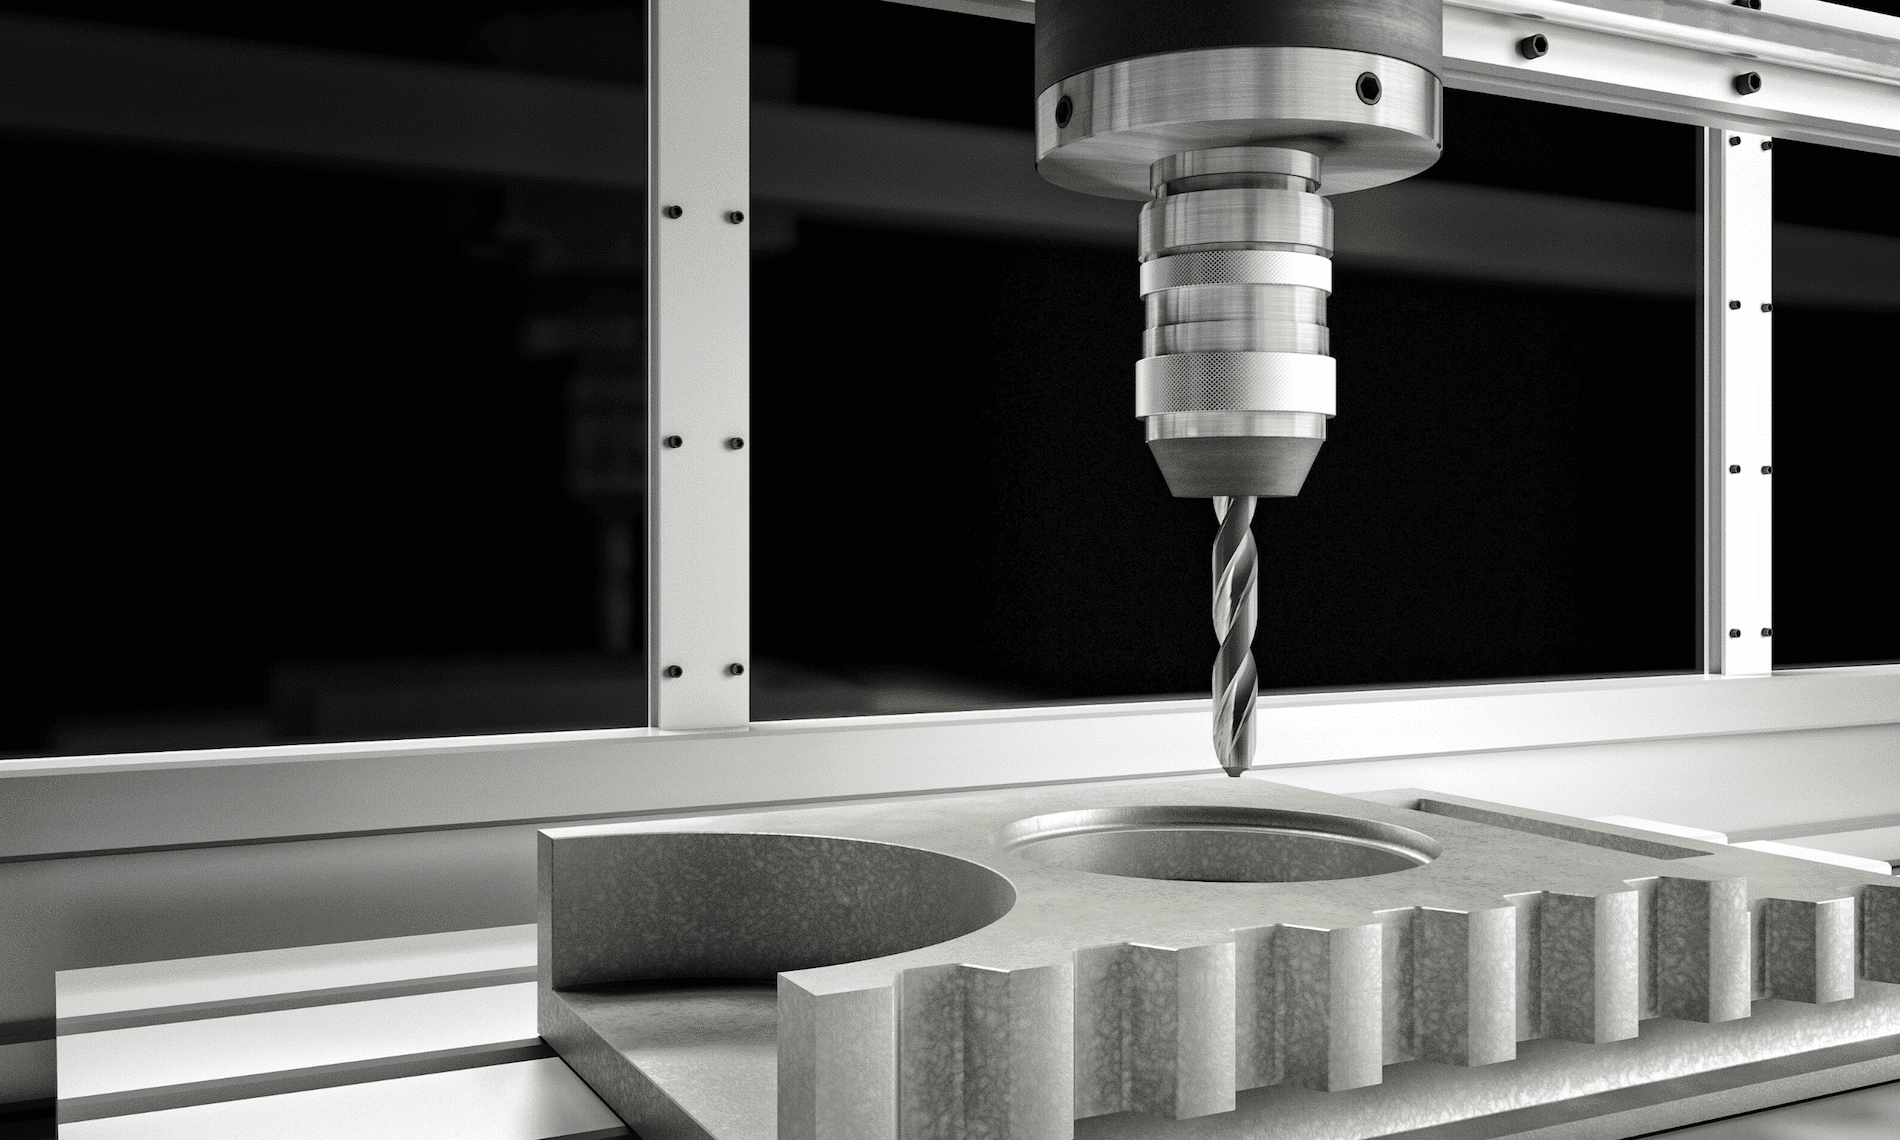
    HSM CAM is the comprehensive and powerful CNC programming add-on for Inventor (Inventor CAM – included with a subscription to the Product Design and Manufacturing Collection ), Fusion 360 (Fusion 360 Manufacturing – built into Fusion 360), and even SolidWorks (HSMWorks – included with a subscription to Fusion 360).

    Please visit our HSM CAM page to read about all the advantages of this integrated CAD/CAM solution and to find lots of technical resources: https://www.solidcad.ca/partner-products/hsm-cam/

    Also, try our SolidCAD universal milling post-processor, compatible with a wide variety of 3-axis, 4-axis, and 5-axis machines that accept FANUC-style G-code. This open-source post-processor generates nicely-formatted NC code, and is chock-full of features to make it as flexible as possible. These features include:

    • Safe restart feature after M00 program stops
    • Automatic date and time stamp function
    • Tool table feature in header
    • Operation name, tool name, and cycle time at top of each operation
    • Activation of accumulated pecking depth feature for G73-style drilling
    • Activation of the Manual NC code pass-through feature
    • Property to toggle between 3-axis / 4-axis / 5-axis configurations
    • Property to set maximal spindle speed
    • Property to toggle tool preload on/off
    • Property to toggle rigid tapping on/off
    • Property to assign an M-code for rigid tapping
    • Property to toggle between G54-G59 and G54.1 P1-P300 work offsets
    • Property to toggle between G28 and G53 retracts
    • Properties to set M-codes for 4th and 5th axis brake lock/unlock functions
    • Property to toggle on/off the output of rotary axis positions at every operation
    • Property to toggle on/off the output of M01 optional stops at tool changes
    • Property to toggle on/off automatic spindle gear changes
    • Property to set a spindle gear change crossover speed
    • Property to toggle between French and English for the output of comments and messages
    • Property to toggle on/off lowercase support for comments
    • Property to set the rapid rate used for operation time calculations
    • Property to toggle on/off the automatic creation of sub-programs for patterns
    • Property to toggle between 4 digit and 8-digit program IDs
    • Property to toggle on/off the output of the tool list in the program header
    • Property to toggle between relative or absolute coordinates for IJKs
    • Property to toggle between automatic tool changer or manual tool changes
    • Property to toggle between M30 and M99 for program termination
    • Property to toggle between returning to home or going to parking position at program end
    • Properties to set X- and Y-coordinates for parking position
    • Property to convert from feed expressed per min. to feed expressed per second
    • Property to inverse Z direction convention
    • Property to disable output of all coolant codes

    This post processor is available here: https://www.solidcad.ca/solidcad-generic-post-processors-download/

    Achieving Super Results with Autodesk Fusion 360 and ExactFlat

    Achieving Super Results with Autodesk Fusion 360 and ExactFlat


    Recently SolidCAD’s own Hung Nguyen created an outstanding Iron Man mask for his son who was heading to Comic-Con. With a combination of the Autodesk Product Design and Manufacturing Collection and integrated apps from ExactFlat and Pepakura, the International Winner of the Fusion 360 Model of the Month was able to get the job done with little money and time. Hung began the process with ReCap Pro and converted human scan data to a 3D mesh model. He then refined the 3D model with ReMake and used Fusion 360 to prepare the model for production. After that, Hung created perfect flat patterns with ExactFlat Online software in a few short minutes.

    Since 3D modeling typically consist of “faces”, a piece creation step was taken to prepare the design for flattening since the faces may not align with the “pieces” that need to be cut. Hung used the ExactFlat Publisher Plugin for Fusion 360 to combine faces into pieces. The other key part of the process is optimizing the pattern for strain and sag which was done with Pre-Flatten tools in ExactFlat to generate the rough pattern. This optimization step provides a view of the pattern shape as well as highlighting areas of strain or sag in the pattern.  Knowing this before anything is cut is critical in saving time and materials.

    Once Hung had the patterns right, he used nesting software to optimize the material cost. He then generated CNC code using Fusion 360 CAM 2D profile cutting. The final step was to assemble all the parts of the custom-fit Ironman suit together, which was the perfect shape and size for his son.


    To learn more about Hung Nguyen, click here

    To learn more about Autodesk Product, click here


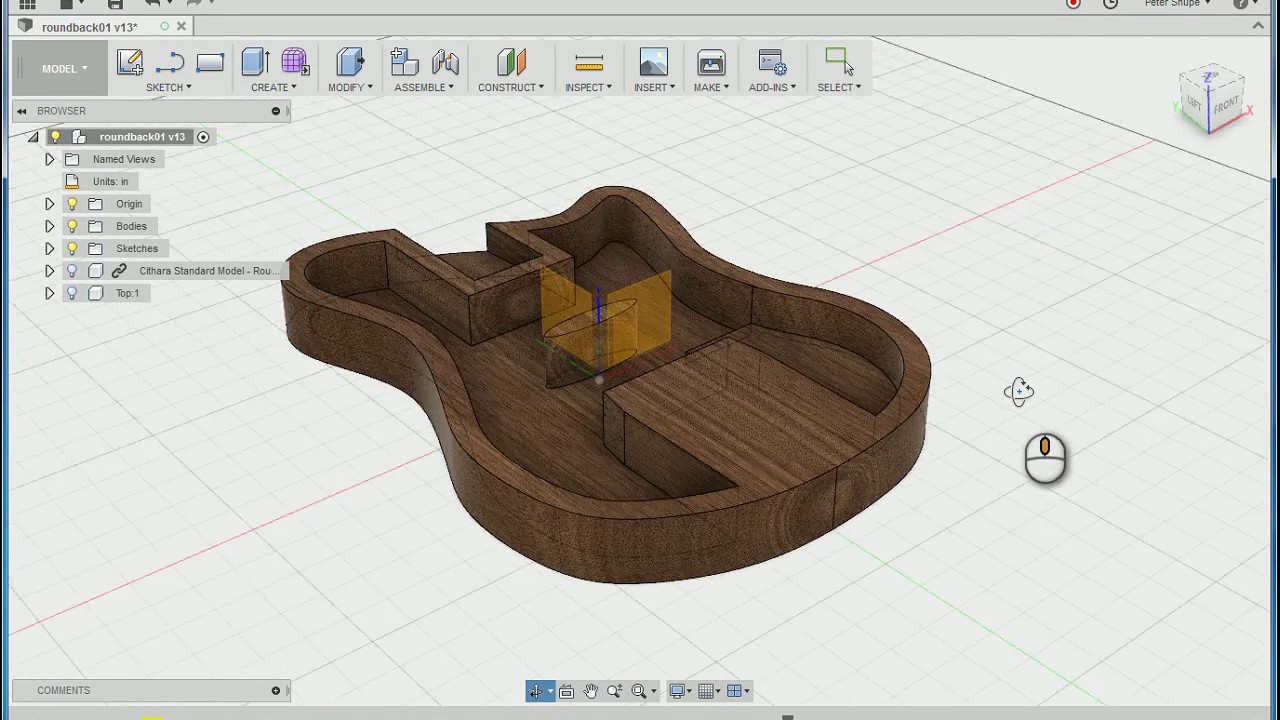
    Check out how SolidCAD helped Cithara Guitars Inc. make beautiful music using Autodesk Fusion 360!

    PROJECT PROFILE

    If you are inquiring about a product that does it all when it comes to product design, Fusion 360 is the solution for you!

    This 3D cloud-based platform allows users to test both fit and finish, create photorealistic renderings and simplify the production process overall. With this software you can now efficiently fabricate your designs using a CNC mill.

    Recently SolidCAD directed Cithara Guitars Inc, a custom guitar shop located in Hamilton, ON., to Fusion 360.  With Autodesk’s Fusion 360, Cithara Guitars was able to completely design and manufacture their guitars in one environment without any rework or errors