
May 9, 2023
Free your Drives: Using Relative Paths in your Automated Models
Here’s the scene: You’re 18 months deep into building automated models and templates for your production team, and everything is working as well as you can hope – but the IT team has an upgrade plan in the works. You and your team of designers are now sporting brand new laptops, better in almost every way from what you were using before, with one small caveat: the hard drives are now a small SSD solely for Operating system usage (C:\) and a large storage drive for everything else (D:\).
To anyone who is not knee-deep in the automating trenches, this may not seem like a problem at all. You might be thinking, “Well, more space is great!”; but there’s always a ghost in the machine when you’re bootstrapping something like an automated workflow. The main challenge that I’ve seen (and have personally fallen victim to) is that users will hard-code a specific drive into their automated templates when a file path is needed – something that isn’t wrong, but can lead to challenges down the road.
So, how do we fix it? We’re going to take a look at three options, one of which you may have already considered:
- Manually Changing the Drive Letter
- Referencing the Drive Letter via Document Location
- Referencing the Drive Letter via Project Workspace Location
Manually Changing the Drive Letter
Let’s start with the simplest, but least robust choice: manually updating the drive letter in your models. Take a look at this snippet of code:
If Parameter("Location") = "Front"
Components.Add("FRONT MOUNT CLIP", "C:\BDL_Vault\DeskStorage\Designs\Standard Mounting\133092.ipt")
Else
Components.Add("REAR MOUNT CLIP", "C:\BDL_Vault\DeskStorage\Designs\Standard Mounting\133088.ipt")
End If
This is a direct reference to a specific folder on my C:\ drive, a distinct location that I’m using to store that specific standard file. Following this concept, you would simply edit each string to look like this:
If Parameter("Location") = "Front"
Components.Add("FRONT MOUNT CLIP", "D:\BDL_Vault\DeskStorage\Designs\Standard Mounting\133092.ipt")
Else
Components.Add("REAR MOUNT CLIP", "D:\BDL_Vault\DeskStorage\Designs\Standard Mounting\133088.ipt")
End If
At this point, your template is updated. The main drawbacks to this method are that the location is still hard-coded (albeit to a new drive letter), and you will need to update each template individually each time this needs to happen.
Referencing the Drive Letter via Document Location
When a file is saved, the folder path is stored as a piece of background data that is accessible via iLogic – meaning we can grab this information and pare it down to find the drive the file is stored on. A simple way to access (and display) this information is here:
Dim DocPath As String
DocPath = ThisDoc.Path
MessageBox.Show(DocPath)
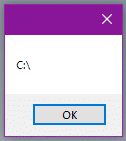
After finding the path with the above line of code, we’ll need to find the root of the path, which can be done using the .NET GetPathRoot method:
Dim RootLetter As String
RootLetter = System.IO.Path.GetPathRoot(DocPath)
MessageBox.Show(RootLetter)
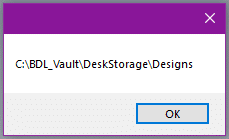
Now that we have the drive letter stored in a local variable, we can use that to build out the string we want to use to locate our file, like this:
Dim StandardLocation As String
StandardLocation = RootLetter & "BDL_Vault\DeskStorage\Designs\Standard Mounting\"
MessageBox.Show(StandardLocation)
The main downside to this method is that locating the drive will be entirely dependent on where you’ve saved the file that this rule is going to run in. If you have multiple storage drives and you’ve saved this file on a very specific drive (G:\, for example) then this method will return G:\ as the root drive, which may not be where you mean to look.
Referencing the Drive Letter via Project Workspace Location
This method is the most variable of the three I’ve mentioned so far, as it relies specifically on where your project file’s Workspace folder is located. The steps to get the drive letter are almost identical to the previous method, but with a slightly different input required. I’ll show you three ways to get the data we want in the snippet below:
Dim WSPath As String
WSPath = ThisApplication.DesignProjectManager.ActiveDesignProject.WorkspacePath
WSPath = ThisServer.DesignProjectManager.ActiveDesignProject.WorkspacePath
WSPath = ThisDoc.WorkspacePath
The first line of code references the DesignProjectManager object within the context of the Inventor Application. From accessing that object, we can specify that we want to look at the current active project, and then grab the Workspace path from there.
The second line of code is the same as the first, but rather than referencing the Inventor Application, it references the Inventor Server. Functionally, this will operate the same way when run on the desktop Inventor application, but if you are eventually going to export your models to a cloud-based service (such as SolidCAD’s VARIANT configurator) you will need to reference this Server object instead.
The final line of code is the simplest, directly referencing the current document, and searching for the Workspace of the currently active project.
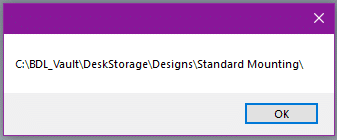
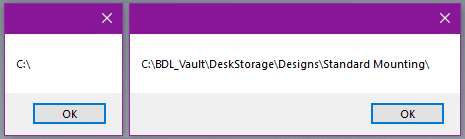
All of the above options will result in a string that looks something like this, when printed inside a message box:
After choosing your method (I would recommend #3, personally) you can then take the same steps to get the root of the Workspace and build out your file path:
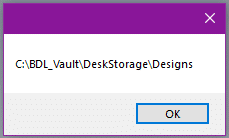
Dim RootLetter As String
RootLetter = System.IO.Path.GetPathRoot(WSPath)
MessageBox.Show(RootLetter)
Dim StandardLocation As String
StandardLocation = RootLetter & "BDL_Vault\DeskStorage\Designs\Standard Mounting\"
MessageBox.Show(StandardLocation)
This method will ensure that you are always referencing the same drive that your workspace exists on, which is commonly where any automated templates or standard components will be located.
What Does This Actually Look Like?
Here is an example of a very short conditional rule that makes use of the third method to locate the drive and replace a component based on the triggering parameter:
Dim WSPath As String
Dim RootLetter As String
Dim StandardPath As String
WSPath = ThisServer.DesignProjectManager.ActiveDesignProject.WorkspacePath
RootLetter = System.IO.Path.GetPathRoot(WSPath)
StandardPath = RootLetter & "BDL_Vault\DeskStorage\Designs\Standard Mounting\"
ThisAssembly.BeginManage("Mounting Clips")
Select Case Parameter("Location")
Case "Front"
    Components.Add("FRONT MOUNT CLIP", StandardPath & "133092.ipt")
Case "Rear"
    Components.Add("REAR MOUNT CLIP", StandardPath & "133088.ipt")
Case "Left"
    Components.Add("LEFT MOUNT CLIP", StandardPath & "133090.ipt")
Case "Right"
    Components.Add("RIGHT MOUNT CLIP", StandardPath & "133077.ipt")\
Case Else
    'No Clip, should never happen
End Select
ThisAssembly.EndManage("Mounting Clips")
InventorVb.DocumentUpdate(True)
As you can see in context, this doesn’t add very many lines to your overall rule (even less if you initialize the variables with their end values), and it helps to future-proof your code in the case that you will be using different drives over time.
If you’d like to learn more about iLogic and how to use it, you can continue checking out the articles here on the SolidCHAT blog, or if you’re looking for a more structured or in-depth learning approach, we offer standard and custom training for iLogic and other Autodesk products here at SolidCAD.
Until next time!
Related Posts

-
Plasman Success Story
Plasman didn’t just improve productivity — they reshaped the way their team works. Explore the complete story to see what changed and why it mattered.[…]
-
Built to Scale: How Greenlane Reinvented Its Operations for Sustainable Expansion
From PLM implementation to real-world impact, Greenlane reshaped their manufacturing and sustainability strategy. Read more.[…]
-
Northern Transformer Corporation
Northern Transformer took a bold step toward smarter, more scalable manufacturing. Explore the complete case study to learn what changed, why it worked, and how it’s shaping their future.[…]

- Accruent
- Advanced Manufacturing
- Architecture
- Architecture
- Architecture - Blog
- Assembly Line Automation
- AutoCAD
- Autodesk
- Autodesk Construction Cloud
- Automotive
- BIM
- Blog
- Blog Posts
- Building Design & Engineering Services
- Building Engineering
- Building Engineering - Blog
- Building Product & Fabrication
- CAD
- CAM, CNC & Machining
- Civil 3D
- Civil Infrastructure
- Civil Infrastructure & GIS Services
- Civil, Survey & GIS
- CNC Machining Services
- Construction
- Construction
- Construction Project Lifecycle
- Consulting Services
- Consumer Products
- CPQ & Aftermarket
- CTC Software
- Data Management
- Digital Transformation
- Energy & Utilities
- Engineering
- Engineering
- General
- Government & Public Sector
- Industrial Machinery
- Industries
- Industry
- Industry Topics
- Infrastructure
- Inventor
- KnowledgeSmart
- Manufacturing
- Mining
- News
- Pinnacle Series
- PLM
- PLM & PDM
- Product Lifecycle Management
- Revit
- Sales and Aftermarket for Manufacturers
- Simulation & Analysis
- Software & Technology
- Software Development
- Thought Leadership
- Tips & Tricks
- Visualization
- Visualization & Reality Capture Services