s you sit in your office, look out over the different workstations, cubicles, communal areas and conference rooms. Do you ever think about where all the furniture and fixtures came from? It’s no small stroke of luck that all the correct colors, textures and quantities showed up when delivered.
The interior designers responsible for this magic not only work to capture the look and feel of the indoor built environment, but they also consider traffic flow, occupancy restrictions and other code compliancy. If you’re interested in the how-to technical side of the tools below, check out my blog, “Bluebeam Revu for Interior Design.”
So, which Bluebeam features are most important for interior designers?
Groups
Layers
Spaces
VisualSearch
Legends
Digital Dashboards
Groups
Laying out large office spaces can have standard configurations multiplied several times throughout the space. Tagging each chair, desk and file cabinet can take a long time depending on the number of workstations. To help speed this up, several markups can be Grouped, allowing the user to copy/paste the entire workstation with all its components, thus reducing the number of picks and clicks significantly.
Layers
Sometimes office layouts can get busy and cluttered when you add power poles, data connections, ceiling-mounted projectors and wall-mounted screens. By creating a layer system in Bluebeam, you can hide or isolate each of these individually, making the plans much more comprehensive.
Spaces
Differentiating distinct areas on layout plans is another way to keep everything organized. Using Spaces in Bluebeam allows you to sketch out specific rooms, sections, departments or entire floors. As a result, you can sort fixtures by room number or department. If you have eight employees on the finance team, for instance, your counts for chairs and desks should report eight of each. You can have a breakdown of fixtures per department and quickly get totals per floor or entire layout.
RELATED:
VisualSearch
With many of the equipment and fixtures being labeled on the plans, a visual search is extremely powerful for finding all instances of a particular chair, desk or power pole. Bluebeam has the ability to search for a specific layout of pixels forming a symbol. The ability to count all the office chairs in one search saves considerable time over shifting through drawings clicking on each one individually.
Legends
Having the ability to display fixture counts directly on a printed sheet helps everyone downstream. From delivery to installation, it’s important to know what goes where and how many. Legends in Bluebeam provide accurate counts directly on the layout sheet along with other important specifications. Customized data can be sorted, filtered and displayed, putting the most valuable information at the forefront.
Digital Dashboards
Often a client may not be familiar with drawings or specifications and may need a more visual representation of the package they’re purchasing. A Digital Dashboard using Bluebeam is a powerful way to convey industry data to the design team while being extremely visual for the client. The design quickly comes to life with a look and performance of a common website. Digital Dashboards show different views, product images and use hyperlinks in a universally understood language.
These are just a few of the essential tools and functions in Bluebeam helping interior designers efficiently lay out and accurately count fixtures while communicating with the client.
Managing Auditoriums, Hospitals, Educational Facilities, Hotels and Data Center Documents, Equipment, Content and Meta Data is a Challenge to say the Least.
The 2019 Intelligent Information Management Benchmark Report Indicates:
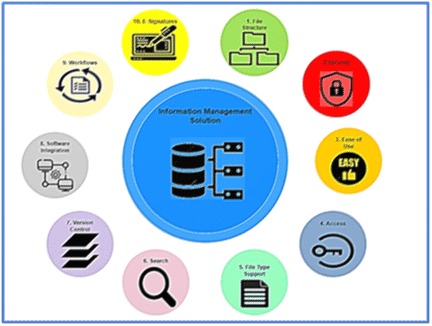
INFORMATION MANAGEMENT ISSUES
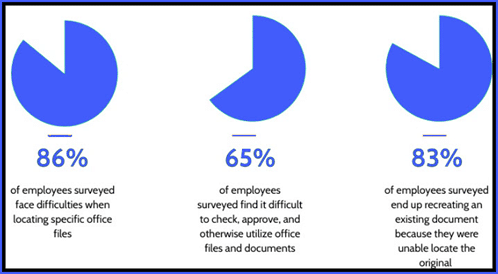
These issues can cause a loss of productivity to the tune of 21%. To put a dollar amount to this stat poor document management can cost up to $4,000 per employee per month.
This number only accounts for the actual monetary losses due to poor productivity. The cost gets even higher when you take into consideration potential losses, such as upset clients and missed opportunities.
If you don’t have a clear and standardized approach to Information Management, your business is likely hemorrhaging capital.
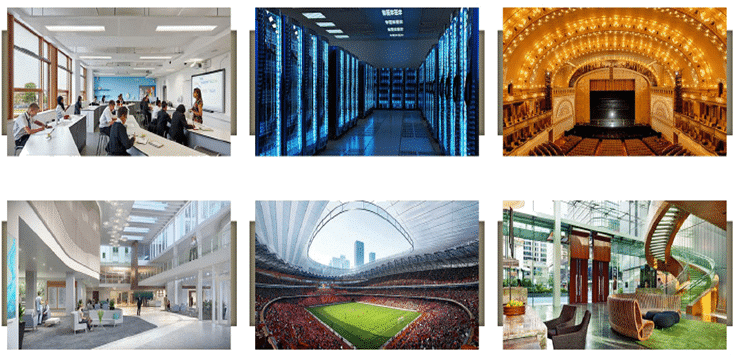
In this blog, we will show you how Meridian can assist in the Initiation, Planning, Execution and Control stages of managing types of buildings such as Auditoriums, Stadiums, Hospitals, Educational Facilities and Data Centers.
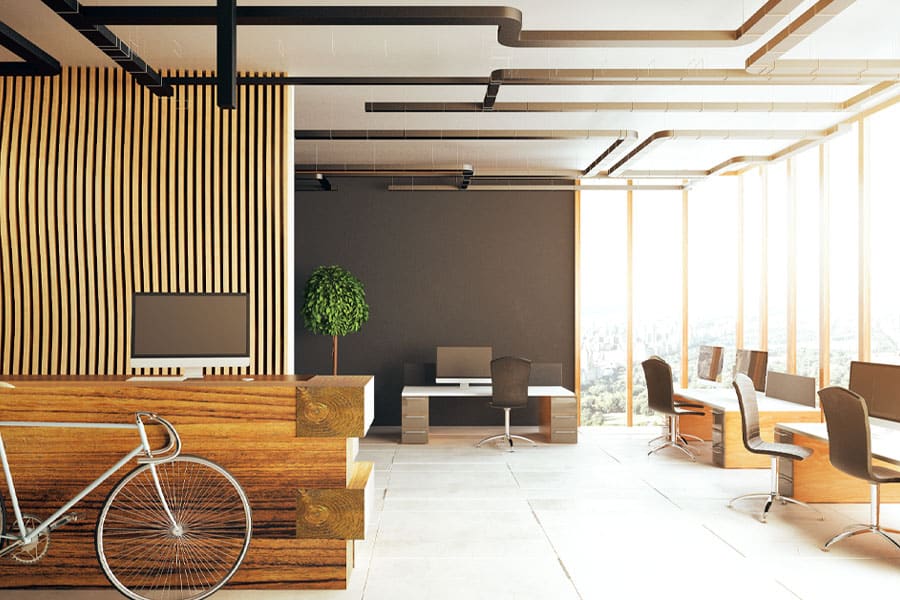
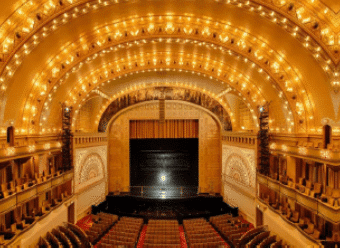
MERIDIAN FOR AN AUDITORIUM
An Auditorium is a large building or hall designed to accommodate large audiences and they are used for public gatherings, typically speeches or stage performances. Buildings such as opera, theater, assembly hall, exhibit halls, etc. would also have the same design considerations as an auditorium.
The Engineering, Construction, Procurement and Maintenance teams require an Information Management System with Meridian’s functionality to manage the Documents, Equipment, Content, and their associated Meta Data to Design, Construct, Build and Maintain the Building Structures, Bathrooms, Change Rooms, Furniture, and Maintenance Equipment since these are the Key Components for the Overall Planning, Designing, Building and Maintenance of an Auditorium.
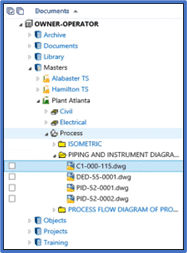
MERIDIAN DOCUMENT, EQUIPMENT CLASSIFICATION, CONTENT MANAGEMENT CONTENT
Building: Architectural, Electrical, Piping, Structural and Maintenance
Chairs: Foldable Chairs
Lights: Downlights, Wall Mount Lights and LED Lights
Furniture & Fixtures: Podium Tables, Dressing Rooms, Green Room, and Dinner Room
Security: CCTV
Material & Fabric: Curtains, and Seat Fabric
Insulation: Soundproofing
Digital Signage
HVAC: Heating and Air Conditioning
CASE STUDY PROJECT: AUDITORIUM
In this project an Engineering Procurement Construction company developed lightweight and parametric electrical lighting fixtures. The project included creating, reviewing, revising, and approving the documents, content and assigning equipment identifiers by categorizing into 3 Types of Lighting Fixtures- Indoor, Outdoor & Decorative.
The Engineering, Procurement, Construction team required a single source Information Management System with Meridian’s functionality to manage the Documents, Equipment, Content, and their associated Meta Data to manage the Documents, Equipment, Content, and their associated Meta Data to Design, Construct, Build and Maintain the Building Structures, Bathrooms, Change Rooms, Furniture, and Maintenance Equipment since these are the Key Components for the Overall Planning, Designing, Building and Maintenance of an Auditorium.
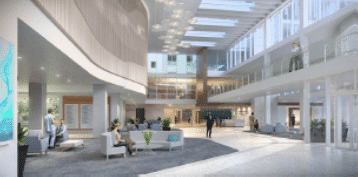
MERIDIAN FOR A HOSPITAL
Hospitals usually are a multi-story building with multiple patient rooms, operation theaters, and a large quantity of medical equipment. The facility aims at delivering a message to patients, visitors one that conveys welcoming, caring, comfort, and compassion, commitment to patient well-being and safety.
The Engineering, Construction, Procurement and Maintenance teams would require Meridian to manage documents, equipment, content and associated meta data for the design, construction, building and maintenance for the Building Structure, Medical Equipment, Patient Bed, Operation Rooms, and Maintenance since these are the key components for the overall planning, designing and maintenance of a healthcare facility.
MERIDIAN DOCUMENT, EQUIPMENT CLASSIFICATION, CONTENT MANAGEMENT
Building: Architectural, Electrical, Piping, Structural and Maintenance
CCTV: Security Equipment
Patient Room: Beds, Lights, Medical Trunking; Headwall
Operation Rooms: Beds, Stretcher, Medical Equipment
Lights: Downlights, Wall Mount Lights and LED Lights
Waiting Room: Benches, Chairs and Tables
Nurses Station
Conference Room: Tables, Chairs, Computers, Screens and Projectors
Cafeteria: Tables, Chairs and Kitchen Equipment
Staff Locker: Cabinets and Bathrooms
Server Room: Computer and Network Equipment
Elevators
HVAC: Heating and Air Conditioning Equipment
CASE STUDY PROJECT: 2021 PANDEMIC RELATED PROJECT
When COVID-19 first occurred like a wrecking ball in early 2020, hospitals were among the most affected. Faced with a huge surge in patients infected with an unknown life-threatening virus, hospitals took immediate action to keep patients and staff safe while quickly moving to adapt to structural needs that were changing by the day.
From day one, the Engineering, Construction, Procurement and Maintenance teams focused on critical issues like upgrading ventilation, creating isolation rooms, expanding emergency departments, and building temporary structures to handle patient overflow. Due to COVID-19 hospitals had to redirect resources to, many facilities had to delay other construction projects while they reassessed their current needs.
Most hospital construction projects were impacted in a variety of ways by the pandemic, according to the 2021 Hospital Construction Survey, which included responses from more than 300 facilities professionals at hospitals.
The survey showed that 76% of respondents have delayed one or more construction projects due to COVID-19, while 29% have canceled at least one project altogether. For projects started before the pandemic, renovation was overwhelmingly the main project delayed, canceled, or fast-tracked. During the pandemic, renovation is also the focus, the survey shows.
The Engineering, Procurement, Construction team required a single source Information Management System with Meridian’s functionality to manage the Building Structures, Bathrooms, Change Rooms, Furniture, and Maintenance Equipment Documents, Equipment, Content, and their associated Meta Data since these are the key components for the planning, designing, building and maintenance of an Auditorium
The Renovations included the addition of:
Isolation Rooms
Upgrade & Replace HVAC Systems
Upgrade & Expand Laboratories
Modified Designs to In Progress Projects
Expedited Drawing Process (Create, Review, Modify, Approve, Construct and Build)
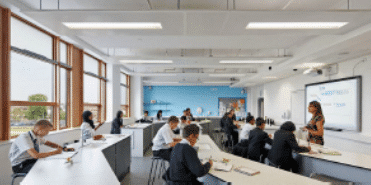
MERIDIAN FOR EDUCATIONAL FACILITY: CLASSROOMS
Educational facilities are buildings or structures used to teach students. It includes Schools, Colleges, and Universities however they can also include Day-Cares, Nurseries, Private Institutions, Fitness Centers, and Sports Venues.
Designing an educational facility certain aspects like daylighting, accessibility for the students, specification of sustainable and non-toxic building materials, etc. are a high priority.
The Engineering, Procurement, Construction team require an Information Management System with Meridian’s functionality to manage the Documents, Equipment, Content, and their associated Meta Data to manage Documents, Equipment, Content and their associated Meta Data for the Design, Construction, Building and Maintenance for the Building Structures, Classrooms, Bathrooms, Change Rooms, Furniture, and Maintenance Equipment since these are the key components for the overall planning, designing, building and maintenance of an Educational Facility.
CASE STUDY PROJECT: HIGH SCHOOL
In this project an Engineering Procurement Construction and Management company completed multi-phased project at a high school throughout the school year. The students were moved around the school to allow construction to continue. The project included hazardous material abatement, demolition and renovation to the library, science room, sports venue, washrooms, common areas and home economic labs. Structural modernization to the exterior, replacing and modifying the windows to allow for more natural light.
The Engineering, Procurement, Construction team required a single source Information Management System with Meridian’s functionality to manage the various types of the hazardous material abatement, demolition and renovation to the library, science room, sports venue, washrooms, common areas and home economic lab Documents, Equipment, Content, and their associated Meta Data.
MERIDIAN FOR EDUCATIONAL FACILITY: SPORTS VENUES
The Sports Venues are generally multi-level, open space, large walkways, stairs, elevators, and a variety of rooms and large seating areas. A Sports Venue is used for indoor or outdoor sports along with concerts, or other events.
The Engineering, Construction, Procurement and Maintenance teams require an Information Management System with Meridian’s functionality to to manage Documents, Equipment, Content and their associated Meta Data for the Design, Construction, Building and Maintenance for the Building Structures, Walkways, Bathrooms, Change Rooms, Stairs, Elevators, and Maintenance Equipment since these are the key components for the overall planning, designing, building and maintenance of a Sports Venue.
MERIDIAN DOCUMENT, EQUIPMENT CLASSIFICATION, CONTENT MANAGEMENT
Building: Architectural, Electrical, Piping, Structural and Maintenance
CCTV: Security Equipment
Change Rooms: Bench
Lights: Downlights, Wall Mount Lights and LED Lights
Rooms: Benches, Chairs and Tables
Conference Room: Tables, Chairs, Computers, Screens and Projectors
Cafeteria: Tables, Chairs and Kitchen Equipment
Staff Locker: Cabinets and Bathrooms
Server Room: Computer and Network Equipment
Elevators
HVAC: Heating and Air Conditioning Equipment
MERIDIAN FOR A HOTEL
Hotels are multi-story buildings with a large quantity of guest rooms and amenities. Hotel space type requires flexibility, durable finishes, attention to regular maintenance, and special HVAC systems and lighting. The rooms specially require comfort for the guests and the other areas’ design often involves skylights and generous glazing areas that provide an infusion of natural light which make them prominent areas well suited to serve ceremonial and social functions.
The Engineering, Construction, Procurement and Maintenance teams require Meridian to manage Documents, Equipment, Content and their associated Meta Data for the Design, Construction, Building and Maintenance for the Building Structures, Guest Rooms, Furniture, and Maintenance Equipment since these are the key components for the overall planning, designing, building and maintenance of a hotel.
MERIDIAN DOCUMENT, EQUIPMENT CLASSIFICATION, CONTENT MANAGEMENT
Building: Architectural, Electrical, Piping, Structural and Maintenance
CCTV: Security Equipment
Hotel Rooms: Beds, Closet, Lights, Table, Chair and Bathroom
Lights: Indoor Lights, Decorative Lights, and LED Lights
Conference Room: Tables, Chairs, Computers, Screens and Projectors
Fitness Centre: Weights and Cardio Equipment
Elevator
HVAC: Heating and Air Conditioning
CASE STUDY PROJECT: MARRIOTT: FAIRFIELD INN & SUITES
The Engineering, Construction, Procurement company completed a remodel and renovation. The project scope included the construction of a public space area and additional guestrooms.
The Engineering, Procurement, Construction team required a single source Information Management System with Meridian’s functionality to manage the various types of Project Documents, Equipment, Content, and their associated Meta Data.
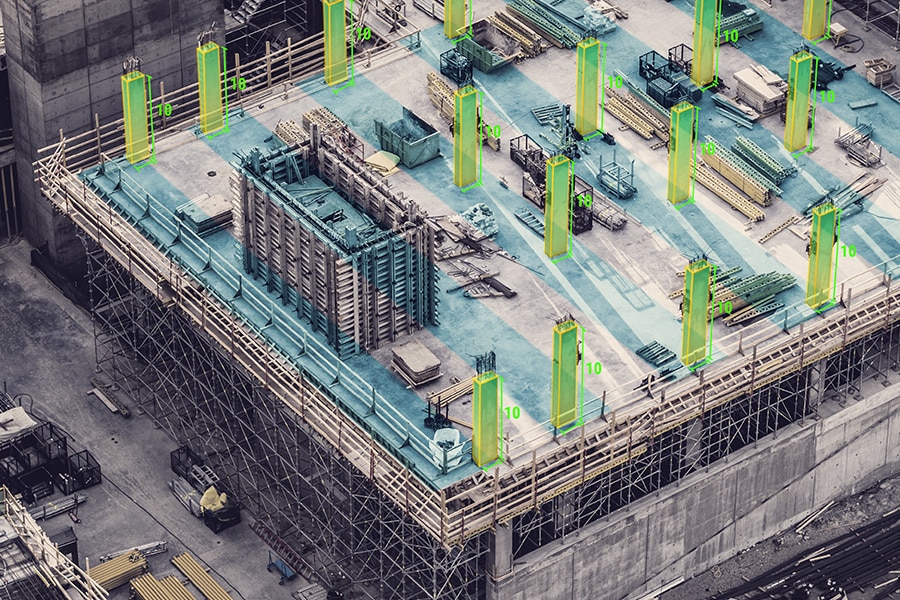
MERIDIAN FOR DATA CENTRES
Data centres are home to the computer, network, power, storage, and applications necessary to support an enterprise business. The data center infrastructure is central to the IT architecture, from which all content is sourced or passes through. Proper planning of the data center infrastructure is critical, and performance, resiliency, and scalability need to be carefully considered while designing one.
The Engineering, Construction, Procurement and Maintenance teams require Meridian to manage Documents, Equipment, Content and their associated Meta Data for the Design, Construction, Building and Maintenance for the Data Centre Server Racks, Power Lines, and HVAC Equipment. Since these are the key components for the overall planning, designing, building and maintenance of a Data Centre.
MERIDIAN DOCUMENT, EQUIPMENT CLASSIFICATION, CONTENT MANAGEMENT
Building: Architectural, Electrical, Piping, Structural and Maintenance
Equipment: Hard Drives, Mounts, Racks, Servers, Switches and Routers
Power Sources: Battery Banks, Generators, UPS
Environmental Control: Computer Room AC (CRAC), HVAC, Exhaust System
Data Centre Cabinets:
Workstations
CASE STUDY PROJECT:
A global Data Centre provided required to a new data hall for a leading cloud services provider with overhead busway. The Data Centre DATABAR system, with the MCMS monitoring system, was installed during COVID-19. Through proper factory safety protocols, The Data Centre was able to maintain the projects required lead times without manufacturing delays due to a single source Information Management System with Meridian’s functionality to manage the various types of Project Documents, Equipment, Content, and their associated Meta Data.
CONCLUSION
Inefficient processes can lead to severe inefficiencies with your Corporate, Contractor, Project, Vendor, Operations, and Maintenance Documents, Equipment, Content and Associated Meta Data. You need a robust electronic information management system to make your processes efficient. Meridian features provide robust capabilities for your enterprise-wide data and documents needs while also meeting your compliance requirements.
The next step is to determine the right Information Management System which is determined by your current Document, Equipment and Content Management pain points and needs.
To learn more about Meridian solutions (EDMS and CMMS) and how they can help your team, don’t hesitate to get in touch with the SolidCAD Meridian Team.
Despite the temptation to implement new technology quickly, it’s important that there are practices in place to ensure the tool is evolving in the long run.
ost construction industry leaders would likely agree that implementing new technology can be a complicated process.
From identifying pain points to researching possible solutions to going about the lengthy process to test and implement the new technology, the process can be painstaking—even though such efforts have largely gotten relatively easier and more accessible recently.
Still, it’s important for construction leaders to remember that any new technology implementation is a marathon, not a sprint.
While many focus on the initial dash to become operational on new technology, it’s critical to account for long-term considerations. Even once the initial phase of implementation is complete, seemingly solving the problem, it’s worth maintaining a continuous-improvement approach.
Here are six things construction leaders can do to ensure they’re taking the long view when implementing new technology.
Make training continuous
It’s easy to focus on the initial implementation training when installing a new technology. Construction leaders have by this point spent months (or even years) researching the new tool and orchestrating its implementation.
Yet, there are several reasons why training should be designed as a continuous, long-term process.
No matter how well-designed your initial technology implementation training may be, people aren’t likely to retain it all the first time around. Often when taking on new technology, people don’t know what they don’t know—so they retain what’s taught to them just to get by, without fully realizing the context of the tool.
Revisiting concepts taught in the initial training may be helpful several months after the implementation training. Then, as time passes, additional ongoing training should take place about new features and tools.
Appoint technology champion(s)
It’s likely that the initial technology implementation featured a leader or group of leaders responsible for the complex process of overseeing the effort and all its components. This leadership structure should persist long past the initial implementation.
Depending on the size of your company or team taking on the new technology, this can be one person or several people. A large municipal department, for instance, may appoint a council of strategic advisors to oversee and maintain the long-term efforts associated with new technology implementation.
These people should meet regularly to craft new training and other initiatives to ensure that the technology’s use is progressing. They should also come from different divisions or disciplines across a company to ensure every perspective is represented.
Initiate internal user groups
A great way to embrace a continuous-improvement approach to a new construction technology implementation is to form an internal user group. This group is designed to meet regularly to share knowledge of the new technology and explore new possibilities of how the tool can be used.
Perhaps the best way to make these groups effective is to make them social as well. Have them meet after working hours so they feel more informal and community-oriented, rather than just another meeting during the workday.
Devise external knowledge sharing
Equally as critical may be coming up with ways for external knowledge sharing on new technology. While internal user groups are tremendously effective in expanding a company’s use of new technology over the long term, it’s important that construction firms have a way to bring in external knowledge, too.
Attending or organizing industry events on new technology, or starting one that brings in like-minded users from other organizations, are all ways to channel external knowledge that will pay dividends long into the future.
Conduct regular technology audits
No matter how long a tool has been in place and how knowledgeable people may be on it, construction leaders should get into the habit of conducting regular, formal audits on the technology. Whether you bring in an outside group to conduct the audit or use your internal technology leadership team, doing this ensures that the technology remains effective at improving your firm’s efficiency and solving new problems that arise over time.
Embrace failure
Don’t worry if everything isn’t perfect. New technology implementations can be messy. Try to embrace the small failures that will inevitably come, allowing you to iterate to ultimately maximize the value of the new technology. After all, such failures are often the best learning opportunities.
Bluebeam’s dexterity as a construction technology makes it invaluable to the industry, but standardizing its tools and features to specific job roles or workflows makes it even more valuable.
Standardization is paramount in construction. Whether you’re a superintendent on a multibillion-dollar skyscraper project or an estimator on a mixed-use development, every industry player needs to abide by a set of standards to get the job done.
Using construction technology is no different. As digital collaboration tools continue to play an outsized role in the industry, it’s critical that those who are leading technology implementations customize the tools so workers can learn them quickly and apply them on the job effectively.
Perhaps no construction technology benefits more from standardization than Bluebeam. The tool’s pliability is one of its greatest strengths. Here’s how to apply standards to Bluebeam so you can get the most out of the technology.
Simplify what you see
Construction is a complex industry. Any given job may have more than 100 different types of roles, from the general contractor overseeing the production of a build, to the architects and engineers determining a project’s fine details, to the electrician carrying out those details.
Bluebeam is designed to help all of these people do their jobs better. Still, its capabilities are so robust that any first-time user might become overwhelmed. Therefore, it’s critical that, upon implementation, Bluebeam is customized with standards that are specific not just to each role but any particular workflows as well.
The best way to do this is to eliminate anything that’s unnecessary in Bluebeam’s interface. If you don’t need to create forms in Bluebeam, for example, scrap the icons and buttons to remove them from view. Repeat this with any other unneeded tools, panels or capabilities.
Create Custom Profiles, Tool Sets, Icons, Etc.
Revu, Bluebeam’s flagship PDF markup tool, has a seemingly endless amount of features. One way to completely customize Revu to better serve a job role or workflow is to save specific interface settings as a Profile, which can then be shared with other project colleagues.
Watch the video here https://youtu.be/RswYZRTXsVM
By creating custom Profiles, users can re-order and even turn off any of the interface’s panels and tools, ensuring that only the most used and relevant tools are in view. Users can do the same with the toolbars within Revu. Standardizing workspaces in Bluebeam with custom Profiles, and sharing those Profiles across teams, will go a long way toward simplifying the overall experience of using the technology.
Customization doesn’t stop with Profiles in Bluebeam. Markup tools—the symbols that are saved in the Tool Chest—can also be standardized as a custom tool set. Moreover, users can upload their own markup icons to standardize for use in a specific project or workflow.
Like with Profiles, implementation leaders should take advantage of such customization. From tool sets to specific markup icons, create a standardized experience in Bluebeam for your team that is as specific and simple as possible.
Review standards often
While establishing standards in Bluebeam is essential at the beginning of the tool’s implementation, it’s equally important that custom elements—from Profiles to tool sets—are reviewed and updated regularly.
Bluebeam is like a fine wine—it gets better with time. As knowledge of Bluebeam expands as people on your team continue to use it, it’s worthwhile to potentially integrate new tools and features as part of your customized standards.
Review these standards on an informal level every quarter, while larger, more robust standardization updates should happen once every six months to a year. Use these opportunities to gain feedback from users on which standards should be updated or eliminated.
The bottom line
Bluebeam’s versatility as a construction technology makes it invaluable to the industry. But with such flexibility comes the need to customize it for specific types of users and workflows. Failing to set standards when using Bluebeam—or any construction technology—risks slowing down the tool’s adoption and overall effectiveness over time.
As a structural engineer, I draw a lot of details and lay out a lot of plans. This means a lot of repetitive objects get drawn. How many times can you draw a 4×4 post or a beam hanger before enough is enough?
Thankfully, Bluebeam’s Tool Chest feature allows me to store and organize pre-drawn objects and groups into a tab for later use. If you have an object or group that you want to save for later, then right click it and select “Add to Tool Chest,” then select what folder to save it into. By default, there are some folders already for the general storage of saved objects. The “My Tools” folder is for creating custom hotkeys.
Folder management
To access the Tool Chest tab, click the Tool Chest tab icon, which looks like this:
Or press alt + x. At the top of the tab next to Tool Chest, click the downward caret symbol and select “Manage Tool Sets.” Within this new menu, you can add, delete, re-order, modify, import and export folders. If you’re just starting out, then you’re likely happy with just the default folders for now.
There are two ways to view the folders, which can be toggled by clicking the gear symbol to the right of the folder name within the Tool Chest tab and selecting either “Symbol” or “Detail.” Within the “Detail” option, you can rename the objects, which names can be seen when mousing over the symbols. You can modify the color and layer of objects within the folders by right clicking them and selecting the appropriate option.
Adding to the Tool Chest
Right click an object and select “Add to Tool Chest,” then select the subfolder. If you have a group of objects to save, first select all of the objects and then press ctrl + g or right click an object to be grouped and select “Group.” Then save it into the Tool Chest the same way as a single object. You can rearrange the order of the saved objects within the folder by dragging them around.
Using saved objects
You can bring a saved object into a document by clicking it within the folder and then clicking within the document. There are some advanced features such as sequencing, quantity legend and actions, among others, that are a topic for another time. If your “Reuse Markup Tools” feature from the F8 menu is enabled, it will continue putting in objects until you press escape or right click.
Let’s do a quick flashback to show a feature in Bluebeam Revu you might not be aware of, although it’s been around for several years.
One of my favorite releases of Revu came in 2017, when the company’s developers introduced several enhanced measurement tools allowing intelligent material takeoff workflows. How great is it when you can simply highlight the length of a beam and it automatically calculates and provides totals? Or using Dynamic Fill to find area measurements by pouring paint on a floorplan to fill the room or space?
My all-time favorite feature, however, is Quantity Link.
With this tool, Revu users are able to link Microsoft Excel files directly to the markups in a PDF drawing. As you might already know, the totals in Revu are calculated in the Markups List. Quantity Link, however, takes the information a little further. As you measure materials in Revu, the measurement or quantity totals are simultaneously updating in the connected Excel spreadsheet.
What exactly does that mean? Here are the top five benefits of using Quantity Link in your workflows.
Presentations: Whether you’re a developer presenting to a city or a city presenting to the public, visual, numerical data can be extremely important. When creating land use presentations for a new development, you can have your visual graphs update automatically, painting a clear picture of design intent.
Legacy Spreadsheets: Most specialty contractors have an existing spreadsheet they use for estimates. Those spreadsheets are one of the reasons you’re successful; why give them up when you can connect them to markups in Revu? Even if the spreadsheets aren’t rich with formulas, they can be created to match the requirements of your estimating software, allowing you to simply import.
Easily Update Revisions: Once you have all your markups in place collecting quantities, it’s really easy to simply update the existing markups when a revision comes in rather than starting over. With features like Document Compare and Overlay Pages, Revu will pinpoint exactly where changes were made so you can instantly update your markup and the spreadsheet at the same time. This also paints a pretty good picture for scope creep, justifying additional materials, schedule changes and labor.
Does your company need an Electronic Document Management System (EDMS) with the ability to manage your Corporate, Contractor, Project, Vendor, Operations, and Maintenance data and documents while continuing to practice consistent Information Management practices.
The following features are a must.
1. File Structure
Consistency matters. Like navigating around your house, it’s nice to know where everything is and that items are placed in a logical order (hopefully your kitchenware isn’t found in your bathroom). The same holds true for managing your data and documents. Knowing where your data and documents are, and how to locate it leads to streamlined processes, productivity, shareability and consistency across multiple projects and facilities.
How you organize your file structure and where the data and documents are stored is seen as an overall map to your Electronic Document Management System (EDMS).
2. Security
Your vital data and documents should not only be stored but also protected. An Electronic Document Management System (EDMS) with the capability to provide security roles allow your users to perform specific actions on specific data and documents. Security roles are named sets of security privileges. Each security privilege controls a specific command or function that can be either granted or revoked. Your users or groups are assigned to security roles for specific folders in a project or facility.
By default, your users can perform the same actions on data and documents. If additional control is required, the privileges of security roles can be updated by the folder and document type.
3. Ease of Use
Ease of Use is a subjective topic. Your users will find an Electronic Document Management System (EDMS) easy-to-use by reducing the number of “clicks” used to manage the data and document information.
The Electronic Document Management System (EDMS) – Meridian creates a rendition (copy of a document in a format other than the original) Typically, the rendition is in a noneditable format and is distributed only for reference or hard copy printing while the original, editable source document is not distributed outside of the organization. Examples of rendition formats are Portable Document Format (PDF) and Autodesk Drawing Web Format (DWF). Renditions can often be created by the same application that is used to edit the original document or they can be created by a different application. In some cases, the renditions are stored in a separate project or Electronic Document Management System (EDMS)
4. Access
More than 70% of the population is continuing to work remotely, an Electronic Document Management System (EDMS) solution should offer a great remote and mobile user experience. This will ensure tasks and transactions are continued when remote or on-the-go.
A robust file type support is a key Electronic Document Management System (EDMS) feature allowing a wide range of support from various applications like AutoCAD, AutoDesk and other design applications to common file types like Word, PDF, JPEG, PNG, TIF, and more. Additionally with the emerging file formats like 3D, panoramic, virtual reality, and augmented reality an Electronic Document Management System (EDMS) must have the capabilities to support them.
6. Search
Have you ever tried shuffling through a disorganized stack of papers and folders, you know how much time is wasted doing the cumbersome task. The Electronic Document Management System (EDMS) – Meridian makes organizing, searching, and managing data and documents easier to ease the painful process.
Meridian’s optical character recognition technology and global search capabilities enhance the data and document searchability based on their attributes such as the name and title. The data and documents can also be stored using their name, title, number, and type attributes as well as others. This increases the search and retrieval speed by utilizing a full-text search and attribute categories criteria.
7. Version Control
Version control is a method of organizing the file structure, so your data and documents are filed in an easy-to-trace order. Version control allows your employees to track and monitor document changes by creating updated versions of the document each time it’s modified. It enables you to track how the document has been modified and evolved. The version control number is updated when a document is edited, indicating that you see the most recent version.
Version control is extremely useful when several of your employees are working on the same document simultaneously. In addition, it enables each document modifier to understand the review process and see how a document has changed and who has made modifications in the past.
8. Software Integration
A robust software integration service can boost your company’s overall efficiency. Integration with software such as AutoCAD, Revit, MicroStation, SAP and 3rd party Construction Maintenance Management Software.
Like when you prune a plant, pruning your outdated software can lead to better, more efficient growth. When your outdated or broken software pieces aren’t taking up your company’s storage capacity anymore, you’ll get to work at faster speeds. As a result, you’ll be able to accomplish more with your software. Furthermore, you can also get rid of other inefficiencies like data and document duplication. Synchronize your data and documents using Electronic Document Management System (EDMS) – Meridian this will mean fewer mistakes and better accuracy, which will also contribute to your business efficiency.
9. Workflows
More than 70% of the population is working remotely, and to accommodate, 75% of businesses are already using applications with workflows. While we were still working from the office, it was easier to define, track and remind your team members of their daily tasks. But it became difficult with the implementation of the work from home model. Now even post-pandemic, the world still prefers working from home or a hybrid model of working. So how do you track or remind your team members of outstanding tasks?
The answer is simple; you can track the daily activities by using a workflow. The Electronic Document Management System (EDMS) – Meridian contains ad hoc workflow requirements in an environment to support work processes, including concurrent document modification practices, batch plotting, created work packages and multiple files.
10. E-Signatures
Do you think you waste too much time signing papers or documents? Your employees format a document, print it, sign it, and scan into the computer. It takes both time and money. In this digital age, there are new software innovations, like e-signatures. E-signature lets your employees sign documents in seconds. The business world acknowledges the advantages of these techniques for digital signatures. It is a comfortable and effective way to sign electronic documents. E-signatures prevent unnecessary delays also; it is a secure way to sign documents because traditional signatures can be forged or copied.
The Electronic Document Management System (EDMS) – Meridian e-signature provides a fast service to you and your company. This feature allows you to sign documents in seconds and enables you to send the signed documents without the need of envelopes, stamps, or delivery costs. It’s time to quit your traditional ink pen signature method. With the e-signature, it cuts down turnaround time by more than 80%.
Final Thoughts
Inefficient processes can lead to severe inefficiencies with your Corporate, Contractor, Project, Vendor, Operations, and Maintenance data and documents. You need a robust electronic document management system (EDMS) to make your processes efficient. The Electronic Document Management System (EDMS) – Meridian features provide robust capabilities for your enterprise-wide data and documents needs while also meeting your compliance requirements.
The next step is to determine the right Electronic Document Management System (EDMS) which was determined by your current Data and Document Management review and identified pain points and needs.
To learn more about Meridian solutions (EDMS and CMMS) and how they can help your team, don’t hesitate to get in touch with the SolidCAD Meridian team.
Upon buying a home many years ago, a homeowner provided the contractor with a PDF for wooden flooring installation. The contractor vowed to take off the quantities, but also required a home visit so they could do an onsite measurement check as well.
Baffled, the homeowner questioned the firm as to why the home visit was needed. The explanation: “You’ll see when we get there.”
The firm measured on-site and found out that its takeoffs were 22% more than the initial estimate.
“I realized that they didn’t have the right tools,” the homeowner said. “Had I known about Revu back then, I would have told them, ‘You are not only wasting your time, you’re also wasting my time. If you use this tool, you’ll be a lot more accurate.’”
That homeowner was Deepak Maini, a 20-year qualified mechanical engineer who not only knows about Bluebeam Revu now, but swears by it for accurate quantity takeoffs.
Now a national technical manager at Cadgroup Australia, Deepak strongly advocates for the use of Revu to accomplish accurate quantity takeoffs. Using the digital tools in Revu helps to avoid costly mistakes from paper-generated processes, especially when dealing with large or complex projects.
Deepak’s QTO Tips and Tricks in Revu
Calibrate the PDF – Don’t rely on the drawings to be in proper scale. This process ensures that your measurements are accurate.
Create Custom tool sets – Align all project collaborators by creating and deploying a tool set for takeoffs that can be used and standardized throughout your company and on future projects.
Use Custom Columns – Why not have an immediate cost breakdown? Columns in the Markups List are highly customizable. With values plugged into your Custom Columns, users can instantly see the materials and price estimates.
Use VisualSearch – Using this feature, you can find the total count of light fixtures or electrical outlets quickly within your entire bid package by using Revu to search for a visual cue or object.
Calibrate the PDF
“You don’t always know whether those sheets have been printed to the right scale or not,” Deepak said. “Calibration ensures that we use the right scale and we get the right measurements.”
Revu includes automatic prompts for setting scale and can calibrate a PDF to a single scale or to separate X and Y scales as needed, as well as setting multiple measurement scales on the same PDF using viewports. “When it comes to taking off regions and areas and so on, it’s got some really smart tools that let you snap onto the corner points of the areas and you can really easily take off those quantities,” Deepak added.
Custom tool sets
Taking off building quantities can be a repetitive process, and if you have multiple people working on several bid packages at once, having a standard set of tools makes work consistent and efficient among everyone. Markups, like colored hatch patterns, and symbols, like lighting fixtures, can be saved as a custom tool set in Revu and even shared with other users.
Cities and municipalities transitioning their plan check process from paper to digital have a lot to look forward to.
Moving the paper-based process of reviewing and approving plan documents for local-area building projects can improve your efficiency in the digital era. But that doesn’t mean making the transition from paper to digital is always easy. There are many considerations—some of them not so obvious—that need to be taken into account when moving the plan review process from paper to digital using Bluebeam.
Whether approving plans for a single-family home or a robust, skyline-defining high-rise skyscraper, there are several process-oriented tips cities should follow to ensure a smooth transition to digital.
Here are four things cities and municipalities would be wise to consider as they undergo their paper-to-digital plan check transformations.
Appoint a leader
No matter the size of your city or municipality plan check review team, it’s critical when preparing to undergo a paper-to-digital transformation with Bluebeam that there is someone on the team leading the effort internally. This person, typically someone who has at least modest experience using Bluebeam, will act as the liaison between the city or municipality and the Bluebeam implementation team.
Channeling communication through an internal point person will alleviate potential blockers in the process of getting the rest of the team up to speed on using Bluebeam. It will also help other team members have an internal “expert” to go to when minor questions arise.
Consider process, not just software
Bluebeam Revu is an extremely malleable software that users can customize to suit their specific needs. So when preparing to use Bluebeam to transition a city’s plan check review process to digital, it’s important to consider the workflow first and then how Revu fits in it.
Luckily, Bluebeam’s professional services team can help customize Revu for each city’s particular workflow. Preparing documents ahead of the official review cycle in Revu—through software features like page labels, OCR and batch link, as well as setting up a Studio Session—can make the broader transition much easier to digest.
Simplify transition
Change is hard. From comfort level with technology to experience with digital tools, every team member is going to approach digitization differently. That’s why cities and municipalities that are going digital with their plan review process should work to simplify the process using Revu as much as possible. Start small by focusing on the easy wins that benefit the entire team. Once their knowledge of Revu expands, add more in-depth elements.
Begin with features like Profiles and Tool Sets in Revu to customize and standardize the review workflow process, making it as easy as possible for those involved.
With Profiles, cities and municipalities can eliminate toolbars and panel icons in Revu that won’t be needed. This keeps Revu’s interface simple and clean, and easier to use for team members and collaborators.
Tool Sets give the ability to create custom tools in Revu for each department that is reviewing documents, even using different colors to distinguish each department’s tools. Additionally, you can create tools in Revu that contain commonly used comments; this way each user doesn’t need to manually type them in every time.
Think beyond initial training
When it comes to learning Bluebeam Revu, process is just as important as training—and this applies to cities and municipalities embracing Revu for plan check as well.
Indeed, eventually team members will receive the training they need to use the software, but an equally important consideration when initially implementing it is the high-level process, or workflow, that the team needs the software to exist under.
How does the ideal plan check review process work? What stakeholders are involved? What sorts of reviews or markups are they conducting? What approval stamps need to be digitized? The Bluebeam professional services team can help you work out these questions and develop a process that meets your team’s specific needs.
Looking forward
No matter where cities are in their digital review journey, there are always industry consultants at Bluebeam available to help ease the transition. Revu is a powerful, comprehensive tool for the full spectrum of users across the architecture, engineering and construction industry. But that doesn’t mean that implementing Revu for the highly specific needs of a municipal plan check process needs to use the full scope of the software’s capabilities.
Simplifying Revu’s tools and streamlining how it’s used in a workflow will ensure that the transition from paper to digital is as beneficial—and easy—as possible.
Bluebeam Revu has a variety of built-in features, including a comprehensive markup tool palette. You can draw elliptical curves, lines, polylines, rectangles, text boxes, arrows, highlights, hatches, polygons and combinations thereof. You can even store custom grouped objects into the custom Tool Chest tab for later use.
For many, you have your default markups just the way you like them, and even have populated your Tool Chest tab. You feel that you’re proficient with Bluebeam Revu’s markup tools, but some things inevitably feel more cumbersome than good old pen and paper.
Have you ever drawn an object for the umpteenth time and just wished that you could somehow have multiple default settings for a markup that you could easily switch between?
For example, I often draw a callout (default hot key: “q”) that has red-colored 12-point font with no line around the text box. I also often draw blue callouts with 20-point font and a 1.0 point line weight around the text box. I have the red callout variant as my default, but I use the blue variant so often that it could just as well be my default.
For a long time, I reformatted each (default) red callout into a blue callout or copied a blue callout where needed. Thus, for each callout, I had to adjust the line color, text color, line thickness and font size. For those keeping score at home, that means I had to press the hot key, click and drag and then use seven clicks and some typing to reformat the callout.
This is about nine times slower than just using the default formatting. If I had a genie that gave me three wishes, and I wasn’t allowed to use any for client management, I think I’d use all three wishes to create my own custom Bluebeam Revu hot keys.
As it turns out, Bluebeam Revu has granted you many more than three wishes for precisely that!
Users of the Tool Chest tab will notice that there is a default partition called “My Tools.”
When you open the Tool Chest Panel (default hotkey: “Alt + X”), you will see My Tools at the top. The My Tools Tool Set is a configurable collection of frequently used tools that you can easily access. It has a few special properties you should be aware of:
Tools in the My Tools Tool Set are automatically assigned hot keys for quick access
The hot keys are numeric, according to the tool’s positioning in the My Tools tool set (its hot key is shown in the upper right corner of its icon)
You can click and drag to change a tool’s position, which will automatically change its associated hot key
Now, let’s relate back to my callout formatting quandary above. I can keep my “q” hot key as the red variant by default—so far, so good. Then, I can format a blue variant callout to my liking, right click on it, mouse over “Add to Tool Chest,” and then select “My Tools.”
This places my customized markup at the end of the list in My Tools. Click and drag to place this newly added markup in the first position and the hot key labels will update automatically. You may now press “1” to select and be able to place an identical copy of this markup.