fbpx
  • Civil 3D 2025.1 Update

    The Civil team at Autodesk has released the latest update to Civil 3D 2025. Click here to see Release Notes and click here for the Online Help page. As usual, the update can be installed via the Autodesk Access app in your Windows status bar, or by downloading the update at your Autodesk Account page.

    Here are a few noteworthy new features:

    Corridor Performance

    If you like to grip-edit corridor regions, but you are apprehensive due to the poor performance and laggy cursor, you’re in luck. I tested a very large corridor with a dense assembly frequency, and I noticed zero cursor lag! Impressive.

    Survey Database

    The survey database is now fully supported in Autodesk Docs.

    Surfaces

    Imagine a surface style that displays only contours, and that style is assigned to a surface. Your goal is to edit the TIN lines or points. In 2025, you’d need to assign a style with those components turned on. Now in 2025.1, these components are automatically turned on after initiating these edit tools.

    Dynamo

    If you’re a Dynamo developer, or you know one:

    • 1100 new nodes have been added.
    • The library has been reorganized.
    • The Dynamo Core has been upgraded to 3.2.2
    • Colour control has been improved.

    For any questions reach out to your sales rep or contact us at info@solidcad.ca

    Go for Gold with V-Ray

    Current Offers and Promotions

    Go for Gold with V-Ray– Celebrate the Paris Summer Games with a Special Discount!

    Limited time offer! Promotion ends on August 20th, 2024

    Start the games with top-tier rendering power!

    Start the games with top-tier rendering power!

    V-Ray is your partner in achieving breathtaking, photorealistic results that push the boundaries of digital creativity. Enjoy 16% off new annual V-Ray Premium or Solo subscriptions, celebrating 16 days of world-class sports competition between July 23, 2024 and August 20, 2024!

    V-Ray Solo and Premium subscription plans allow you to use V-Ray with every host application, including 3ds Max, Cinema 4D, Maya, Nuke, Houdini, SketchUp, Rhino, Revit, and Unreal.

    Use promo code Olympia16 during the checkout process on our e-store.


    Make the podium.

    Dive into the world of top-tier rendering with V-Ray, where your most intricate 3D projects are rendered with the precision of a competitive athlete. Built for quality, optimized for speed, and designed to scale effortlessly with your needs. Whether it’s in architecture, media & entertainment, or product design, V-Ray brings your visions to life, pushing the boundaries and setting new standards in the visualization arena akin to an athlete striving for gold medals.

    Precision Rendering

    Like precision in competitive sports, V-Ray delivers photorealistic renderings with meticulous detail, capturing every nuance with the skill of a world-class athlete.

    Peak Performance

    V-Ray pushes the boundaries of 3D rendering, mirroring the relentless pursuit of excellence and record-breaking performance seen in sports.

    Teamwork

    V-Ray enhances teamwork with seamless integration across all leading 3D modeling tools and other Chaos products, echoing the synergy and coordination found in professional sports teams, leading to extraordinary results.

    Adaptability

    Like elite athletes adjusting to new challenges, V-Ray is built to meet any scale, complexity, and performance needs in production. It evolves with your requirements, ensuring peak performance and gold-medal outcomes in every project.

    Podium Position

    Preferred by 92 of the top 100 architecture firms, V-Ray masters the art of rendering complex projects, akin to athletes competing at the highest international levels.

    Contact us if you have any questions!

    Matterport Ultimate Business Bundle

    Current Offers and Promotions

    Matterport Ultimate Business Bundle

    Limited time offer! Promotion ends September 20th, 2024

    Why Choose This Bundle?

    Outstanding Performance: The Matterport Pro3 is renowned for its ease of use and scalability, making it an ideal tool for any professional.

    Seamless Integration: Effortlessly integrate with Autodesk Construction Cloud, Procore, or many other CAD packages.

    Enhanced Collaboration: Leverage BIM, E57, and floor plan add-ons to achieve deeper collaboration across teams.

    Cost Efficiency: Reduce costs associated with site visits and expedite decision-making processes.

    Benefits for AEC

    Matterport brings transformative benefits to the Architecture, Engineering, and Construction (AEC) industry by streamlining workflows and enhancing project efficiency. You can share a model within 24-48 hours of scanning the space, helping them to share the status of a site and discuss what needs to be done. They will time and money not only by minimizing site visits, but by being able to notice smaller issues early on, which could become larger issues later in the construction process.

    Current Bundle Offers:

    Matterport PRO2 3D Camera (MC250)

    Matterport PRO2 Professional Kit Bundle

    Matterport PRO3 Performance Kit

    Contact us if you have any questions!

    Autodesk Desktop Connector

    Version 16.9 of the ADC is now available to download. You can find information about it and download it from this link.

    If you’re upgrading from 15.x, it would be best that you read this document as there have been significant changes.

    In addition to the usual performance and defect fixes, probably the most important new feature is this:

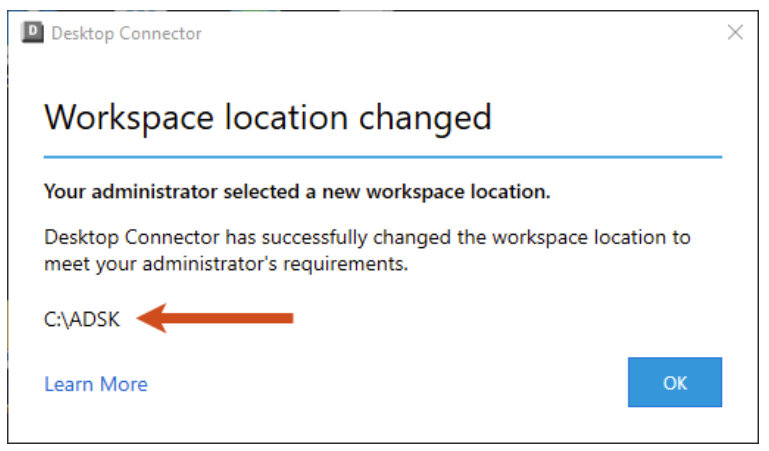
    Administrators now have the ability to set the local workspace location during install/deployment of Desktop Connector. This capability allows admins to enforce a company standard workspace. (CDX-24152)

    For any questions reach out to your sales rep or contact us at info@solidcad.ca

    Civil 3D: Subassembly Composer Tip of the Year

    Good day folks, do we have a tip for you today! If you create custom subassemblies with the Subassembly Composer, you’ll want to read on…

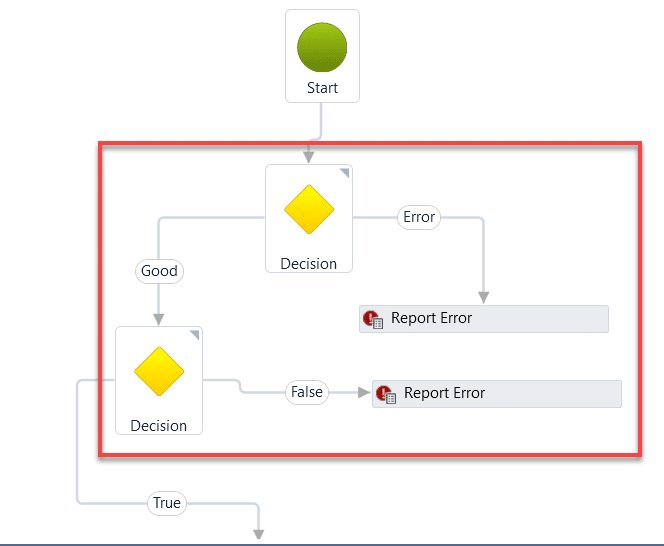
    I’ve created maybe a couple hundred subassemblies for myself and various customers over the years. Some easy and some very involved. In nearly all of them, I’ve wanted to move all or some of the nodes in the flowchart. In this example, I need to move the nodes within the red rectangle.

    It sounds easy, and it is, but only if you know the trick. And many thanks go to my colleague Jae Kwon for pointing this out to me today. Where were you 6 years ago?


    Multiple nodes can be selected by holding the CTRL button while selecting nodes but only one moves.

    Here is the key:

    1. Double click in a blank area. It doesn’t seem to matter where, just double click somewhere, say close to the X in the image.

    2. Select the nodes you’d like to move by holding CTRL and picking them with your mouse. To move all, CTRL+A.

    3. Use the arrow keys (not the mouse) to move them.

    That’s it. Enjoy.

    For any questions reach out to your sales rep or contact us at info@solidcad.ca

    Civil 3D 2025

    Well, it’s that time of year again when Autodesk bestows us with the latest release of their flagship Civil Design application. Read on to see which features speak to this blogger.

    File Format

    This is probably the most-asked question, and I’m happy to say that there is yet again, no format change. We are still on the 2018 format. Good news for everyone!

    Performance

    Performance has yet again been significantly improved across the board in Civil 3D 2025.0.

    Corridors

    There is a new corridor creation dialog box that will allow for more efficient creation of corridor with multiple baselines using alignments and feature lines.

    Civil 3D 2025

    Civil 3D 2025Civil 3D 2025

    Coordinate Systems

    New horizontal coordinate systems have been provided.

    A new vertical coordinate system workflow exists to specify the survey datum. The new command is GEOCSASSIGN.

    Another new system variable named, ENABLEVCSSUPPORT, exists for DEM/GeoTIF files.

    Civil 3D 2025

    Surfaces

    Level of detail tools are intended to increase performance by reducing the amount of data displayed on the screen. Note that in 2025.0 ,two previous commands have been removed: LEVELOFDETAIL and LEVELOFDETAILOFF. These are replaced by object-based settings.

    Civil 3D 2025Civil 3D 2025

    For any questions reach out to your sales rep or contact us at info@solidcad.ca
    AutoCAD 2025

    Well, it’s that time of year again when Autodesk bestows us with the latest release of their flagship drafting application. Here is the Official Documentation. Read on to see which features speak to this blogger.

    File Format

    This is probably the most-asked question, and I’m happy to say that there is yet again, no format change. We are still on the 2018 format. Good news for everyone!

    Activity Insights

    More actions are being logged into the Insights.

    If you use the DWG History tools, these have been merged with Activity Insights. Note: the history is now only available within the Insights palette. The DWGHISTORY command no longer exists, though the functionality is still there.

    AutoCAD 2025

    AutoCAD 2025

    Markups

    Markups from Autodesk Docs are now supported.

    Assigning specific annotation styles is now possible.

    Polygonal revision clouds are supported.

    Comments attached to markups are selectable.

    Hatch

    This one is pretty cool! Draw a new hatch object without creating or specifying a boundary. E.g. use the new hatch rectangle command to quickly create a hatch. Not limited to rectangles; any shape is possible.

    A new hatch path option is available. This creates a hatch of a specified width along a path, like a polyline.

    AutoCAD 2025

    Blocks

    AutoCAD can use machine learning to detect linework and convert that linework to a block. Imagine a drawing where all the door blocks were exploded. You would prefer that they had not been. Use the new command to identify those door lines and convert them to a block

    AutoCAD 2025      AutoCAD 2025

    ESRI Maps

    ESRI maps are now integrated into AutoCAD. Now, you can use five additional types of Esri maps to assign geographic location information to a drawing file.


    AutoCAD 2025

    AutoCAD 2025

    For any questions reach out to your sales rep or contact us at info@solidcad.ca

    Civil 3D: Object Names and Style Descriptions

    Does your company require the use of a specific naming convention for Civil 3D objects? Has it been difficult to adhere to that standard? If so, read on for some tips.
    When an object is created in Civil 3D, it requires a name. This is the naming convention for a new alignment using the out of the box Civil 3D drawing template. It will be named Alignment – (1), the next one will be Alignment t – (2), etc. This name is not very descriptive, and I hope you’re using something better than this already!

    Here is an example of a company’s strict naming convention.

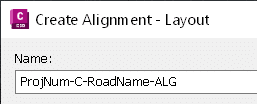
    1234-C-Granville-ALG

    • 1234                     =             project number
    • C                            =             civil
    • Granville              =             road name
    • ALG                       =             alignment

    Users must refer to a naming standard, often a PDF document somewhere on the network, and this can take time. Under pressure, users sometimes skip the formalities and use a non-standard name. We must make it as easy and fast as possible for them.

    Why not embed this standard into the drawing template itself so users won’t need to open another file? Here is how this could be done directly in your Civil 3D drawing template. The users’ responsibilities would be to edit the mixed-caps data and leave the ALL CAPS data.

    Prompting the user with the information they need when they need it will help to ensure better efficiency and (potentially more important) reduce the chance that they use non-standard names. This can be done for all relevant Civil 3D objects in the Settings tab by:

    • Editing the Feature Settings for the object in question.

    • Configuring the name template.

    • Clearing any child overrides so all alignments get named properly regardless of the command used.


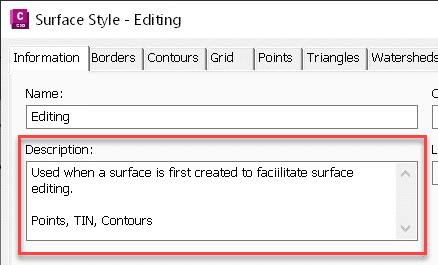
    While we’re on the subject, it can be beneficial to include a good description with styles so that users are prompted when or why to use a style. I try not to have make the description so long that my users need to scroll to see the entire thing. They won’t! Make it concise.

    Civil 3D: 2024.3 Update

    Civil 3D 2024 has a new update: 2024.3. You can use Autodesk Access to install it or download it from your Autodesk page.

    Here are the notable enhancements.

    Civil 3D: 2024.3 Update

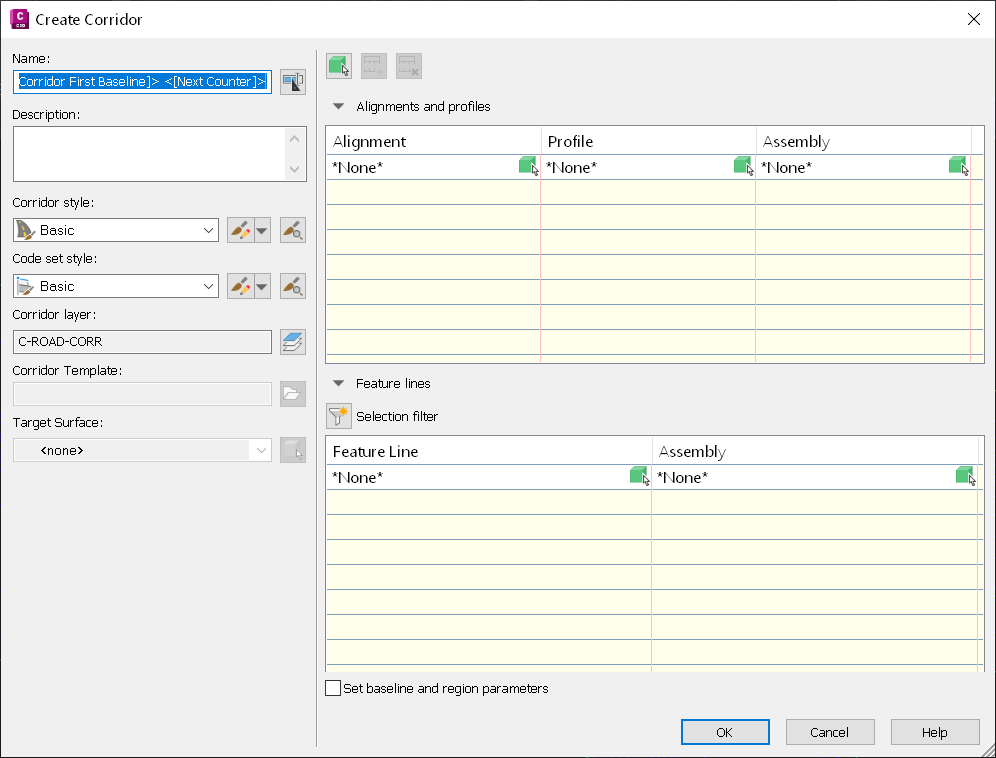
    • When creating a new corridor, expect to see this new dialog. It allows for the creation of multiple baselines right at the time of corridor creation. For large corridors, this could be a significant time saver.
    • In that same new dialog, feature lines can be more efficiently chosen by filtering based on criteria such as Name, Style, Layer, and Site.
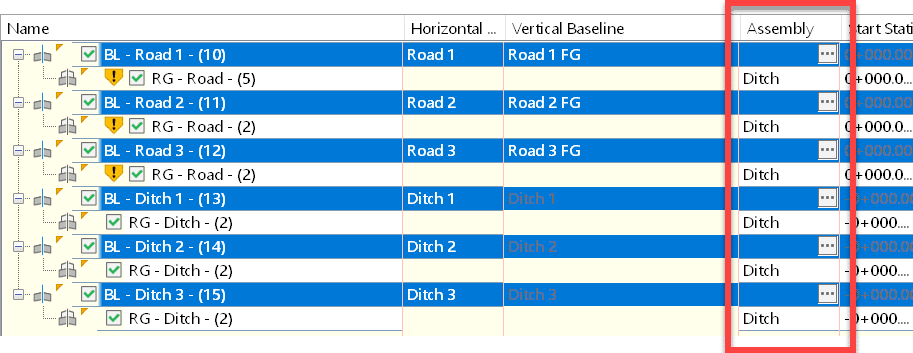
    • Assign alternate assemblies in Corridor Properties for multiple baselines and regions simultaneously.

    Civil 3D: 2024.3 Update

    • The Dynamo Core has been updated to version 2.19. Note, that this can cause issues with Dynamo scripts created prior to 2.19…
      “if you have no nodes set as “Output”, nor a Slider or Boolean Input, it will never show your Inputs in the Dynamo Player.”
      “Adding a node as an Output will “solve” this issue”

    In the API, Added the ability to call the API to export C3D objects to the ArcGIS FileGeodatabase to automate workflows from C3D to ArcGIS.

    Mastering Point Clouds in Civil 3D: A Three-Part Guide to Efficiency: Bonus Part

    This is a bonus article in the Point Cloud series. Click to view: 

    Article 1 

    Article 2 

    Article 3 

    With all this talk about decimation and removing many of those original points in the cloud, how does one know if they’ve removed too many points? Here is how I do it. 

    • Insert the point cloud into Civil 3D.
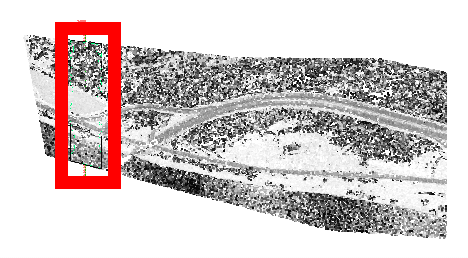
    • Make a surface from the original point cloud, but only a small subset, so it’s not too big.

    • Make a surface from the decimated classification using the same red border as above. This so you can tell how many points are used for each surface within that area. 
    • Make an alignment and profile sampling both surfaces and have a look. The blue is the original, the red is the decimated cloud. Some of it is bang on and some of it isn’t. You get to decide if you have decimated too much.

    Are there any other ways to decimate that are better? VRMESH and Pix4D are expensive applications that do this, but I have limited experience with them. Civil 3D, however, has one more trick up its sleeve. 

    • Make a new surface and paste the original point cloud surface into it. Yes, the big one, but remember that it’s only using the points within the red border. 
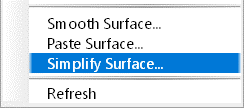
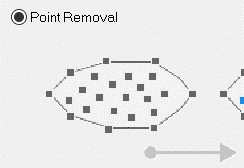
    • Use the Simplify Surface editing tool. The highlighted number is where you can experiment. The bigger the number, the more points will be removed.

    • Sample this new surface in the profile view with the other 2 and compare. The purple profile was created with this new surface. That surface contains about the same number of points as the one created using the decimated cloud from Recap. It is closer to the original.

    What does this mean? Is Civil 3D’s Simplify Surface tool better than Recap’s “Intelligent Decimation”? In my experience, I find that yes, it can give me a better result. But not always. Even in this same dataset, there are areas where the decimated cloud is closer to the original. The red line below. 

    Here is my philosophy. This works best for me. Your mileage may vary depending on your point cloud. 

    1. If a cloud has 80 million points, it is more efficient to decimate it using Recap before it ever comes into Civil 3D. 
    1. Decimate in Recap, but maybe not as much as you would like. E.g., if I think  1 million points is the right number for my Civil 3D surface, I will decimate to 2 or 3 million. 
    1. After modeling the surface, use the Simplify tool to get the surface down to that 1-million-point mark, or whatever your intended number is. 

    Click here to download the sample files.