fbpx
  • Can Climate Proofing Structures Help Reverse Climate Change?

    This story was originally published by on the Bluebeam Blog.

    With the built environment such a prominent source of carbon emissions, it is vital that the industry recognizes the urgent need to ‘climate proof’ homes and other built assets and infrastructure.

    Everyone is aware of the potentially catastrophic consequences of climate change. Climate change has been exacerbated by human activity, particularly since industrial activity increased dramatically in the 1800s. The burning of fossil fuels such as coal, oil and gas generates greenhouse gas emissions, effectively trapping the sun’s heat and raising temperatures around the world.

    Responding to the looming crisis, international governments have pledged to lower carbon emissions to reduce global warming. Only last month negotiators from dozens of countries agreed to shift away from fossil fuels at the COP 28 climate summit.

    Yet as the United Nations (UN) points out, rising temperatures are just the start.

    “The consequences of climate change now include, among others, intense droughts, water scarcity, severe fires, rising sea levels, flooding, melting polar ice, catastrophic storms and declining biodiversity,” it says.

    Eliminate carbon emissions from buildings

    The built environment is stepping up and playing its part in reducing carbon emissions. Since construction activity and building occupation accounts for around 39% of global carbon emissions, the pressure is on designers, developers, building owners and operators, and occupiers to make buildings greener.

    There is much work to do. A report called “UK Housing: Fit for the Future?,” published in 2019 by the UK government’s advisory Committee on Climate Change (CCC), argued that the UK’s legally binding climate change targets would not be met “without the near-complete elimination of greenhouse gas emissions from UK buildings.”

    The CCC’s report noted that efforts to reduce emissions from the UK’s 28 million or so homes had stalled, while domestic energy use—which accounted for 14% of total UK emissions—had increased. Worryingly, efforts to adapt the UK’s housing stock to the impacts of the changing climate—known as climate proofing—were “lagging far behind what is needed to keep us safe and comfortable, even as … climate change risks grow.”

    So how can the UK’s building stock, and particularly homes, be climate proofed?

    There are two approaches: First, when building new, do so to exacting standards that lower their environmental impact; second, retrofit existing buildings with materials and technologies to the same end.

    Build in weather resistance

    The UN’s Environment Programme (UNEP) says it is possible to build in resistance to heatwaves, extreme cold, cyclones and strong winds, coastal flooding and drought with a variety of construction strategies.

    “Structural designs can help reduce heat inside buildings,” the UNEP says. “In Vietnam, traditional housing designs such as the optimum orientation of buildings, high-rise rooms and large openings improve ventilation.”

    “Walls of concrete, stone or other heavy material that capture solar heat are used in China, Chile and Egypt. Green roofs and reflective surfaces can also reduce temperatures in and around buildings.”

    The UNEP says that adapting to cold and temperate climates “requires capturing heat and minimizing heat loss. Insulations in roofs, walls, ceilings and double-glazed windows help to minimize heat loss and lead to more energy-efficient buildings.”

    To resist the effects of strong winds, homes could be built in circular shapes, while strong connections between foundations and the roof are critical to building wind-resilient houses.

    Homes built in areas at risk of flooding could be positioned on pillars to allow floodwater to flow underneath, the UNEP suggests, while those in drought-affected regions could feature rainwater harvesting and recharge systems that capture water on the roofs of buildings.

    Passivhaus technology

    Companies have been working on climate-proof building concepts for years. Perhaps the most familiar example is the Passivhaus program. Developed in Germany in the late 1990s, key features of a Passivhaus are lots of insulation and airtightness, minimal thermal bridging, optimization of passive solar gain, mechanical ventilation with heat recovery and a simple, compact shape.

    According to the International Passive House Association, which promotes the Passivhouse Standard, along with “a greater public understanding of highly energy-efficient buildings,” such homes need just 10% of the energy used by typical Central European buildings.

    A disadvantage, at least in the short term, is that a Passivhaus costs around 8% more upfront to build, says the IPHA. But a house built this way eventually uses much less energy than a conventional new home, meaning over time this kind of outlay will be recouped; plus, there’s the improved comfort and structural performance to consider.

    We understand the sort of elements that should go into a newly built home. Let’s assume that new UK homes are being consistently built to high climate change-resistant standards and housebuilders lay claim to buyers making significant energy savings when acquiring “new.” The next question is what to do about existing homes?

    Given the age of most of the UK’s existing housing stock, this is an issue that needs tackling. More than half of the country’s homes were built before 1965, more than a third before 1945 and 20% prior to 1919. Just 7% has been delivered since 2000.

    Retrofitting homes—the costly solution

    Retrofitting has been put forward as the best solution. But given the number of households in the UK, around 28 million, the scale of the task is positively Herculean. The cost is not insignificant either.

    According to a study by the University of Nottingham, the cost of “deep retrofit”—effectively retrofitting a home to the highest levels of energy efficiency—is expected to average around £69,000, or $86,850, more than twice the government estimate for such work. So carrying out such retrofits on every older home in the country will come with a high cost.

    In addition, there is the time it will take to retrofit so many homes. But not doing anything isn’t an option, which the industry recognizes.

    Infrastructure is another area where climate proofing is vital so services can continue to function in the event of things like catastrophic flooding.

    According to the OECD, “ensuring that infrastructure is climate resilient will help to reduce direct losses and reduce the indirect costs of disruption,” which can result from the same factors that threaten the viability of so many homes across the country.

    Turner Construction Produces a Bold Initial Measurement of Embodied Carbon

    This story was originally published by Diana Kightlinger on the Bluebeam Blog.

    Carbon tied up in building materials makes up the largest source of construction emissions—but difficulties quantifying it make reducing the industry’s carbon footprint tough

    The 39% of total global energy-related carbon emissions due to buildings has been widely reported. Less known, however, is that an eye-opening 11%—more than a quarter of that total—are scope 3 emissions. These indirect emissions come mainly from the extraction, manufacture, delivery, installation and end-of-life disposal of materials, according to the International Code Council.

    “Scope 3 emissions are hard to measure and even harder to manage,” said Sara Neff, head of sustainability for Lendlease Americas, during an interview with the Built Blog. “But we know that more than 90% of our emissions are scope 3.”

    Lendlease is not alone. But before reducing scope 3 emissions, construction firms must measure them. In its “Baseline Embodied Carbon 2022 Report,” Turner Construction, a top U.S. green builder and contractor, made a solid effort to do just that. The study quantifies greenhouse gas (GHG) emissions associated with a sample of the footprints and materials for the firm’s projects.

    To learn more, Built spoke with Rowan Parris, embodied carbon program manager at Turner Construction.

    Built: What prompted Turner to conduct the study and report on your embodied carbon baseline?

    Parris: We saw a unique opportunity to contribute meaningful data on embodied carbon to the industry at large, and to use that data ourselves to set impactful and realistic reduction targets for our projects and operations. We use the Embodied Carbon in Construction Calculator (EC3) Tool because of its robust database of Environmental Product Declarations (EPDs) and ability to filter average results based on project and material characteristics, like location or strength class.

    Built: Does Turner consider embodied carbon the greatest challenge to reducing your own carbon footprint—and that of the rest of the construction industry?

    Parris: Embodied carbon is likely to be the largest single piece of our scope 3 reporting categories. Turner has already taken steps to reduce our scope 3 emissions through a range of efforts, including reducing business travel and offering employees a flexible work policy that enables people to work remotely. These policies reduce our overallscope 3 emissions, but they also increase the relative impact of embodied carbon.

    The 2022 Baseline Report homed in on “upfront” embodied carbon associated with upstream material manufacturing. But embodied carbon also includes emissions associated with transportation, the construction process itself and deconstruction and demolition impacts.

    Turner’s jobsite metering program is the most robust in the industry, with more than 150 projects tracking fuel, electricity and water consumption. Through this program, we have gained key insights into GHG-intensive activities on our construction projects. We have begun to address these sources through collaboration with original equipment manufacturers (OEMs), rental partners, trade partners and clients.

    We have been tracking construction and demolition waste for more than a decade and have committed to increasing our landfill diversion percentages on a 10-year path to zero construction waste. We routinely recycle, use manufacturer take-back and recovery programs, separate our waste streams and train our trade partners in methods to optimize landfill diversion.

    Built: What analysis did you do of additional materials used in construction—such as aluminum, glass, insulation and wood?

    Parris: We focused our first benchmark report on the materials with the highest emissions and best available data. We are also tracking other materials on projects with client- and legislative-driven reduction targets. The materials of focus vary depending on the specific goals of the project and range from concrete and steel to all materials needed to achieve LEED pilot credit for Procurement of Low Carbon Construction Materials.

    Built: You evaluated many characteristics, from gross floor area and project revenue to geography and seismic category, to find the main drivers of embodied carbon in your projects. Was only one statistically significant?

    Parris: A key predictor is a profoundly helpful tool to make high-impact decisions early in a project’s development. The only statistically significant relationship was embodied carbon intensity per floor area. Perhaps with more projects and broader material scope, we’ll see different statistical trends in future reports.

    Built: What’s new for the 2023 Baseline Report?

    Parris: First, in alignment with Turner’s public environmental, social and governance (ESG) commitments, we expanded the materials to include concrete, steel, asphalt, glass and wood. This enables us to see a more complete picture of the buildings included in the study based on the data available in the industry. Embodied carbon data is evolving quickly as manufacturers ramp up EPD publication to meet rising demand. We plan to continuously evaluate additional material categories based on a balance between impact and data availability.

    Second, we lowered the revenue threshold this year to ensure we have projects represented from a wider range of geographies and project types.

    Finally, all projects will collect product-specific EPDs where available in lieu of the industry average values we used in the 2022 baseline.

    Built: Although I realize you can’t improve what you don’t measure, the next question has to be how to reduce embodied carbon. Thoughts?

    Parris: There’s no getting around the urgency. Turner is collaborating with clients, designers and suppliers to encourage low-carbon products and has actively managed embodied carbon on over 75 projects in addition to our benchmarking efforts.

    Built: Is Turner’s ultimate goal to reach absolute zero on carbon emissions, including embodied carbon? Any projections on when?

    Parris: Turner has committed to net zero scope 1, 2 and 3 emissions (including embodied carbon) by 2040, with interim targets for net zero scope 1 and 2 by 2030. The work we’re doing to engage our supply chain is integral to making absolute zero a realistic ultimate goal.

    Is a Fossil-Free Jobsite Possible?

    This story was originally published by on the Bluebeam Blog.

    A zero-emission jobsite, with no fossil fuel consumption, means the construction industry has to create a zero-emission construction fleet. It is not as big a stretch as it initially sounds

    For Thanksgiving this past year, my mother hosted our family, which meant we would be traveling to my hometown in the middle of Texas. The rental company presented me with an electric vehicle option in Austin, and I decided this would be great. But after driving a bit (OK, more than a bit) over the limit and in cold weather, that 280-mile range was almost exhausted at 142 miles. And there is no EV infrastructure in my hometown. Not one public charger. So I plugged it in, and 36 hours later had enough juice to make the trek back to Austin. Naturally, I started thinking about this in the context of the construction industry, and it led me to wonder what better eco-friendly methods there are to manage all-day usage. I was especially curious about hydrogen.

    Imagine a fossil-free jobsite—one where we are not consuming petrochemical-based fossil fuels and with zero on-site emissions. Disregarding vehicular energy requirements, which may still require fossil fuels for generation depending upon the location, for this conversation lets focus on emissions at the site.

    Is “zero emission” a realistically attainable goal? In fact, it is not only possible, but available today—for those willing to make the investment and test new processes on their next construction site.

    A zero-emission jobsite, with no fossil fuel consumption, means we have to create a zero-emission construction fleet. It is not as big a stretch as it first sounds. There are already options for those willing to make the leap—electric battery or hydrogen-powered equipment.

    Battery-powered machinery is a great option, with potential range capabilities per charge or fueling equal to or greater than gasoline or diesel. The downside: these technologies require 2-8 hours to recharge assuming a high-voltage source, which leads to inefficiencies and project downtime. Hydrogen, on the other hand, has the same range as battery-powered machinery without the downtime associated with refueling.

    The long-term savings achievable with these technologies can easily offset the upfront costs of switching from gasoline or diesel machinery, while contributing to the fossil fuel- free worksite.

    It is also possible to convert existing gasoline or diesel equipment models to hydrogen with minimal machine redesign. This can be achieved by converting to a hydrogen combustion engine, which operates similarly to traditional internal combustion engines (ICE), with cylinders pumping compressed hydrogen gas rather than gas or diesel. Just like an ICE, a spark ignites the hydrogen gas, creating power to drive the machinery. This can often be a more affordable and simpler option to reduce fossil fuel consumption on the jobsite.

    However, a challenge with burning hydrogen in internal combustion engines is the possibility of pollutant emissions such as NOx and particulate matter (PM) being produced. These are harmful to human health—in fact, GeoHealth finds that eliminating pollutant emissions from energy-related activities, including construction, could prevent more than 50,000 deaths a year in the US. Because of this there is increasingly stringent legislation against them. One way of reducing the levels of NOx produced involves increasing the amount of air in the combustion chamber, but this reduces efficiencies. Another way is to favor an engine that takes the “flame” out of the combustion reaction altogether. As the harmful pollutants in question are formed around a flame, this approach is extremely effective at eliminating them.

    Hydrogen fuel cells use a catalyst to generate electricity through a chemical reaction. With this method, hydrogen is held in a fuel cell on the machinery itself and is powered through a negative electrode terminal—hydrogen is funneled between an electrolyte and another positive electrode terminal. This creates a chemical reaction that results in a continuous flow of electricity to the batteries. Naturally, this seems like the best option because of the continuous creation of energy, but it is more complicated and expensive to implement.

    Other solutions use a flameless combustion reaction to generate electricity from fuels. This technology can be fuel-agnostic, using flameless combustion technology, which uses high temperature exhaust heat recovery to unlock pollutant-free power from any fuel at the flick of a switch. With hydrogen being just one option for fossil-free fuel, this approach enables contractors to leverage whichever renewable fuel is most cost-effective and abundant at any one time.

    It’s important to protect profit margins from dramatic fluctuations by enabling balance between sustainability and cost throughout the energy transition on a project-by-project, day-by-day basis. This means sites can deploy fuel-agnostic generators at scale today and see immediate carbon and pollution reduction benefits—much to the benefit of site teams, the environment and the local community, offering an alternative and lower-risk entry point for transitioning to fossil fuel-free jobsite.

    So what are other downsides of using hydrogen as an energy source? The biggest is safety. Hydrogen has a small molecular size, so if it leaks through solids and mixes with air, it can be explosive, similar to gasoline or diesel. It is also not naturally occurring, so it has to be extracted from fossil fuels, compressed and then used to create a chemical reaction, converting energy into electricity to power electric motors on the construction machinery.

    Reimagining Home with Regenerative AI Tools

    This story was originally published by Diana Kightlinger on the Bluebeam Blog.

    To create a more desirable future, how should homes, neighborhoods and cities evolve? The SPACE10 Research and Design Lab launched a global competition to find out

    Droughts and floods, scarce resources and migration are all buffeting people worldwide. To make shelter more desirable requires rethinking what home sweet home looks like—and not just in terms of appearance or function. Rather, designing and building must move beyond sustainability to become regenerative and improve communities and ecosystems.

    That’s embodied in the mission for SPACE10—”to create a better everyday life for people and the planet.” The organization launched the Regenerative Futures competition to restore and enhance the well-being of humans and the natural environment. But to enhance imagination and creativity and conjure up new visions, the competition required entrants to use generative AI.

    “The results truly show the potential of emerging AI tools to allow for new, diverse and hopeful visions of the future, in a time that requires us to imagine new ways of living,” said Ryan Sherman, creative director, SPACE10. “From the United States, China and Mexico to Lebanon, Ukraine and the United Arab Emirates, we received over 250 entries from over 40 different countries.”

    A panel of 10 globally recognized architects, designers, AI artists, journalists and creatives selected winners. Experience designer Kedar Deshpande of Denver took the overall prize for his entry in the category, “Designing for the Future in Harsh Environments.”

    The energy-positive, modular, breathable structure manages air and water filtration. The passive solar design maximizes natural light and heat while minimizing harsh effects.

    A hostile environment inspires resilience

    Deshpande’s design is a resilient home concept. The dwelling is imagined in Rajasthan, India, a semi-arid landscape that experiences sandstorms and floods, with temperatures ranging from 28ºF to 122ºF.

    “India is a country of drastically varying environments, climates and available building materials,” Deshpande said. “Growing up, I was able to visit the country multiple times and see these unique places. One such location was the massive Thar Desert—the most widely-populated desert in the world and home to more than 16 million people.”

    Worldwide, 1 billion people live in similar desert landscapes. Relentless water scarcity and extreme temperatures heavily impact daily life. Many residents adopt a nomadic lifestyle. “This instability contributes to a lower standard of living, which I believe can be helped with forward-thinking regenerative design principles,” Deshpande said.

    Textual and visual generative AI define the process

    Entries in the Regenerative Futures competition harnessed a range of AI tools and techniques. “While the majority used a combination of ChatGPT/GPT-4 and Midjourney, we saw a mix of Stable Diffusion, DreamBooth, Runway, and custom models trained on unique datasets,” Sherman said.

    The much-touted ChatGPT generative AI tool was the springboard for Deshpande. “ChatGPT proved valuable in researching regenerative home design within the ecosystem I was designing for, providing insights into the future of using natural materials, bio-adaptive architecture and disaster-resistant design,” he said. “These were used as seeds to envision structures within Midjourney.”

    The visual generative AI tool Midjourney works by analyzing a variety of sources—which can include information on building performance, energy usage and the environment—to identify patterns and trends. Starting with an existing structure design, Deshpande layered ideas into prompts to build and generate hundreds of possible solutions.

    The program can also help designers identify ways to improve structures and make informed decisions about design, materials and construction methods. Here, the goal was a building that was more energy-efficient, regenerative and cost-effective over the long term.

    Earth-based construction makes the most of energy, light and water

    Deshpande’s design embedded the home in the earth to insulate it naturally. Locally sourced natural materials like sand and clay ensured sustainable and eco-friendly building practices. 3D-printed structures combined with natural fibers created bio-composites for living insulation and modular construction. And for the utmost in resilience and durability, self-healing materials like advanced polymers and bio-concrete let the home repair itself.

    Locally created self-healing materials respond to wear and tear or natural disasters. The house’s modular slabs provide structures to capture air and water for purification.

    The dwelling is off-grid and energy-independent thanks to solar capture, hydrogen-generating gardens and piezoelectric devices integrated into structural components. The design also includes compact and visually appealing hybrid wind energy systems, modular energy storage systems and energy-sharing community networks.

    The interior is oriented for sun exposure and allows naturally regulated air to flow. Retaining walls outside preserve gardens and windows from harsh weather effects.

    Design envisions a future based in harmony

    Javier Torner, programme officer, UN Habitat Planning, Finance and Economy Section, summed up the judging panel’s impression of Deshpande’s work: The proposal creates harmony between design and environment, incorporating the semi-arid characteristics to build an integrated architecture that protects against extreme temperatures and preserves ecosystems.”

    And resilience to climate extremes goes beyond a single dwelling. By using resources in an efficient and collaborative manner, homes can extend resilience to the community. As an example, creating local networks that pull data from smart monitoring devices in each residence can help entire communities respond and adapt to environmental changes.

    In addition to respecting the surrounding land and ecology, Deshpande also wanted the home to reflect its cultural and historical context. That means building in collaboration with local people to incorporate traditional knowledge, materials and building techniques.

    “Designing for the Future in Harsh Environments exemplifies the potential of human-AI collaboration to envision a resilient, imaginative and accessible way of living that is regenerative by design,” Sherman said.

    And with climate extremes making the planet increasingly inhospitable, it’s gratifying to know that the built environment can not only be resilient but also help replenish and restore the world around us.

    Navigating the Markups List in Bluebeam

    This story was originally published by on the Bluebeam Blog.

    If you’ve ever seen a document full of cluttered markups, you’ve thought, “How am I supposed to work with this?” Whether it’s a busy shop drawing, a dense set of plans or a particularly brutal back-and-forth coordination document, cluttered markup hellscapes are a dime a dozen for engineers and architects. Thankfully, the Bluebeam Markups List is a powerful tool to quickly sort and organize markups in a way you can meaningfully interact with.

    Getting Started

    To access the Markups List, mouse over near the bottom of the Bluebeam window—your mouse will change into a different symbol and there will be a horizontal blue line indicating that you’re now hovering at the edge of the Markups List—and click and drag it up to reveal the Markups List.

    Structure

    The structure of the Markups List is a table with columns of information about every markup in the document (except flattened markups, which are not shown unless unflattened). The columns are customizable with respect to their width, order and which columns are shown. Clicking the drop-down menu next to Markups List and then mousing over Columns will show you which columns are visible. You can check and uncheck boxes and reorder the columns to create your desired table. You can sort the list by any category.

    Actions

    Import/Export: Using the Markups List drop-down menu, mouse over Markups and select Export Markups. This will create a .bax file that any Bluebeam user can open to see all of the markups in your document. You can import markups using the same menu.

    Hide Markups: You can click the eye symbol with the slash through it to toggle hiding or unhiding all markups in the document. This allows you to see a clean view of the base document without markups in the way.

    Search: The search bar will filter out markups that don’t have information containing the searched word(s). This applies to any information in any of the columns.

    Filter: The Filter List button toggles if filters will be applied to the markups shown in the Markups List. You can choose specific types of markups to show and hide from any number of columns. Hiding markups in the Markups List will cause the markups to become light gray within the document, making your other markups stand out better. I most often sort markups by color or date so I can find recent changes or certain types of markups based on my color-coding system.

    Editing Markup: Clicking any of the markups listed in the Markups List will set your view on the selected markup and allow you to edit it normally as if you had clicked it within the document. (Note that this functionality works in reverse also, where if you click a markup within the main window, it will also highlight that markup within the Markups List.) You can even select multiple markups (using either control or shift to select multiple markups) and manipulate them simultaneously if desired. For example, you can select all of the markups and change their color, copy them or lock them, etc., even if they’re on different pages.

    Summary: This exports a document in either CSV, XML or PDF format that summarizes the markups in your document. This is a foolproof way to make sure that the user sees every markup contained within the document.

    When you’re finished with the Markups List, you can drag the upper edge back down to the bottom of the screen to hide it. There is no better way to stay organized with lots of markups than by using the Markups List. Once you learn this tool, you might even look at images like the one at the beginning of this article and the word “fun” may come to mind.

    Chris Graham is a structural engineer in Southern California. Chris brings the powerful tools of Bluebeam to bear on the design team side of the construction industry.

    Land Development Quantities in Bluebeam

    This story was originally published by  on the Bluebeam Blog.

    By now you’ve read several of my articles showcasing various disciplines within the design and construction industry and how I’ve helped them implement Bluebeam within their workflows. Like all the others you can learn more about the technical tools in my parallel blog post, “Land Development Bluebeam Tools of the Trade.” This one has a little different backstory, but it speaks to my approach to every Bluebeam implementation.

    Early last year someone reached out to me following up on a referral. He asked if Bluebeam could do estimating for erosion control work. I quickly showed him on the fly how the basic tools could easily measure what he was looking for and explained how custom tools could take things to the next level. It’s always my goal to make the workflow as easy as possible. I tell my customers I want the intern next summer to get the same results as a senior estimator. Well-thought-out, standardized tools and workflows are key to success. It turns out he wasn’t looking for tools or workflow suggestions; he was looking for an estimating service.

    My kryptonite in business is wanting to help everyone—to the point where I become part of their team. That weakness, however, is also my superpower! In this process, I truly gain an understanding of the diverse struggles, goals, processes, and challenges every company deals with every day.

    Long story short, I somehow became an erosion control estimator. I built a handful of custom markup tools and delivered a material takeoff that was more accurate than the tabulation that was prepared using their existing workflows. I guess you could say I played the role of an intern and proved my point. I still get calls from time to time to do estimates for them and enjoy the change of pace. I’ve always embraced these engagements because what I learn each time sets me apart as a trainer. I’ve been told I explain things differently than other trainers and have a deeper knowledge of what Bluebeam can do. I made a habit of always answering “Yes and” when people ask if Bluebeam can do this or that. I never allow Bluebeam to be kept in a box.

    So I guess in this case, I’m sharing how I built an estimating department that over delivered to a repeat customer. Here is how I implemented my tools of choice.

    Civil 3D 2024: Custom Subassembly Help

    Do you create custom subassemblies for Civil 3D? PKT files? Do you write your own help files (you should)? If so, read on for this new, very welcome feature.

    TLDR: In Civil 3D 2024, right clicking your custom subassembly Help button in the tool palette opens whichever help file is embedded into your PKT. In previous versions, this did not work unless you used a CHM-type of help file.

    Detailed answer:

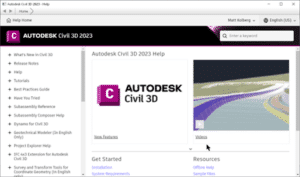
    Accessing subassembly help is easy…so long as you try to get help using out of the box subassemblies, like this DaylightBasin.

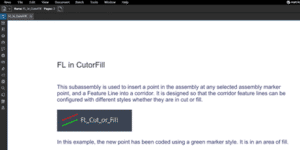
    In all Civil 3D versions up to now, getting help from your custom PKT files is not as easy. Click help, like the image above, gets you this generic help page. It does not open the PDF, or MS Word file that you have embedded into the PKT. If you create a CHM file, then it DOES open. But creating these is not as straightforward as you may wish. You can get the help, but you add the subassembly and then go to subassembly help.

    Now, in 2024, there seems to be new functionality that I’ve just experienced which does not appear to be documented. I developed a PKT for a customer last week and I right clicked Help in the tool palette…AND IT WORKED! The PDF opened right away.

    To learn more about Civil 3D, feel free to contact us.

    Enjoy!

    How Technology Can Help Construction Amid Economic Uncertainty

    This story was originally published by JAMES CHAMBERS on the Bluebeam Blog.

    Technology has the potential to eliminate redundant work and streamline mundane-yet-critical tasks, easing the burden on construction firms as they face a possibly challenging economy ahead.

    onths of political and economic uncertainty point to a potentially bleak outlook for the construction industry in 2023.

    According to the latest Autumn Construction Forecasts 2022–2024 from the Construction Products Association (CPA), construction output is expected to fall by 3.9% in 2023.

    As real wages plummet and further rises in interest rates are expected, demand for private housing new build and repair, maintenance and improvement (RM&I) is likely to fall as well.

    What’s more, those working in commercial and infrastructure are increasingly concerned about inflation driving up construction costs during a recession.

    While adopting new technologies can be daunting for any business, it would be remiss to rule anything out as the industry faces turbulent times. There are many ways in which technology can help businesses survive a construction recession.

    Mitigating the impact of a recession on the construction industry

    Building information modeling (BIM) has been around for a while, but the construction industry has generally been slow to embrace the digital world and what it has to offer.

    However, the COVID-19 pandemic accelerated digital transformation in several industries, including construction, forcing companies to review their processes, operations and procedures, many of which were outdated and no longer fit for purpose.

    Organizations were given the opportunity to identify gaps that could be filled through digitalization, and embracing new technologies has enabled them to adopt solutions that might otherwise have taken years to integrate.

    Here are some ways in which technology can help the construction industry in a recession:

    1. It aids sustainability efforts

    One of technology’s biggest appeals relates to sustainability in that it enables businesses to become paperless, thus eradicating printing costs.

    Plus, having everything processed digitally not only reduces carbon footprints but also facilitates remote working – something many businesses had to adapt to for the first time during the pandemic.

    1. It improves collaboration

    Cloud technology makes it easier to share information even when you’re not physically in the same location; real-time data can be shared from any device at any time, so everyone has access to the latest information. This can help avoid unnecessary delays, saving time and resources.

    1. It streamlines processes and saves money

    There is a myriad of software that can be used to automate processes that have typically drained people’s time and energy. From payroll to scheduling to project management, there is a wide range of construction software out there that can help businesses save valuable time and money.

    1. It supports training

    It’s important to retain as many employees as possible, especially during a downturn and as the construction industry already struggles with recruitment. Technology can help connect your teams and offer access to flexible, up-to-date training.

    1. It minimizes re-work

    Re-work is one of the most common reasons construction companies lose money during projects. Not only does it extend the project schedule and risk late delivery, but it also impacts your company’s reputation, impacting the number of bids secured. Software can help track progress and bring the whole team together, making mistakes and problems less likely.

    Embracing digital construction during a recession

    Technology helps to boost productivity in the construction industry by streamlining and automating processes, and despite having a long way to go before being completely digitalized, firms that take advantage of its power have an opportunity to stand above competitors that are slow to adapt.

    The Bluebeam Feature That Will Make Your Workflows Way More Efficient

    This story was originally published by CHRIS GRAHAM on the Bluebeam Blog.

    ne of the most common themes of my discussions with people about Bluebeam is that they wish they could add just one important feature that would make their workflows much more efficient. My response is usually that it is already there.

    Often their eyes get big and they say, “Really?” And more often than not, these features are within the Status Bar. The Status Bar’s visibility can be toggled on and off with the F8 key. You’ll find several different buttons and dropdown menus at the bottom right of your screen (default).

    Grid

    The grid feature is the first of the buttons (hotkey: shift + F9). This turns on a visible grid within the document. The grid spacing is ¼-inch each way and cannot be altered. The grids don’t print or have any interactions with content or markups—they’re just visible guides. However, they can be snapped to by toggling the second button.

    Snap to Grid

    Selecting this button will highlight it, which toggles on the ability to snap to nodes of the grid. You can draw objects or move objects such that their nodes will snap to grid nodes.

    Snap to Content

    Toggling this button means that you can draw new markups or move markups such that the markup’s nodes will snap to the embedded content. “Content” refers to embedded lines, curves, nodes, etc., within the document itself (not markups). Flattened markups are considered as embedded content and can be snapped to using this feature. Documents plotted from CAD are perfect examples of documents with embedded content.

    Snap to markup

    Toggling this button allows markups to be moved or drawn such that their nodes will snap to other markups. “Markups” refers to “unflattened” markups within the document. Flattened markups become “content” for the purposes of the snap feature. This is a fan-favorite of CAD users.

    Reuse

    This feature allows you to repetitively use the same markup tool until you hit the escape key or right-click. Usually, to draw multiple lines you would press “L,” then click to start, click to stop; then you have to restart the process with pressing “L” again. But if the Reuse feature is enabled, you just keep clicking to draw lines until you’re done. Drawing each line becomes two actions instead of three, which adds up over very repetitive tasks.

    Sync

    The sync button is actually a dropdown menu with two different options. The sync feature allows multiple windows of Bluebeam to maintain the same view—when one pans or zooms, so will the other(s). This works with multiple monitors, split-view tabs within the same window and multiple tabs in different windows.

    Document: Selecting this option from the dropdown menu makes it such that not only is the view on the page synced, but when you navigate to a different page, it does likewise in the other window(s). For example, I often review multiple versions of the same document of the same length to compare changes. This allows me to pan, zoom or change page and seamlessly see both versions simultaneously. It tracks the PDF page number, even if the documents are different lengths. So a 14-page document can be compared to the first 14 pages of an 18-page document, but moving to pages 15-18 of the second document will keep the first document at page 14.

    Page: This option doesn’t allow the page to change in the other windows when the page changes in one window, but still zooms and pans. The Status Bar, viewable with the F8 key, is home to several powerful tools. Each of them brings massive potential time savings or increased accuracy. I sincerely hope that you discover a new favorite feature within the Status Bar.

    How to Design Workspaces—Or Any Interior—With Bluebeam

    This story was originally published by TROY DEGROOT on the Bluebeam Blog.

    s you sit in your office, look out over the different workstations, cubicles, communal areas and conference rooms. Do you ever think about where all the furniture and fixtures came from? It’s no small stroke of luck that all the correct colors, textures and quantities showed up when delivered.

    The interior designers responsible for this magic not only work to capture the look and feel of the indoor built environment, but they also consider traffic flow, occupancy restrictions and other code compliancy. If you’re interested in the how-to technical side of the tools below, check out my blog, “Bluebeam Revu for Interior Design.”

    So, which Bluebeam features are most important for interior designers?

    • Groups
    • Layers
    • Spaces
    • VisualSearch
    • Legends
    • Digital Dashboards

    Groups

    Laying out large office spaces can have standard configurations multiplied several times throughout the space. Tagging each chair, desk and file cabinet can take a long time depending on the number of workstations. To help speed this up, several markups can be Grouped, allowing the user to copy/paste the entire workstation with all its components, thus reducing the number of picks and clicks significantly.

    Layers

    Sometimes office layouts can get busy and cluttered when you add power poles, data connections, ceiling-mounted projectors and wall-mounted screens. By creating a layer system in Bluebeam, you can hide or isolate each of these individually, making the plans much more comprehensive.

    Spaces

    Differentiating distinct areas on layout plans is another way to keep everything organized. Using Spaces in Bluebeam allows you to sketch out specific rooms, sections, departments or entire floors. As a result, you can sort fixtures by room number or department. If you have eight employees on the finance team, for instance, your counts for chairs and desks should report eight of each. You can have a breakdown of fixtures per department and quickly get totals per floor or entire layout.


    RELATED:


    VisualSearch

    With many of the equipment and fixtures being labeled on the plans, a visual search is extremely powerful for finding all instances of a particular chair, desk or power pole. Bluebeam has the ability to search for a specific layout of pixels forming a symbol. The ability to count all the office chairs in one search saves considerable time over shifting through drawings clicking on each one individually.

    Legends

    Having the ability to display fixture counts directly on a printed sheet helps everyone downstream. From delivery to installation, it’s important to know what goes where and how many. Legends in Bluebeam provide accurate counts directly on the layout sheet along with other important specifications. Customized data can be sorted, filtered and displayed, putting the most valuable information at the forefront.

    Digital Dashboards

    Often a client may not be familiar with drawings or specifications and may need a more visual representation of the package they’re purchasing. A Digital Dashboard using Bluebeam is a powerful way to convey industry data to the design team while being extremely visual for the client. The design quickly comes to life with a look and performance of a common website. Digital Dashboards show different views, product images and use hyperlinks in a universally understood language.

    These are just a few of the essential tools and functions in Bluebeam helping interior designers efficiently lay out and accurately count fixtures while communicating with the client.