
September 7, 2021
Wrangle that Sheet: Making Revit Sheets Layout Easily with Free Tools from the BIM Project Suite
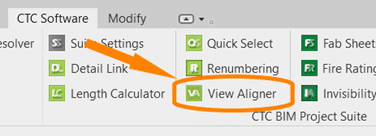
The CTC BIM Project Suite is geared towards users doing the project work, the included tools aim to make everyday project work easier and more efficient that using Revit tools alone. There are 5 free tools accessed from the ribbon while working in Revit, as well as Revit Properties which is access from the File Explorer to allow you access to Revit file properties, such as the Revit version. The paid version of the Project Suite has an additional 13 tools to add to the Revit workflow. The 2022 release of CTC BIM Project Suite saw the addition of a new free tool, View Aligner.
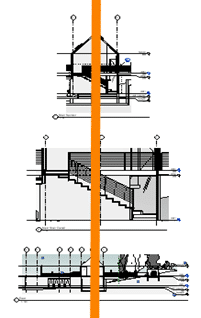
This tool allows you to select any view on a sheet and align the other views to it based on your project needs. The greatest advantage to the View Aligner tool is that it works across sheets.
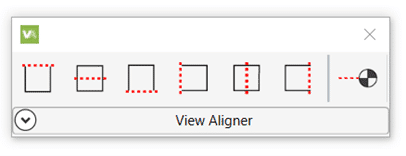
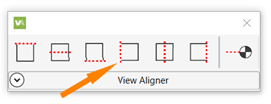
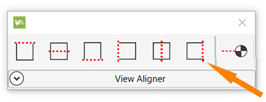
When selected from the tools on the ribbon the floating tool bar appears and can be repositioned to a convenient location.
You have the option of 7 alignments, based on the crop boundary of the views. You can align by each edge; top, bottom, left or right, by either horizontal or vertical centerlines, or by levels.
Upon selection of the desired alignment, instructions for ending the operation appear at the end of the toolbar.
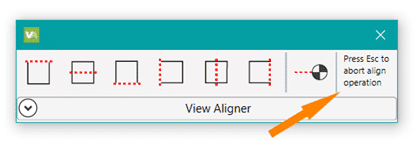
If you click back on the toolbar before pressing Esc you will need to click back into the view (so the toolbar goes white again) before you can press Esc to exit.
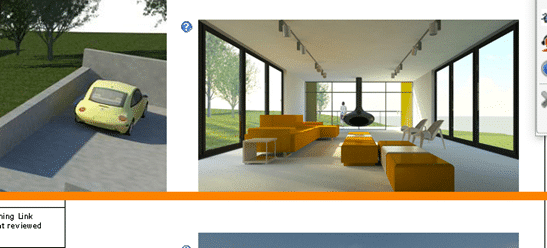
Align Horizontally by Top Edge
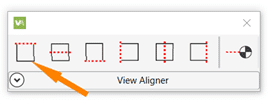
- Select the Align Horizontally by Top Edge icon.
- Select the view with the position you want to align to.
- Every view you click will now align horizontally top edge to top edge of the crop region.
- Press Esc to complete the operation.
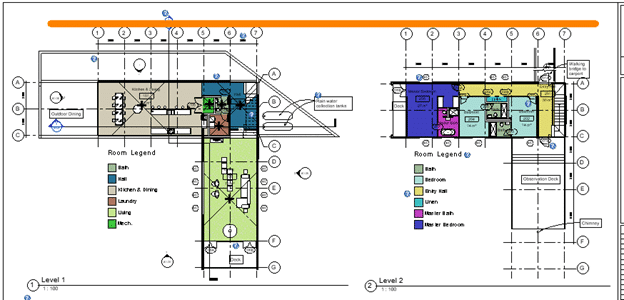
To keep crop regions the same size for all plan views, use a scope box to control the edges.
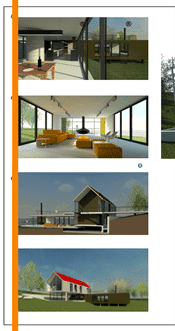
Align Horizontally by Centerline
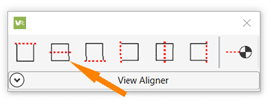
- Select the Align Horizontally by Centerline icon.
- Select the view with the position you want to align to.
- Every view you click will now align horizontally centerline to centerline of the crop region.
- Press Esc to complete the operation.
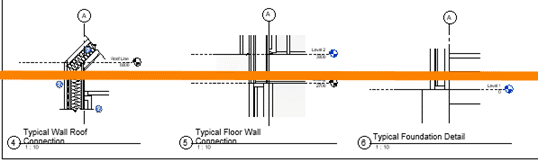
For details that don’t show the crop region try using centerlines to get the massing relatively aligned then adjust view names for a nice symmetrical look.
Align Horizontally by Bottom Edge
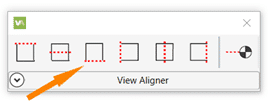
- Select the Align Horizontally by Bottom Edge icon.
- Select the view with the position you want to align to.
- Every view you click will now align horizontally bottom edge to bottom edge of the crop region.
- Press Esc to complete the operation.
Align the bottom of images to help determine the spacing for other elements on the sheet.
Align Vertically by Left Edge
- Select the Align Vertically by Left Edge icon.
- Select the view with the position you want to align to.
- Every view you click will now align Vertically left edge to left edge of the crop region.
- Press Esc to complete the operation.
Align images along the edge of a page for a nice crisp line.
Align Vertically by Centerline
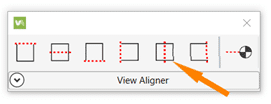
- Select the Align Vertically by Centerline icon.
- Select the view with the position you want to align to.
- Every view you click will now align vertically centerline to centerline of the crop region.
- Press Esc to complete the operation.
Vertical alignment by centerline works best with the unrelated views that Revit can’t snap alignment to.
Align Vertically by Right Edge
- Select the Align Vertically by Right Edge icon.
- Select the view with the position you want to align to.
- Every view you click will now align Vertically right edge to right edge of the crop region.
- Press Esc to complete the operation.
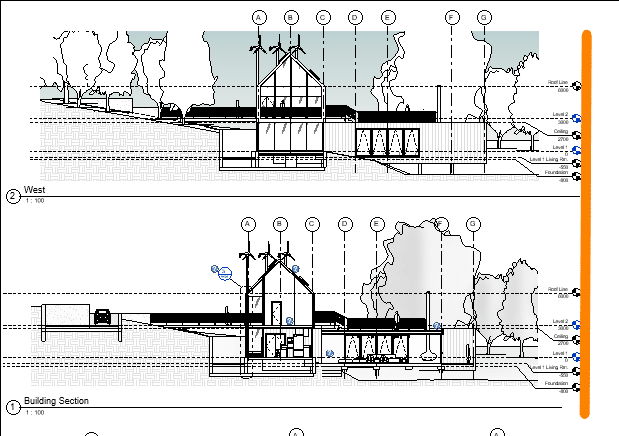
Using a right edge alignment (or left) for elevations results in a cohesive look when grid bulbs for all views are aligned to the same side.
Align By Levels
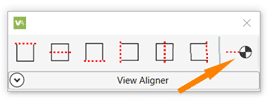
- Select the Align by Levels icon.
- Select the view with the position you want to align to.
- Every view you click will now align by levels.
- Press Esc to complete the operation.
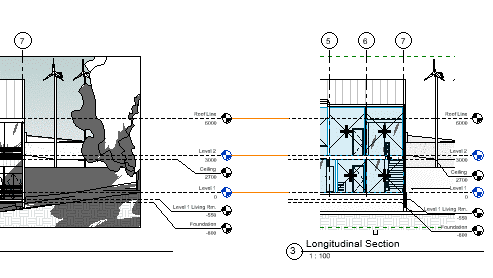
To use this alignment the scale of the views must be the same.
TIPS:
- Use the View Alignment tool to align ‘like’ items.
- Assign a scope box to the crop regions to make alignment quicker.
- Open each sheet you will be working on before starting the tool to use alignment across the sheets. You cannot access the project browser once the tool is active. Use the view tabs to flip between sheets to align the views horizontal across each sheet, then do the same to align vertically.
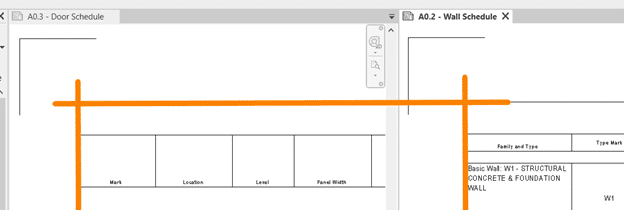
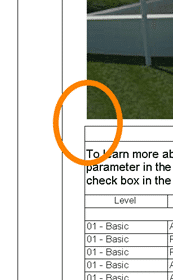
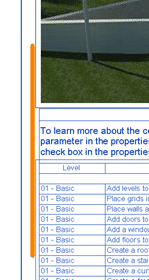
- Alignment works best on views of the same type. As seen below when you align an image and a schedule the space between visible content and the outermost edge of the crop boundary are not the same so despite being aligned the appear “off”.
Get your 2022 release of CTC BIM Project Suite and try the FREE View Aligner tool on your next project. Reach out to us at info@solidcad.ca
Related Posts

-
AME Group Success Story
AME Group (AME) is a Canadian mechanical consulting engineering firm delivering complex building design projects across multiple offices. With many project teams working concurrently, consistency in standards, ...
-
Enhancing Revit Workflows with CTC Tools: A Deep Dive into Spreadsheets
In the modern world of Building Information Modeling (BIM), Excel remains a cornerstone of data management and analysis. Whether it’s for budgeting, scheduling, or data tracking, most professionals are ...
-
Optimizing Contract Administration in AECO: Utilizing CTC Model Dashboard for Revit
Effective contract administration is vital for project success in the AECO industry. By leveraging CTC’s powerful plug-ins for Revit, such as the Model Dashboard, you can enhance project visibility and ...

- Accruent
- Advanced Manufacturing
- Architecture
- Architecture
- Architecture - Blog
- Assembly Line Automation
- AutoCAD
- Autodesk
- Autodesk Construction Cloud
- Automotive
- BIM
- Blog
- Blog Posts
- Building Design & Engineering Services
- Building Engineering
- Building Engineering - Blog
- Building Product & Fabrication
- CAD
- CAM, CNC & Machining
- Civil 3D
- Civil Infrastructure
- Civil Infrastructure & GIS Services
- Civil, Survey & GIS
- CNC Machining Services
- Construction
- Construction
- Construction Project Lifecycle
- Consulting Services
- Consumer Products
- CPQ & Aftermarket
- CTC Software
- Data Management
- Digital Transformation
- Energy & Utilities
- Engineering
- Engineering
- General
- Government & Public Sector
- Industrial Machinery
- Industries
- Industry
- Industry Topics
- Infrastructure
- Inventor
- KnowledgeSmart
- Manufacturing
- Mining
- News
- Pinnacle Series
- PLM
- PLM & PDM
- Product Lifecycle Management
- Revit
- Sales and Aftermarket for Manufacturers
- Simulation & Analysis
- Software & Technology
- Software Development
- Thought Leadership
- Tips & Tricks
- Visualization
- Visualization & Reality Capture Services