• Updated Version: Quantity Takeoffs Are the Best Kept Secret in Bluebeam Revu

    This story was originally published on the Bluebeam Blog.

    Deepak Maini, a 20-year qualified mechanical engineer, shares tips and tricks for using QTO software (From 2019)

    Watch the video here.

    Upon buying a home many years ago, a homeowner provided the contractor with a PDF for wooden flooring installation. The contractor vowed to take off the quantities, but also required a home visit so they could do an onsite measurement check as well.

    Baffled, the homeowner questioned the firm as to why the home visit was needed. The explanation: “You’ll see when we get there.”

    The firm measured on-site and found out that its takeoffs were 22% more than the initial estimate.

    “I realized that they didn’t have the right tools,” the homeowner said. “Had I known about Revu back then, I would have told them, ‘You are not only wasting your time, you’re also wasting my time. If you use this tool, you’ll be a lot more accurate.’”

    That homeowner was Deepak Maini, a 20-year qualified mechanical engineer who not only knows about Bluebeam Revu now, but swears by it for accurate quantity takeoffs.

    Now a national technical manager at Cadgroup Australia, Deepak strongly advocates for the use of Revu to accomplish accurate quantity takeoffs. Using the digital tools in Revu helps to avoid costly mistakes from paper-generated processes, especially when dealing with large or complex projects.

    Deepak’s QTO Tips and Tricks in Revu

    • Calibrate the PDF – Don’t rely on the drawings to be in proper scale. This process ensures that your measurements are accurate.
    • Create Custom tool sets – Align all project collaborators by creating and deploying a tool set for takeoffs that can be used and standardized throughout your company and on future projects.
    • Use Custom Columns – Why not have an immediate cost breakdown? Columns in the Markups List are highly customizable. With values plugged into your Custom Columns, users can instantly see the materials and price estimates.
    • Use VisualSearch – Using this feature, you can find the total count of light fixtures or electrical outlets quickly within your entire bid package by using Revu to search for a visual cue or object.

    Calibrate the PDF

    Using Bluebeam Revu quantity takeoff software

    “You don’t always know whether those sheets have been printed to the right scale or not,” Deepak said. “Calibration ensures that we use the right scale and we get the right measurements.”

    Revu includes automatic prompts for setting scale and can calibrate a PDF to a single scale or to separate X and Y scales as needed, as well as setting multiple measurement scales on the same PDF using viewports. “When it comes to taking off regions and areas and so on, it’s got some really smart tools that let you snap onto the corner points of the areas and you can really easily take off those quantities,” Deepak added.

    Custom tool sets

    Taking off building quantities can be a repetitive process, and if you have multiple people working on several bid packages at once, having a standard set of tools makes work consistent and efficient among everyone. Markups, like colored hatch patterns, and symbols, like lighting fixtures, can be saved as a custom tool set in Revu and even shared with other users.

    Civil 3D: Alignment Creation – Free Entities

    Alignments are created in Civil 3D by selecting AutoCAD objects or by using specialized tools.  Sometimes selecting objects is appropriate, but when the alignment is required to be very flexible in terms of editability, utilizing those specialized tools can be critical.


    There are three types of Alignment segments present within those specialized tools: Fixed, Floating, and Free.  The use of these tools is not always obvious, so we have created 3 video which explains the use of them.


    The last of the three videos, Free Entities, can be viewed at this link or below.

    Four Things Municipalities Should Do When Taking Plan Check Digital

    This story was originally published on the Bluebeam Blog.

    Cities and municipalities transitioning their plan check process from paper to digital have a lot to look forward to.

    Moving the paper-based process of reviewing and approving plan documents for local-area building projects can improve your efficiency in the digital era. But that doesn’t mean making the transition from paper to digital is always easy. There are many considerations—some of them not so obvious—that need to be taken into account when moving the plan review process from paper to digital using Bluebeam.

    Whether approving plans for a single-family home or a robust, skyline-defining high-rise skyscraper, there are several process-oriented tips cities should follow to ensure a smooth transition to digital.

    Here are four things cities and municipalities would be wise to consider as they undergo their paper-to-digital plan check transformations.

    Appoint a leader

    No matter the size of your city or municipality plan check review team, it’s critical when preparing to undergo a paper-to-digital transformation with Bluebeam that there is someone on the team leading the effort internally. This person, typically someone who has at least modest experience using Bluebeam, will act as the liaison between the city or municipality and the Bluebeam implementation team.

    Channeling communication through an internal point person will alleviate potential blockers in the process of getting the rest of the team up to speed on using Bluebeam. It will also help other team members have an internal “expert” to go to when minor questions arise.

    Consider process, not just software

    Bluebeam Revu is an extremely malleable software that users can customize to suit their specific needs. So when preparing to use Bluebeam to transition a city’s plan check review process to digital, it’s important to consider the workflow first and then how Revu fits in it.

    Luckily, Bluebeam’s professional services team can help customize Revu for each city’s particular workflow. Preparing documents ahead of the official review cycle in Revu—through software features like page labelsOCR and batch link, as well as setting up a Studio Session—can make the broader transition much easier to digest.

    Simplify transition

    Change is hard. From comfort level with technology to experience with digital tools, every team member is going to approach digitization differently. That’s why cities and municipalities that are going digital with their plan review process should work to simplify the process using Revu as much as possible. Start small by focusing on the easy wins that benefit the entire team. Once their knowledge of Revu expands, add more in-depth elements.

    Begin with features like Profiles and Tool Sets in Revu to customize and standardize the review workflow process, making it as easy as possible for those involved.

    With Profiles, cities and municipalities can eliminate toolbars and panel icons in Revu that won’t be needed. This keeps Revu’s interface simple and clean, and easier to use for team members and collaborators.

    Tool Sets give the ability to create custom tools in Revu for each department that is reviewing documents, even using different colors to distinguish each department’s tools. Additionally, you can create tools in Revu that contain commonly used comments; this way each user doesn’t need to manually type them in every time.

    Think beyond initial training

    When it comes to learning Bluebeam Revu, process is just as important as training—and this applies to cities and municipalities embracing Revu for plan check as well.

    Indeed, eventually team members will receive the training they need to use the software, but an equally important consideration when initially implementing it is the high-level process, or workflow, that the team needs the software to exist under.

    How does the ideal plan check review process work? What stakeholders are involved? What sorts of reviews or markups are they conducting? What approval stamps need to be digitized? The Bluebeam professional services team can help you work out these questions and develop a process that meets your team’s specific needs.

    Looking forward

    No matter where cities are in their digital review journey, there are always industry consultants at Bluebeam available to help ease the transition. Revu is a powerful, comprehensive tool for the full spectrum of users across the architecture, engineering and construction industry. But that doesn’t mean that implementing Revu for the highly specific needs of a municipal plan check process needs to use the full scope of the software’s capabilities.

    Simplifying Revu’s tools and streamlining how it’s used in a workflow will ensure that the transition from paper to digital is as beneficial—and easy—as possible.

    Civil 3D: Alignment Creation – Floating Entities

    Alignments are created in Civil 3D by selecting AutoCAD objects or by using specialized tools.  Sometimes selecting objects is appropriate, but when the alignment is required to be very flexible in terms of editability, utilizing those specialized tools can be critical.


    There are three types of Alignment segments present within those specialized tools: Fixed, Floating, and Free.  The use of these tools is not always obvious, so we have created 3 video which explains the use of them.


    The second of the three videos, Floating Entities, can be viewed at this link or below. Come back in a week or two for the next video.


    Civil 3D: Alignment Creation – Fixed Entities

    Alignments are created in Civil 3D by selecting AutoCAD objects or by using specialized tools.  Sometimes selecting objects is appropriate, but when the alignment is required to be very flexible in terms of editability, utilizing those specialized tools can be critical.


    There are three types of Alignment segments present within those specialized tools: Fixed, Floating, and Free.  The use of these tools is not always obvious, so we have created 3 video which explains the use of them.


    The first of the three videos, Fixed Entities, can be viewed at this link or below. Come back in a week or two for the next video.


    HOW OUR AEC E-LEARNING SOLUTION IMPROVES EMPLOYEE RETENTION

    This story was originally published by 

    AN AEC E-LEARNING SOLUTION CAN MAKE ALL THE DIFFERENCE FOR YOUR EMPLOYEES.

    Employee retention is one of the biggest ongoing goals for successful companies. Improving retention allows you to keep your top performers, promote from within, and avoid the time and cost of replacing staff.

    recent survey from The Harris Poll found that 70% of employees would likely leave their current organization if its training and development offerings weren’t up to par.

    Let’s explore how our AEC e-learning solution, Pinnacle Series, can help deliver the development employees are looking for and improve retention at your architecture, engineering, construction, or manufacturing organization.

    1. Promotes lifelong learning
    2. Makes workflows more efficient
    3. Personalizes training
    4. Empowers their career goals

    PROMOTES LIFELONG LEARNING

    Learning helps us grow and achieve goals throughout our lives and careers. But often, employees feel like they’re growing stagnant. If you provide the opportunity for them to learn new skills on their own terms, you’ll build the kind of culture that encourages growth.

    MAKES WORKFLOWS MORE EFFICIENT

    Pinnacle Series is full of training videos, documents, and other resources employees can use to improve their skills at dozens of important AEC programs e.g., software skills, company guidelines, health and safety knowledge, and more. And they can do it the minute they need answers, for instance, in the middle of a project. Instead of interrupting a co-worker, they can hop onto Pinnacle Series, watch a quick how-to video, and get back to work with confidence.

    PERSONALIZES TRAINING

    Employees often don’t benefit from a one-size-fits-all course enrollment or seminar that doesn’t fit their individual needs. They feel it’s a waste of their time. In addition, it can be labor-intensive for managers to figure out the required training needs for every employee, especially within larger organizations. With Pinnacle Series, the concept of personalized learning is built in. Users can take KnowledgeSmart assessments to generate a custom learning plan that fills their skills gaps without repeating information they already know.

    EMPOWERS THEIR CAREER GOALS

    By equipping your employees with new skills to move forward in their careers, you’re helping them and your organization. You can invest in and promote from within.

    Want to see for yourself how our AEC e-learning solution can help your organization? Schedule a demo or free trial of Pinnacle Series today!

    Are you a current Pinnacle Series customer? Log in now or connect with your Customer Success Manager to see how you can leverage our platform in your employee retention efforts.

    Vent-a-Hood

    Success Stories

    Vent-a-Hood

    Company Info:

    Vent-A-Hood was founded in 1933, creating residential ventilation for cooking. Vent-A-Hood was the first manufacturer of home cooking ventilation and range hoods and the creators of a proprietary system called the “Magic Lung”, which uniquely filters out grease and smoke to ensure fire safety to their vast number of customers. Currently, Vent-A-Hood employs a highly skilled workforce to achieve quality craftsmanship. A national as well as an international marketing program includes an impressive roster of distributors, many of which are second generation. Vent-A-Hood products are sold in all fifty states, as well as Canada.

    To learn more, visit: www.ventahood.com

    Seamlessly Transitioning from Autodesk Configurator 360 to SolidCAD’s Variant

    The Challenge

    Vent-A-Hood have understood the benefits of configurators for many years. In fact, they were an alpha user of Autodesk Configurator 360, even before a beta was available. They found 3D modelling to be essential as they were previously using an image-based system to showcase their products. This was unsustainable as their products can be configured in a plethora of ways, even without including decorative attachments. Maintaining the image archive became unfeasible and changes were incredibly difficult to implement. They became one of the 1st ever companies to have Configurator 360 published for clients to use. It was this unique relationship with the Autodesk team that lead them to Variant.

    Once Configurator 360 was no longer available, Vent-A-Hood knew they needed an alternative that could keep up with their complex needs. Knowing the company well, Autodesk recommended they reach out to us at SolidCAD regarding our in-house developed configurator product, Variant.

    The Solution

    Implementing Variant has been a smooth and collaborative effort. Mike Sy, Technology & Purchasing at Vent-A-Hood, said he was drawn to, “the simplicity of the menu system and its elegance.” He continued, saying, “It’s quite easy to navigate. It’s not like we had to publish new documentation just for people to use it because for anybody who’s online, it just makes sense. It’s just drop-down menu, change the option, click a button and you’re good to go.”

    Since Variant uses Autodesk Forge Design Automation API for Inventor, it was able to directly leverage iLogic code in existing Vent-A-Hood models, avoiding time-consuming re-work while easily meeting expected timelines. The solution enabled their sales and engineering teams to work from a single source of truth without delays, errors, or miscommunication.

    Variant is currently live on the Vent-A-Hood website as of April 2022 with an ongoing average rate of 2000 configurations added every month. SolidCAD is thrilled to continue working with Vent-A-Hood and for the exciting future updates, some of which the Vent-A-Hood team have helped envision.

    Software And Services Used

    • Variant
    • Implementation and Support

    Testimonial

    SolidCAD is very easy to work with and all the timelines were dead on. I have great communication with the team and give them my thoughts on everything; they’re very receptive. The process has been very collaborative, it’s quite refreshing.
    – Mike Sy
    Technology & Purchasing, Vent-A-Hood

    Similar Projects

    Transforming Learning and Efficiency at NORR: Growth with Pinnacle Series

    Discover how NORR enhanced team performance and training with Pinnacle Series and SolidCAD’s support—unlocking smarter onboarding, improved software adoption, and a stronger learning culture across the organization.[...]

    Équipe Laurence: Driving Growth and Efficiency with BIM

    Discover how Équipe Laurence transformed its civil engineering operations with BIM and SolidCAD’s support, achieving greater efficiency, precision, and project scalability.[...]

    Ian Robertson Design Elevates Client Engagement with BIM

    Ian Robertson Design, renowned for luxury residential projects, partnered with SolidCAD to fully implement Building Information Modeling (BIM), enhancing client engagement through advanced visualization tools and streamlined workflows. [...]

    A Robust Information Management Solution is Key to Succeed in the Oil & Gas Industry Today

    The complexities of upstream & downstream exploration, drilling, projects, operations, and production require continuous advancements, improved communication, best-in-class practices and maximized efficiency.

    The Oil & Gas Industry faces challenges to provide Clean, Affordable and Reliable Products – while lowering costs, carbon emissions and meeting demand.

    The right information management solution plays a vital role.


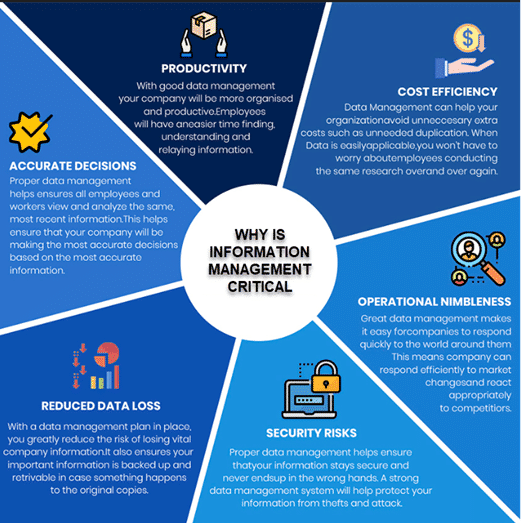
    What Is Information Management?

    Information Management refers to the collection, organization, storage, management and maintenance of data, including databases, documents, equipment, images,models, and other types of electronic records. Information Management evolved from the traditional data management, which focused on storing and maintaining physical records. Information Management can provide the following benefits:

    1. Improved Productivity and Efficiency

    The first benefit of information management is that it increases your productivity and efficiency. Your ability to manage information will increase your workload significantly by making you more efficient with your time.

    1. Faster Information Access

    One of the most important information management benefits is it helps you to access important information more easily. If you are an information manager, your job will be much easier if you have a better idea of how to make the most of your information resources and improve the quality, accuracy, and timeliness of your enterprise information management.

    1. Develop an Effective Information Policy

    The third benefit of information management is the ability to create a successful information policy. Without a well-defined information policy, a company cannot predict the outcome of its information practices or apply them effectively in the real world.

    1. Support Business Needs

    Managing information properly will help companies to track changes and improve performance. They use it for planning, organizing, and tracking information.

    One of the most important information management benefits is to provide the needed information to support business processes, decision-making, and operations.

    1. Robust Security

    Companies need to process, store and manage data in a secure and safe manner. Various security measures are used such as encryption, access control systems, firewalls and others.

    While the benefits of Information Management have been displayed for many years, some businesses view information management as a low priority with little or no return on investment. Specifically, oil & gas companies with remote site locations are unwilling to change to an electronic information management system or overhaul their legacy or generic information management system. Instead, they prefer to continue maintaining a hard-copy based Information Management system requiring high printing costs. In the short-term this to minimizes the impact on their existing day-to-day operations.

    The COVID-19 Pandemic and the Ukraine Invasion

    In the aftermath of the COVID-19 pandemic and current world conditions, the Oil & Gas Industry recovered with oil prices and demand higher than pre-COVID levels.

    With the onset of the pandemic, they scrambled to enable adequate remote access to the Information Management systems, social distancing, and continue to maintain  their remote assets in multiple locations. Suddenly Information Management and Information Management Systems were critical to the day to day operations.

    This was a difficult transition period for many Oil & Gas companies who were without an implemented contingency plan. An accessible, accurate, centralized, robust, scalable and secure Information Management system emerged as an essential system in the day to day operations.

    Information Management is Built on an Electronic Document Management Solution

    A well managed and structured information management system is the basis of a well-executed information management organization. The information management can be overwhelming for oil & gas companies as it’s located in various sources such as:

    • Correspondence
    • Engineering & Vendor documentation
    • Purchase orders
    • Work orders
    • Asset data and maintenance records
    • Equipment data

    Unstructured Information Leads to Uncontrolled Information Management

    Most oil & gas companies manage their information in multiple systems depending on project size, and location. This information can be inaccessible by the corporate, project, operation stakeholders due to:

    • External & internal parties managing the information
    • “Bootleg” copies distributed through uncontrolled processes such as e-mail or copying
    • Multiple systems working independently of each other with little or no integration
    • Uncontrolled and unmanaged workflows without standard processess

    These inconsistencies lead to incomplete information, poor document control, no audit trail and the potential for safety incidents.

    An Incomplete Information Management Solution Leads to Unreliable Information Management Practices

    If your organization contains unreliable documentation & equipment information, this will affect your projects, operations and corporate business activities.

    This leads to:

    • Uncontrolled equipment and documentation
    • Out-of-date equipment and documentation
    • Industry and regulatory non-compliance
    • High Information Management system maintainenance costs
    • Information Management security issues
    • Information Management project risk failure

    Once an insufficient Information Management system exists, the problems have the potential to escalate to additional systems and processes.

    A Reliable and Sufficient Information Management System

    To set up your business with a successful Information Management system, you can improve by focusing on the accessible, accurate, centralized, robust, scalable and secure Meridian Information Management Solution. It will consolidate your Information Management tools and overcome recurring pain points from using legacy solutions or generic information management systems.

    1. Review Your Current Information Management System

    Reviewing your current Information Management system and identifying pain points and needs is the first step for improving your Information Management system and processes.

    This requires you answer these vital questions about your Information Management System:

    • What data do you have?
    • What information are you managing?
    • How, what, where and who access the Information?
    • What does the data tell you about your Projects, Corporate and Operations activities?

    Do you have accurate KPIs, about your business?

    • Identify missing information management opportunities. Where are there currently gaps in your Information Management needs?

    The review of your current Information Management system and processes will assist your team to understand your requirements and how to manage it.

    1. Determine your Information Management Solution

    The next step is to determine the right Information Management solution  which was determined by your current Information Management review and identifying the pain points and needs.

    What Information Management Solution Best Fits your Needs?

    The electronic document management system (EDMS) – Meridian is an Information Management solution easily synchronized to other systems to provide increased functionality as a whole.

    Most oil & gas companies use a maintenance management solution for their maintenance tracking needs. It allows you to digitize and automate maintenance operations to deploy preventive maintenance strategies better, develop better maintenance practices, stay organized, and ultimately save time and money. While this is a significant first step into modernizing your digital data footprint, a stand-alone maintenance management system is missing essential functionality for maintaining your Information Management needs in other areas (engineering, vendor, technical drawings and documentation). This functionality is where the Meridian Information Management Solution can help you consolidate tools and overcome recurring pain points that arise with using legacy or generic information management systems.

    In the aftermath of the COVID-19 pandemic and the current world conditions, companies with a complete Information Management solution will be steps ahead of their competitors who are relying on legacy or generic Information Management systems.

    To learn more about Meridian solutions (EDMS and CMMS) and how they can help your team, don’t hesitate to get in touch with the SolidCAD Meridian team.

    Why Custom Hot Keys in Bluebeam Revu Are a Game-Changer

    This story was originally published on the Bluebeam Blog.

    Bluebeam Revu has a variety of built-in features, including a comprehensive markup tool palette. You can draw elliptical curves, lines, polylines, rectangles, text boxes, arrows, highlights, hatches, polygons and combinations thereof. You can even store custom grouped objects into the custom Tool Chest tab for later use.

    For many, you have your default markups just the way you like them, and even have populated your Tool Chest tab. You feel that you’re proficient with Bluebeam Revu’s markup tools, but some things inevitably feel more cumbersome than good old pen and paper.

    Have you ever drawn an object for the umpteenth time and just wished that you could somehow have multiple default settings for a markup that you could easily switch between?

    For example, I often draw a callout (default hot key: “q”) that has red-colored 12-point font with no line around the text box. I also often draw blue callouts with 20-point font and a 1.0 point line weight around the text box. I have the red callout variant as my default, but I use the blue variant so often that it could just as well be my default.

    For a long time, I reformatted each (default) red callout into a blue callout or copied a blue callout where needed. Thus, for each callout, I had to adjust the line color, text color, line thickness and font size. For those keeping score at home, that means I had to press the hot key, click and drag and then use seven clicks and some typing to reformat the callout.

    This is about nine times slower than just using the default formatting. If I had a genie that gave me three wishes, and I wasn’t allowed to use any for client management, I think I’d use all three wishes to create my own custom Bluebeam Revu hot keys.

    As it turns out, Bluebeam Revu has granted you many more than three wishes for precisely that!

    Users of the Tool Chest tab will notice that there is a default partition called “My Tools.”

    When you open the Tool Chest Panel (default hotkey: “Alt + X”), you will see My Tools at the top. The My Tools Tool Set is a configurable collection of frequently used tools that you can easily access. It has a few special properties you should be aware of:

    • Tools in the My Tools Tool Set are automatically assigned hot keys for quick access
    • The hot keys are numeric, according to the tool’s positioning in the My Tools tool set (its hot key is shown in the upper right corner of its icon)
    • You can click and drag to change a tool’s position, which will automatically change its associated hot key

    Now, let’s relate back to my callout formatting quandary above. I can keep my “q” hot key as the red variant by default—so far, so good. Then, I can format a blue variant callout to my liking, right click on it, mouse over “Add to Tool Chest,” and then select “My Tools.”

    This places my customized markup at the end of the list in My Tools. Click and drag to place this newly added markup in the first position and the hot key labels will update automatically. You may now press “1” to select and be able to place an identical copy of this markup.

    Grading Optimization Troubles and Fixes

    Grading Optimization was a great addition to the Civil 3D 2022 arsenal of tools. It is one of the first tools to incorporate AI into our civil designs and is able to help us get quick preliminary quantities, FG surfaces, and grading objects in a whole new way.

    Despite how exciting this is, there are some commonly encountered issues with getting started in GO.

    Civil 3D & GO 2022:

    One of the first issues I encountered with GO wasn’t apparent until I went to go design an assembly afterwards and got an error message. “Unable to execute the tool.” GO inhibited my access to toolpallets

    There has since been an Autodesk Knowledge Centre post created on this. And an update to GO as well as instructions in the link to the post below have offered an effective fix for this.

    The important thing to do if you are installing GO 2022 for the first time, is to make sure that Civil 3D 2022 has been installed and opened prior to installing GO 2022.

    *This issue will still occur if you install both at the same time without opening Civil 3D before installing GO.

    Click here to read Autodesk Knowledge Center post.

    This next problem is described in Matt Kolberg’s December 2021 post about the GO windows appearing, but only the shadow edge when you attempt to open the tool.

    To capture this fix in a few words, we need to add a new Windows environment variable to our system to enable us to use GO. This is a work around that Autodesk suggested, and a public fix will hopefully be pushed out for GO 2022 in the future.

    A link to Matt’s full explanation is below:

    https://www.solidcad.ca/civil-3d-grading-optimization-problem/

    Civil 3D & GO 2023:

    The above issues appear to be fixed in the 2023 version.

    The next issue worth exploring is that Grading Optimization requires more from your graphics card than Civil 3D. You may run into this blank warning screen below when opening GO, even though Civil 3D is functioning as expected.

    For me, this window popped up to block the screen with no way to close it when opening the Grading Objects Browser.

    There is no description in this dialog box, or posts on Autodesk Knowledge Centre, at the time I am writing this post, explaining the issue. This annoying window was due to an outdated graphics driver on my machine that didn’t affect Civil 3D.

    After updating the graphics driver, this window no longer appears.

    For any questions reach out to your sales rep or contact us at info@solidcad.ca