fbpx
  • HIVE Revit Family Standards

    What are HIVE Revit Family Standards?

    HIVE Standards is a system that helps BIM managers check and maintain the quality of Revit family content for the organization. It is set up in the HIVE Portal and runs automatic checks on the content in chosen libraries. It can also be modified to fit the organization’s own standards.

    Qualified content in a library has the checks performed. If you have 500 items in a library, there may be only 100 items that qualify.

    What qualifies a piece of content?

    • families of versions greater than Revit 2020
    • families that can exist outside of a Revit project model
    • families that have not been automatically upgraded (checks the source version only)

    Configuring Family Standards

    Access Family Standards by logging into the CTC HIVE Portal.


    HIVE Standards

    Select the “Standards” tab and select the “Family Ruleset” on the left side bar.
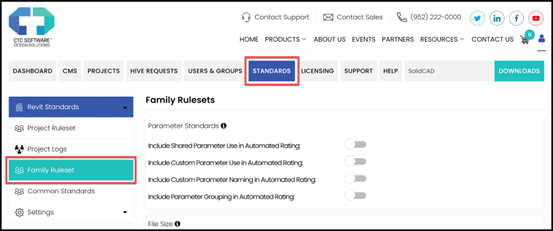
    HIVE Standards

    Select the applicable settings to be used for checks.
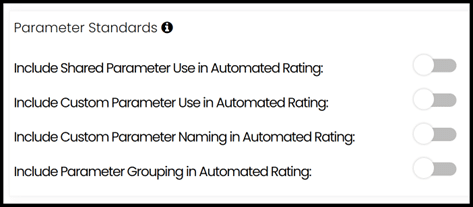
    HIVE Standards

    • Include Shared Parameter Use in Automated Rating: if a shared parameter file has been uploaded to HIVE, it will be used in this check
    • Include Custom Parameter Use in Automated Rating: checks for parameters not typically found in families (such as built-in parameters)
    • Include Custom Parameter Naming in Automated Rating: checks that custom parameters meet the established naming rules
    • Include Parameter Grouping in Automated Rating: checks that parameter groups follow established rules

    HIVE Standards

    • File Size: set a maximum size for the family file and include it in the rating
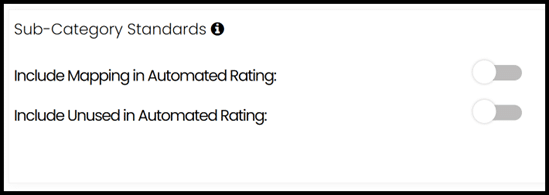
    HIVE Standards

    • Include Mapping in Automated Rating: check that the mapping used follows established standard
    • Include Unused in Automated Rating: check if there are unused sub-categories

    HIVE Standards

    • Reference Plane Naming in Automated Rating: check if the reference planes are named according to established standard
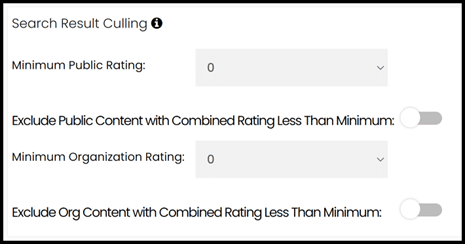
    HIVE Standards

    • Exclude Public Content with Combined Rating Less than Minimum: content from public libraries rated below this threshold will not be shown in search results
    • Exclude Org Content with Combined Rating Less than Minimum: content rated below this threshold will not be shown in search results

    Along with the Family Ruleset settings, additional options with the Common Standards can be applied. Common Standards are organization specific standards that apply to both projects and families. To access the Common Standards, in the left side bar select Common Standards.
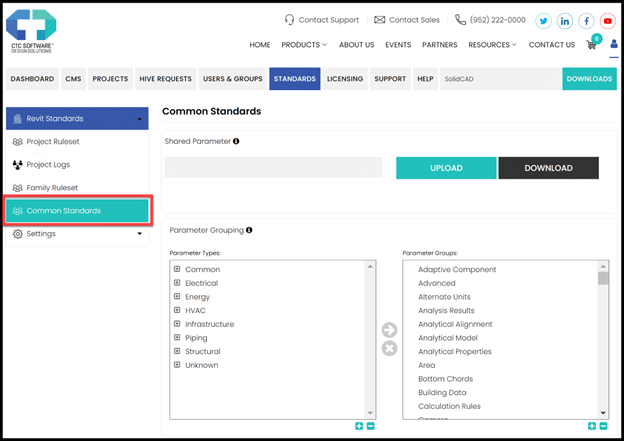
     

    HIVE Standards

    Configuring Common Standards

    • You can upload your organizations Shared Parameter file to be used for various features within standards such as family checking.
    • You can use Parameter Grouping to establish valid parameter groups to be used with standards, select it from the left tree and use the arrow to add it to the right.
    • In addition to the Common Standards, you can set Parameter Name Rules and Custom Sub-Categories
      • Valid Parameter Name Parts: put valid parts of names that should be used when naming parameters. ie. ARCH E_ LC-
      • Invalid Parameter Name Parts: combinations of letters and symbols of names that should not appear in parameter names.

    Running Family Standard Checks

    Select the libraries you want from the organization list by ticking the boxes next to them. A green button will show up on the top right corner of the list when you do that. Press this button to start the process.

    HIVE Revit Family Standards

    • The checking process runs silently, without requiring any input from the user.
    • A scoring process is used during the check (Ex: Identity Data, MEP Connectors, Warnings etc.) to validate the content against the Family Standards settings (Family Ruleset and Common Standards).
    • You will receive a email with the review results and have the ability to download a Excel file that consists of all the results from the checks.
    • You can access and review the data in multiple ways.
    • Directly using the Excel spreadsheet, leveraging PowerBi and utilizing the WebAPI are a few examples.
    • For more information on CTC HIVE Family Standards visit www.ctcsoftware.com.

    For any questions reach out to your sales rep or contact us at info@solidcad.ca.

    Unleashing the Power of BIM Data Suite: A Comprehensive Guide

    In the world of data, gathering and analyzing is crucial. Everyone’s clamoring for more data, and CTC Tools are here to deliver. The BIM Data Suite offers multiple ways to access data for your BIM models, refits, and more. Let’s dive into the setup and where to find this valuable data.

    Data Collection with Project Activity Logger (PAL)

    The data collection process begins automatically with our Project Activity Logger (PAL). PAL extracts data from refit projects upon opening and syncing too Central. Users won’t even notice it working in the background. All the data, such as project details, file open times, and more, is logged to an SQL database. This happens seamlessly as you work in Revit.

    So, where does this data go? It’s stored in an SQL Server database, which can be on-premises or hosted in Azure. CTC Tools can connect to these databases, and we’ve even provided a Power BI template to help you visualize the data.

    Powerful Data Analysis with Power BI

    In Power BI, you can explore various aspects of your projects, including file sizes, project setup, user activities, sync to Central times, and much more. You can also identify patterns, track warnings, and analyze the performance of your models over time.

    This data can be immensely helpful in identifying issues, tracking changes, and improving the efficiency of your Revit projects. It’s a treasure trove of insights that can drive better decision-making.

    Pinpointing Warnings and Affected Elements

    The BIM Data Suite offers extensive insights into your Revit projects. For instance, it identifies unique warnings, the affected objects, and their specific warning messages. It even pinpoints the element causing the issue, whether it’s related to walls, room separation lines, or other common refit warnings. You can access element IDs, enabling you to locate and fix these problems within your Revit project.

    This information remains up to date with each sync to Central. All you need to do is hit “refresh” to get the latest updates.

    Detailed User and Project Insights

    The suite provides a wealth of user and project details, including versions of Revit in use, installed add-ins, and more. You can track user activities, performance metrics, and even which views people are spending the most time in. It offers a unique perspective on where efforts are focused during different project stages.

    There’s also an additional Project Snapshot Exporter, which extracts a comprehensive snapshot of your project based on specified filters. This data can be stored in your SQL server database or saved in various formats, providing versatility in data analysis.

    Creating Project Snapshots

    The BIM Data Suite is a powerful tool for understanding your Revit projects, keeping everything organized, and making informed decisions. When it comes to taking project snapshots, the process is straightforward:

    1. Fix your file paths, ensuring they are accurate.
    2. Place the JSON file in the model compare folder.
    3. Select the data you want to capture – you can choose from various filters, including categories, data types, and parameters.
    4. Click “Begin” to initiate the snapshot.
    5. The snapshot will work through your project, capturing data. You can open the Power BI file to view your snapshots.

    Summary and Conclusion

    In summary, the BIM Data Suite is a powerful and versatile tool for managing and analyzing data from your Revit projects. It empowers you to:

    • Access valuable insights into your projects.
    • Track changes and project health.
    • Identify issues, track warnings, and enhance efficiency.
    • Analyze data to make informed decisions.
    • Improve the organization of your data and projects.

    Whether you’re a BIM manager, project manager, or a Revit user, the BIM Data Suite provides valuable data analysis and management capabilities. It offers a comprehensive solution for navigating the ever-expanding world of data within your projects.

    For those interested in learning more, our website, webinars, and resources are excellent starting points to explore and implement the BIM Data Suite. Your projects deserve the insights and organization it offers, so don’t hesitate to unlock the full potential of your data.

    With the BIM Data Suite, you’re equipped to navigate the data-rich landscape of BIM with confidence.

    For any questions reach out to your sales rep or contact us at info@solidcad.ca.

    Why you should replace your AutoCAD/Civil 3D Tool Palettes with Hive CMS libraries

    As an organization grows, it will navigate through projects of different size and nature. Rules and structures need to be fixed, and when managing engineering data comes into play, engineering and production standards need to be applied.  

    Within AutoCAD and Civil 3D, an engineering firm, a contractor or a government agency will gather standards through templates, support files, specific symbology for lines, blocks and infrastructure representations (Civil 3D styles and Labels).  

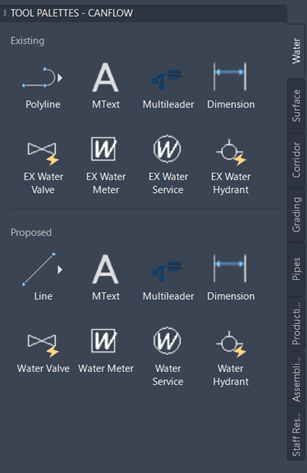
    The closest thing out-of-the-box to a user-friendly interface to structure these standards is a Tool Palette: 

    AutoCAD Civil 3D

    Pros of using a Tool Palette: 

    • Drag-and-dropping objects in the tool palette is an easy way to bring in some content (mainly AutoCAD but limited to assemblies for Civil 3D).  
    • Buttons can launch complex commands, scripts and lisp routines. 

    Cons of using a Tool Palette: 

    • Limited in terms of Civil 3D objects integration. 
    • Launching “non-AutoCAD” files from the command demands complex command buttons, with proper mapped drive on a server (i.e.: Word/PDF documents containing design standards shared to the whole Team) and are near impossible to launch from a cloud data connector (i.e.: OneDrive, Google Drive, and even Autodesk Construction Cloud). 
    • No search engine is available to sift through growing amounts of standards, commands and files that could scale up with your growing organization as time goes on. 
    • Deployment across an organization is extremely complex, due to Tool Palette “obscure” ties in a user profiles and file structure. Same goes for updating your standards over time. 

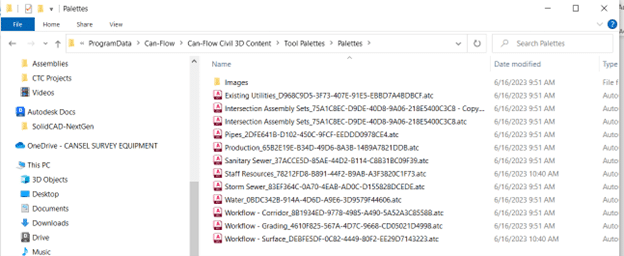
    For example, here’s the first level of Tool Palettes file’s structure: 

    AutoCAD Civil 3D

    And here’s the second level of Tool Palettes file’s structure: 

    AutoCAD Civil 3D

    Hive CMS is a desktop application that will solve these issues, leveraging a cloud system to easily share your CAD standards and design files (AutoCAD, Civil 3D and non-drawing-based files).  

    Developed by CTC Software, Hive supports organizations to share content via a cloud platform, completely compatible with supported versions of AutoCAD and Civil 3D. Among the different types of shareable content, you will find: 

    • AutoCAD Blocks, 
    • AutoCAD/Civil 3D Commands (handling all other kind of object creation and more), 
    • Civil 3D object styles and labels, 
    • Civil 3D assemblies, 
    • Templates, 
    • Lisp routines and script files, 
    • Non-drawing-based files (basically every other types of files like Office files, PDF, PKT, and so forth). 

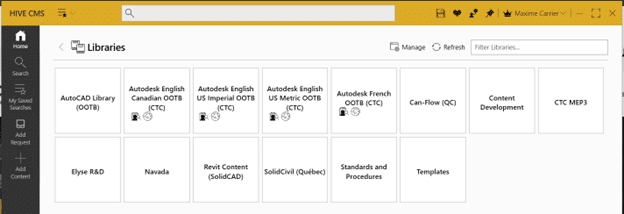
    Hive stores these elements in libraries, as shown in the Hive CMS main interface: 

    AutoCAD Civil 3D

    And then browsing through the different libraries your organization WANTS you to see and work with. 

    AutoCAD Civil 3D

    As you are connecting in your CTC account, Hive CMS filters what shareable content your CTC Account administrator has given you access to.  Depending on the “contribution” level you have access to, you can add, manage and assign “tags” that are basically extra metadata that will help your team search and filter through your shared content. 

    Here’s some tags as an example: 

    AutoCAD Civil 3D

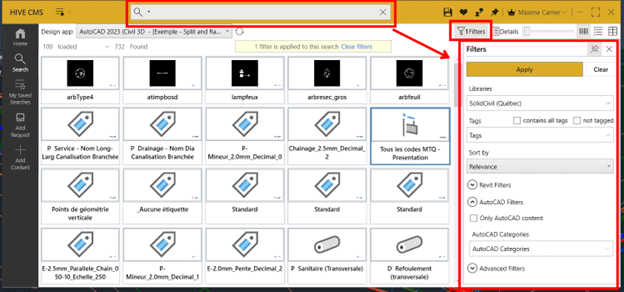
    The search engine from Hive CMS is extremely powerful, helping you sift through your organization ever-changing and ever-growing standards. The Filter menu allows you to do some advanced search using content name and metadata, and even save it for further uses (for you or for your entire organization). 

    AutoCAD Civil 3DT

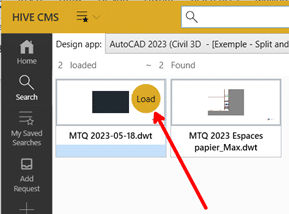
    o use a piece of content, just click it from the Hive CMS interface and it will launch in your currently opened drawing or will add itself to your current drawing (for Civil 3D styles and labels), ready to be used. 

    To launch a file, like a new drawing from a template or opening a PDF document in your default application, just click it from your library: 

    AutoCAD Civil 3D

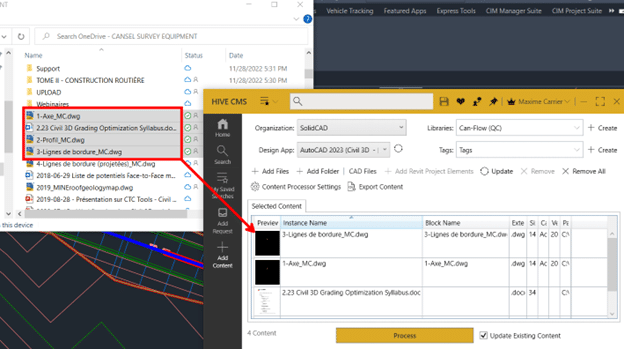
    While there are some subtilities to upload content to your libraries (not covered in this blog), uploading files in Hive CMS is done as easily as drag-and-dropping your files from Windows File Explorer to the “Add content” tabular editor, assigning a Library (and appropriate Tags) and clicking the Process button. 

    AutoCAD Civil 3D

    In conclusion, the Hive system will help your organization to better support your CAD and Civil teams with scalable tools that are easily shared and covering any needs you want from a custom user interface, a custom Tool Palette and so much more. Hive makes your standard deployment easier, safer and way more user-friendly for everyone involved (administrators, superusers and users alike). 

    CTC MEP3 2020.1.2 Update

    What is the CTC MEP3?

    The Mechanical Electrical Plumbing Productivity Pack leads the market as the ultimate content package today, precisely tailored for businesses engaged in the fields of both mechanical and electrical design engineering. The MEPPP seamlessly consolidates the Mechanical and Electrical Productivity Packs into one easy to use pack, ready for immediate deployment straight out of the box.

    CTC MEP3 Overview:

    • Project setup time is decreased by utilizing comprehensive project organization.
    • 50 view templates for all view types, including schedules and 100 predefined view filters.
    • 350+ mechanical families based on manufactured content.
    • Over 225 mechanical details with all Revit linework and annotations
    • More than 350 electrical families with over 200 symbols
    • All family content is fully integrated with extensive schedules & tags.
    • User manual includes links to instructional videos.

    CTC MEP3

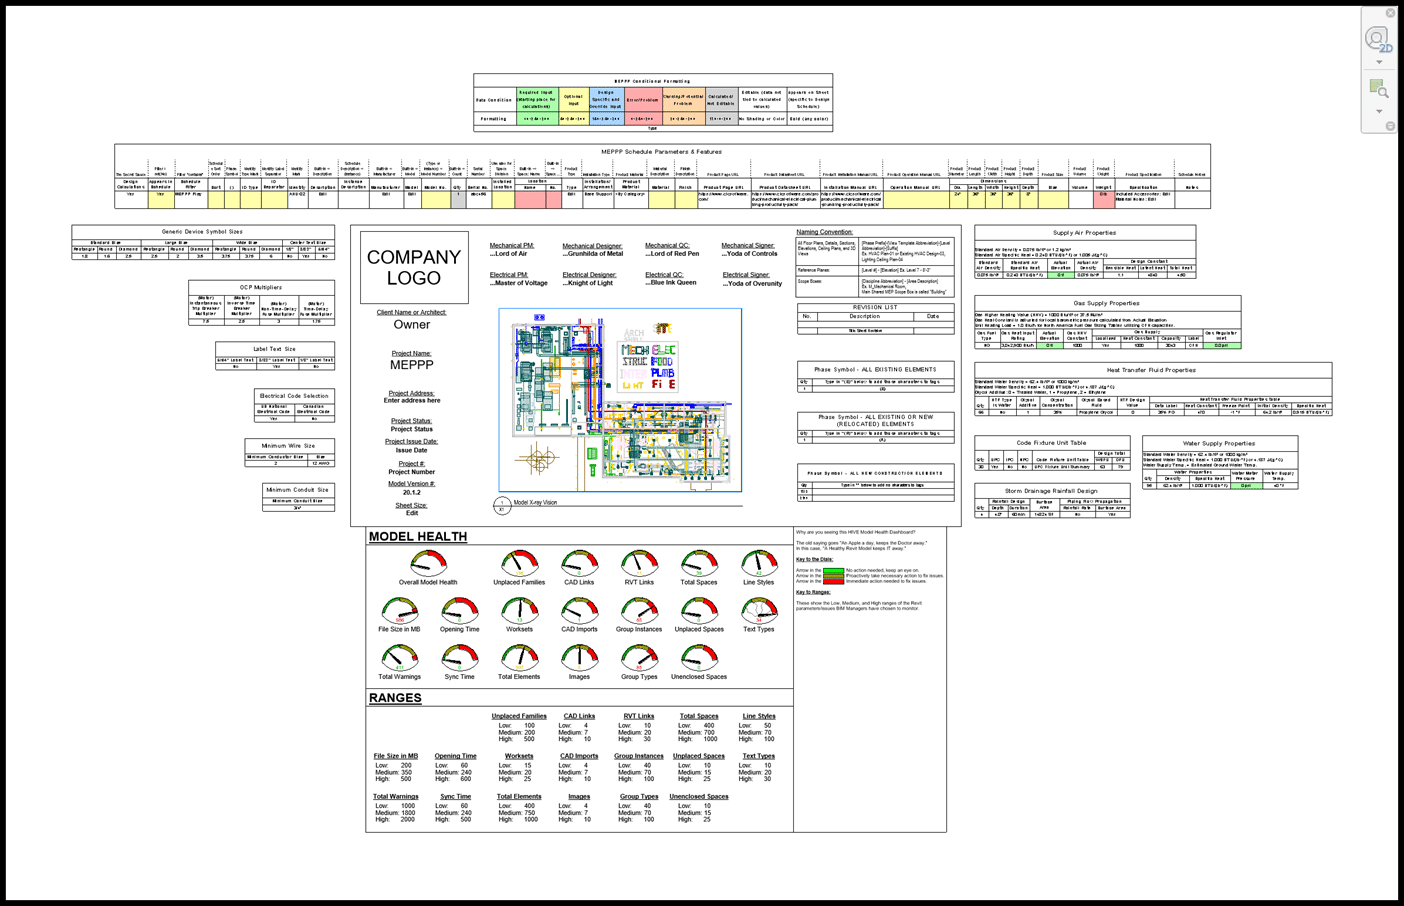
    Figure 1 Cover View

    Previous MEP3 Updates:

    20.1.0

    • Electrical Family Improvements
    • Electrical Hosting
    • Electrical Workflows
    • NEMA Endorsement
    • Conditional Formatting

    20.1.1

    • Mechanical Content Improvement
    • Workflow Consistencies
    • Further Parameter Standardization

    What’s New in 20.1.2?

    Performance Improvements

    • Due to changes in Revit 2021+, combined parameters have been removed to produce “10x” speed improvements.
      • 116 schedules updated.
    • Improved formulas for performance
    • Family structure optimized.

    New Schedules

    • 118 new schedules added across the MEPPP.
    • Full conditional formatting

    Updated Conditional Formatting

    • 10 design schedules updated to new conditional formatting.
    • 101 schedules updated for consistent overall formatting.
      • Organization of parameters, justification, title headers etc.

    New Parameter Groupings

    • 37 parameter types have been re-grouped across all relevant families.
    • 20 family collections have updated <type> vs <instance> parameters.
    • 35 family collections have signification calculation updates.
      • Calculations previously were not inaccurate but were optimized for performance and modernized for current calculations.

    Updated Visibility Graphics

    • 7 view collections have significant updates to visibility graphics. 

    Air Terminal Enhancements

    • Significant updates to auto-sizing
    • New non-auto-sizing options
    • Greater number of families
    • Significant performance improvement

    Families and Types

    • New tagging options (4)
    • New types
      • Condensate Pump
      • PTAC (Wall Unit)
    • New Families
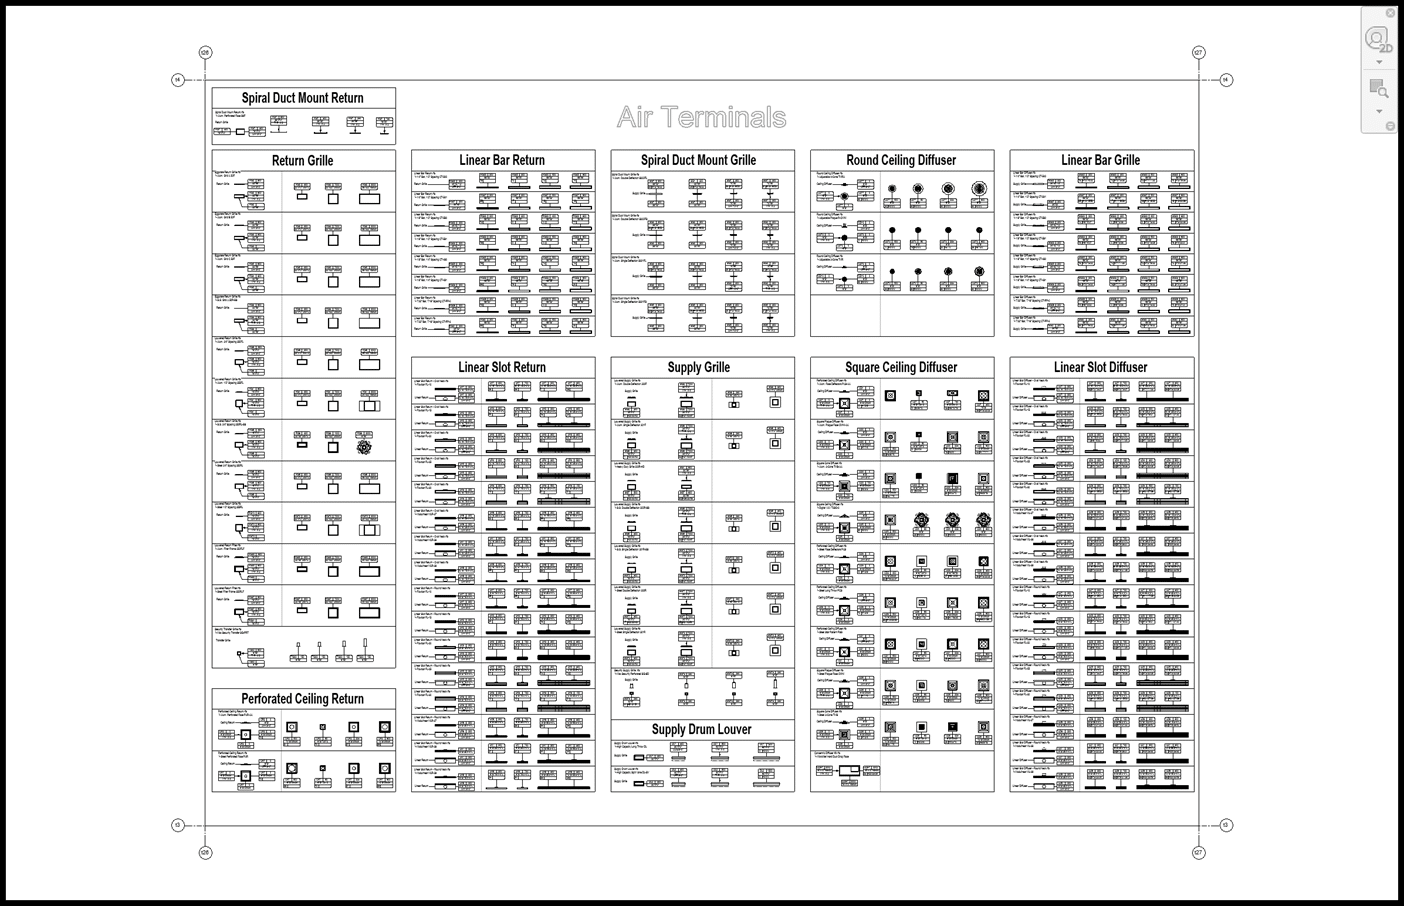
      • Air Terminals (25)
      • Outdoor Split System – Residential
      • Domestic Booster Pump
      • Standpipe Valve

    CTC MEP3

    Figure 2 Air Terminals

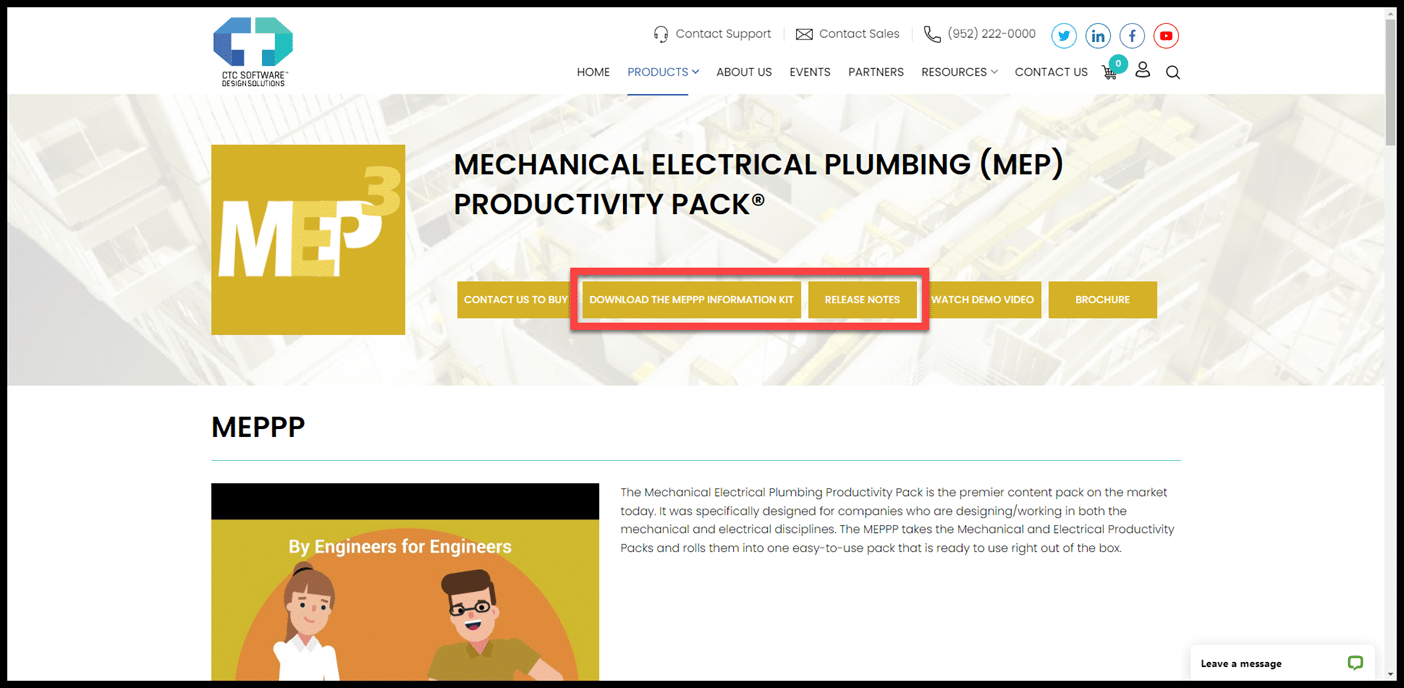
    For a full list of all the new features, enhancements, and fixes, visit www.ctcsoftware.com and review the Mechanical Electrical Pluming (MEP) Productivity Pack release notes or download the MEPPP Information Kit.

    CTC MEP3

    Figure 3 www.ctcsoftware.com

    For any questions reach out to your sales rep or contact us at info@solidcad.ca.

    Revit: Update Room Finish Schedules with CTC Spreadsheet Link

    Modifying and updating a room finish schedule in a Revit project can be a tedious task. Working in an itemized Revit schedule makes it time consuming to modify data cell by cell. Have you been tasked with this assignment?

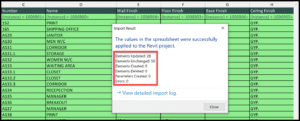
    If only Revit can allow you to manipulate large amounts of data in an efficient way. There is a solution! CTC Spreadsheet Link. CTC Spreadsheet Link allows users to export data from Revit to a spreadsheet where the data can be edited and then pushed back into the Revit model.

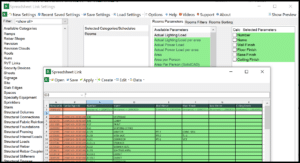
    CTC Spreadsheet Link allows users to export data from Revit to a spreadsheet where the data can be edited and then pushed back into the Revit model. You can create your own saved settings for repeated workflows. Using the Room Finish Schedule example, you would select your category (Rooms), available parameters (Ex: Number, Name, Wall Finish, Floor Finish, Base Finish, Ceiling Finish) and Sorting (Sort Rooms by Number).

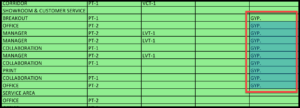
    You can use Excel/spreadsheet like functions. Copy and paste, copy a cell or range of cells by holding down CTRL, you can add formulas to make calculated values and many more.

    What if you are a non-Revit user? CTC Spreadsheet Link allows you to save the spreadsheet to multiple formats (Ex: Microsoft Excel Workbook). Data can be manipulated in the exported native program and then imported back into Revit.

    To learn more about CTC Spreadsheet Link, CTC tools, or if you have any other questions, please feel free to contact us and one of our representatives will be in touch with you as soon as possible.

    CTC Licensing Model Change – What you need to know!

    With the release of the 23.0.0 version of all the CTC Software tools, CTC has taken the opportunity to update their licensing model.

    Licensing for any of the CTC suites of tools was broken up into tiers of licensing with maintenance attached or differences depending on how many employees were in the company. It was tedious to explain, and not too efficient to implement.

    Starting with the 23.0.0 release of the suites, CTC is moving to a CSL model of licensing. This Cloud Shared Licensing is much more in line with the SaS model of software delivery. However, this is deliberately not the named user licensing that Autodesk has moved to. The CSL model is intended to simplify access to the tools while maintaining the flexibility of the network licensing style of license.

    Put simply, the CSL model is a cloud hosted version of the network licensing most of us are familiar with. Which means there is no need for installing license managers on local servers, all users need is internet access to use the CTC tools. The CSL is hosted on the new CTC website that was launched in conjunction with the 23.0.0 suite releases.

    With the new website, there have been additional efficiencies added by automating tasks like the option to renew automatically and automatic fulfillment of orders. The new website will also give administrators detailed insight into their teams’ suite usage and the ability to control the allocation of licenses with the creation of Groups of users on the website.

    The move to CSL was done for efficiency for everyone. This simplifies and standardizes access to the tools, allows for instant license allocation, offers reporting on usage of suites and tools, and simplifies pricing models.


    One thing to note is that the 2022 and older versions of the CTC Suites still only work with the legacy licensing and cannot use the CSL model.


    If you have any questions regarding this new licensing model for the CTC Software, your SolidCAD Account Manager will be more than happy to help.

    CTC Software: The Benefits of Cloud Shared Licensing

    CTC Software has enhanced their licensing model in June 2022, all new licensing is facilitated through Cloud Shared Licensing (CSL) now. This shift to CSL means that moving forward the 2023+ releases of their tool sets will only be available through CSL. It marks a big jump in flexibility and tracking of license sharing and puts CTC ahead of the curve in the industry for license facilitation. All you need is an internet connection and access to their website to use your CTC tools now.

    https://ctcsoftware.com


    What is Cloud Shared Licensing and how is it different from the Network Licensing or Named User Licensing?

    CSL is NOT at all the same as the Named User licensing that most software has migrated to. We can think of CSL as network licensing managed from the cloud. This is preferable to the network licensing because the license manager doesn’t need to be installed on your server and setup time is greatly reduced.

    Named User Licensing ties the license of the product (A seat of Civil 3D for example) to a user’s email, this is intended to restrict the use of that product to that single user among other thing. CSL is still a pool of licenses that you would use a login to access. So 100 employees could have logins to access a pool of 10 licenses, but each license can only be used by 1 person at a time.

    What does this change mean for my company and me using the tools?

    As mentioned above, this will allow you to have access to your CTC tools with a CTC Account login and access to internet. No need to even be connected to your company network to pull a license from your pool of CSL license.

    Importantly, CSL will still allow compatibility with the latest 5 versions of your Autodesk software.

    On the IT and license management side of thing, CSL is incredibly easy to setup, manage, and report on license usage. Through the CTC website we can access the license portal to set up and assign licenses to user groups, borrow licenses to access offline, revoke licenses, setup auto-renewals, and manage roles & admin rights associated with your CTC products.


    How do I manage my licensing now?

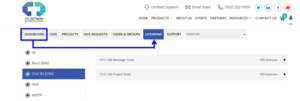
    Accessing the licensing portal is done through the https://ctcsoftware.com website and clicking on the person icon next to the shopping cart.

    After logging in, you will be directed to the portal dashboard where you can navigate to licensing to see all your CTC products.

    From here you can invite user, add them to user groups, assign roles, and assign access to your various products.


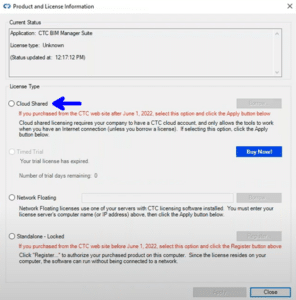
    From within the Autodesk software once the tools are installed on the work station, the user ill just have to click on one of the darker colored tools to bring up the “Product and Licensing Information” dialog box.

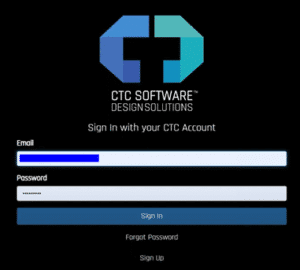
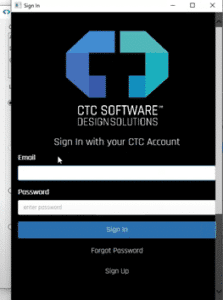
    Once you click the Cloud Shared and click Apply, it will bring you to the Sign In window to enter your CTC Account credentials. You will only be required to sign in the first time you access the tools and will give you access to all the tools that you are assigned to in the licensing portal.

    The new Cloud Shared Licensing is the future for CTC Software and I hope this article has shown you some of its benefits. CTC has done a great job with a couple webinars linked below to explain the picks and clicks in more detail for setup and management of the license portal, so I would encourage you to watch them as well.


    Note for their Network and Standalone end of life:

    May 1st, 2023: You will no longer be able to buy Network or Standalone Licenses. Only new seats of CSL.

    May 1st, 2024: You will no longer be able to renew existing Network or Standalone Licenses. This marks the point where CTC tolls will only be available as CSL.


    Resources:

    CTC YouTube Channel:

    A Comprehensive Introduction to Cloud Shared Licensing https://www.youtube.com/watch?v=JH9X_6PA3Zw

    Administering Cloud Shared Licensing
    https://www.youtube.com/watch?v=hg_TnV1wimI

    Civil 3D: Recreate your Template

    Recreating a Civil 3D template from scratch is not something we look forward to, but it may be necessary at times. Read on to find out more.

    You may ask why one would need to do this. Some users will do this when they upgrade to a new Civil 3D release. I have not seen any evidence that would convince me to do this. The only time I would recreate a template is if there is a serious problem that can’t be fixed without it. The recover command does a very good job at removing anomalies that may arise between Civil 3D releases.

    So, you’ve decided to do it. What to do? There may be further steps that what you see below, but these will go a long way to making this arduous task a little more pleasant. The workflow below assumes that your original template is not completely pooched and can be successfully inserted into your new file.

    1. Open problem template:

      • Export system variables to a file.            


      • Note the assigned coordinate system in Civil 3D Settings, Files tab.   


      • Use this CTC tool to export the Civil 3D Object Layers to a file. It is found in the CIM Manager Suite.
        Civil 3D’s Import Styles and Settings tool does a poor job of restoring these. If you don’t own CTC tools, enter Civil 3D Settings and note all the object layer settings so they can be restored in the new file.


      • Export any Layer Filters. If you’re using Civil 3D, this is easy.
      • Export any Layer States.
      • Export any Property Sets (if you are using Civil 3D).

    2. Begin a new blank drawing using the acad,dwt or dwt files, and save the drawing.

    3. Import system variables from the file you saved earlier. There are many settings saved in a DWG that must be restored.
     

    4. Import the Layer Filters.

    5. Import the Layer States.

    6. Import the Property Sets and check any label styles where they are referenced to ensure they operate properly.

    7. Insert problem file and explode. Purge anomalous blocks if necessary.

    • This step will insert most of the styles and any pre-configured objects like Point Grous, Surfaces, Pipe and Pressure Networks.
    • If the original file is too far gone, skip this step. You will need to recreate any pre-configured Prospector objects.

    8. Set the coordinate system if there was one set in the original template.

    9. Import styles and settings from problem file.
    If you skipped step 4, note that this command DOES NOT import everything. See this document for more information. These may need to be dragged and dropped form the original or recreated. 

    10. In the Prospector, inspect the names of any pre-configured objects and adjust if necessary.

    11. Use this CTC tool to import object layers from the file you exported previously.

    • Restore them manually if you do not own CTC Tools.

    12. Import paper space layouts from problem file.

    13. Close the new file and run the RECOVER file to open it and check for problems.

    14. Recreate the Scale List.

    • This can be easily done by creating some text in the original file and assigning all the scales to it. Copy this text and paste it into the new file then delete the text. New scales will now be available.

    15. Test, test, test. To make sure everything works as it should.

    16. Of course, make a backup of the original file and SAVE the new file with the original name.

    CTC Licensing Model Change – What you need to know!


    With the release of the 23.0.0 version of all the CTC Software tools, CTC has taken the opportunity to update its licensing model.

    Licensing for any of the CTC suites of tools was broken up into tiers of licensing with maintenance attached or differences depending on how many employees were in the company. It was tedious to explain, and not too efficient to implement.

    Starting with the 23.0.0 release of the suites, CTC is moving to a CSL model of licensing. This Cloud Shared Licensing is much more in line with the SaS model of software delivery. However, this is deliberately not the named user licensing that Autodesk has moved to. The CSL model is intended to simplify access to the tools while maintaining the flexibility of the network licensing style of license.

    Put simply, the CSL model is a cloud-hosted version of the network licensing most of us are familiar with. This means there is no need for installing license managers on local servers, all users need is internet access to use the CTC tools. The CSL is hosted on the new CTC website that was launched in conjunction with the 23.0.0 suite releases.

    With the new website, there have been additional efficiencies added by automating tasks like the option to renew automatically and automatic fulfilment of orders. The new website will also give administrators detailed insight into their teams’ suite usage and the ability to control the allocation of licenses with the creation of Groups of users on the website.

    The move to CSL was done for efficiency for everyone. It simplifies and standardizes access to the tools, allows for instant license allocation, offers to report on the usage of suites and tools, and simplifies pricing models.

    One thing to note is that the 2022 and older versions of the CTC Suites still only work with the legacy licensing and cannot use the CSL model.


    Want to learn about this licensing in more detail? Visit: View Recording (gotowebinar.com).

     If you have questions regarding this new licensing model for the CTC Software, your SolidCAD Account Manager will be more than happy to help!