So, you have created a new model using the InfraWorks model builder, but you’re not pleased with the resolution. If so, read on…
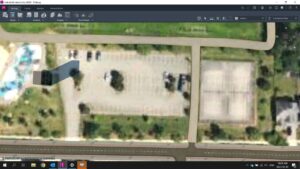
Here is an example of a recent model I created. Free, but not a great image.
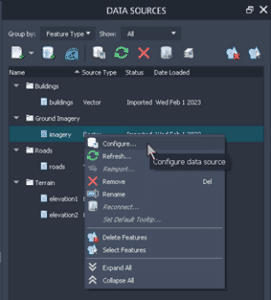
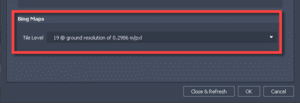
You’re not stuck with this. InfraWorks chooses a resolution that it believes is adequate. Configure the imagery data source and set the resolution to a higher number.
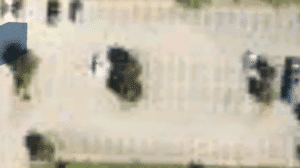
Allow the software to regenerate the model and voila…
To learn more about InfraWorks, or if you have any other questions, please feel free to contact us and one of our representatives will be in touch with you as soon as possible.
Autodesk has just released their Point Cloud management application, Recap 2023. Click here to join the live webinar on April 19th. Click here for Autodesk documentation. Read on to find out more.
Here is the new feature:
Autodesk Docs
Store point clouds in Autodesk Docs and share them with stakeholders. The Autodesk Viewer has been enhanced to allow Point Clouds to be viewed, measured, and annotated within an internet browser.
Autodesk has just released its Civil visualization and analysis application, Infraworks 2023. Click here to join the live webinar on April 19th. Click here for Autodesk documentation. Read on to find out more.
Here are some of the new features:
Parametric Content
Easily check for updated content from the styles palette.
The Infrastructure Parts Editor plugin for Inventor is no longer required, point to any Inventor Part or Assembly, and it will be added as a new style.
Structural Bridge Design
Bi-directional workflow between structural analysis and the parametric bridge model has been enabled.
Command Search
Use simple terms to search for the commands you need when you need them. And, this tool keeps a history of your past actions, making it even simpler.
Cloud Credits
Cloud credits are no longer required for Watershed Analysis and Profile Optimization.
It’s relatively easy to create a custom component road assembly within an Infraworks model. But how does one save that custom assembly for use later? Read on to find out!
The answer depends on how you’d like it to be shared:
Export for use in other existing models.
Save for use when new models are created.
Saving the Assembly
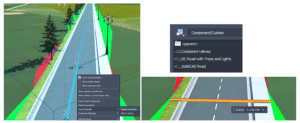
First, to save a custom assembly, simply right click the component road and choose Add to Library. Choose a station to copy and give the new assembly a name. The new assembly will appear in the style palette.
Choose a station to copy and give the new assembly a name. The new assembly will appear in the style palette.
Export for Existing Models
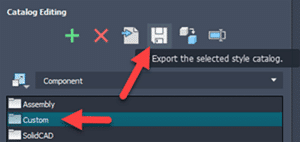
The individual assembly cannot be exported, but the catalog can. Select the catalog, in this case, Custom, and click to export to a JSON file.
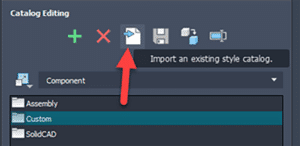
The JSON file can then be imported into a different existing model using the import button. The assembly will be available in the styles palette.
Save for Future Models
There is no “tool” for this, but if one copies the appropriate files from and to the correct locations, then it works just fine. The custom assembly files can be found in the model’s folder path.
…model.files\unver\Content\Styles\Component\ . Possibly in a Custom sub-folder.
There will be 2 files for each assembly. A PNG image and a ACItem file.
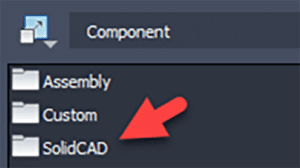
Copy these two files to the Infraworks standard folder. Feel free to create a sub-folder here to place your custom assemblies. This folder will appear within Infraworks.
Do you use BIM 360 and AutoCAD products? Do you have the Autodesk Desktop Connector installed? If so, there is a new update. This may not be news to you as there are frequent updates, but this one is somewhat unique. Please read on.
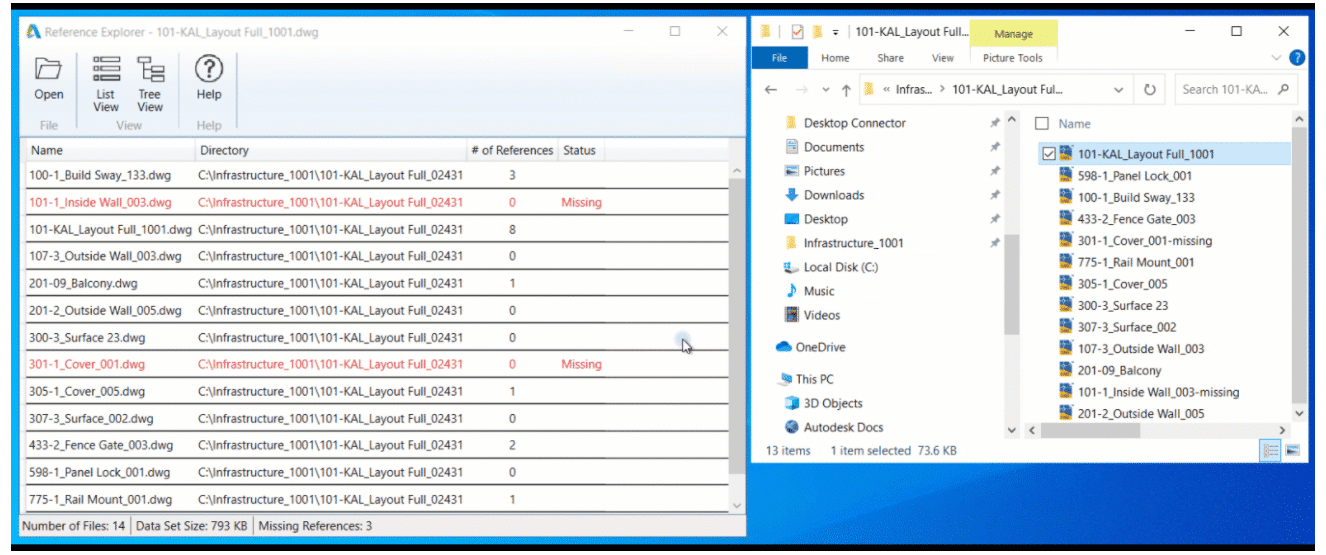
The new Reference Explorer provides the ability to visualize all files in a dataset as well as the relationships between the files before or after uploading to the cloud.
Resolved Issues:
DST files will not open, and content is incomplete after the DST file is saved to the workspace, or when synced from the cloud.
Increased the number of concurrent files in download workflows to increase performance.
Do you use more than one CTB file when printing in AutoCAD? More than 10? 40? What if I said you really only need 1, the Monchrome.ctb file? Read on to find out how…
If you already understand CTB files, feel free to scroll down to the heading “Do This Instead”.
Let’s look at what we have to work with:
1.AutoCAD users use various colours.
2.Typically, the colours used are chosen from this 256-colour “Index” palette.
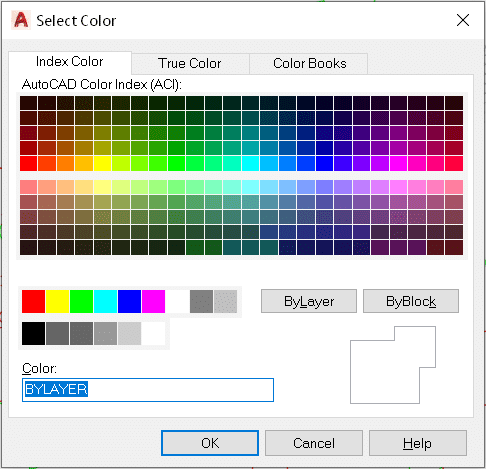
3.Those colours on the screen don’t always print that colour.
4.Linework need to print to varying widths.
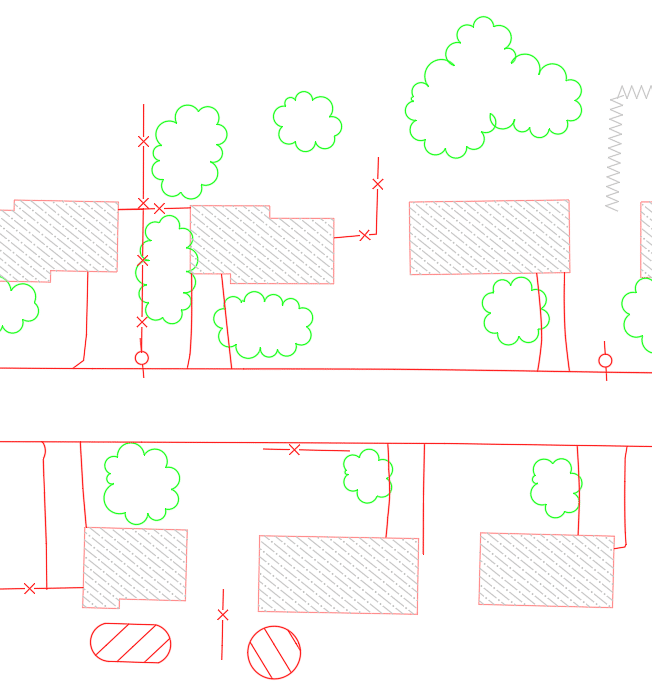
On-Screen:
Printed:
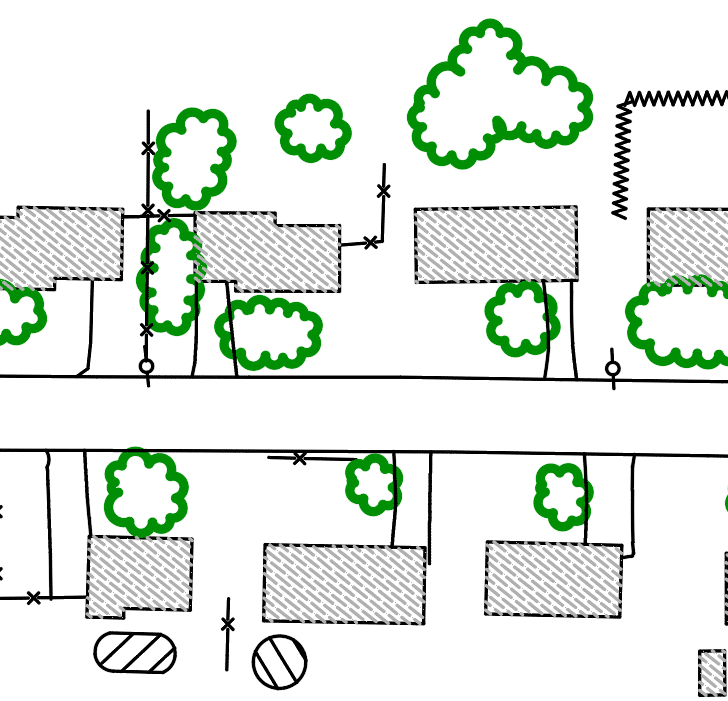
CTB files are the intermediary between the drawing on screen and the final printed product. If one is not used, what you see on screen is what is in the print. They are used to transform what is seen on screen to what is displayed in the print.
Many AutoCAD users rely on several CTB files to print documents to various regulatory standards. Here is why…
The City of SolidCAD requires a sanitary sewer layer to be red on screen but print black and thick (1mm).
The District of Cansel requires that same sanitary layer to be red on screen but print red and not so thick (0.7mm).
42 other standards exist and a unique CTB file is required for each of them.
Here is the SolidCAD CTB file:
Here is the Cansel CTB file:
THESE ARE NOT REQUIRED!
Yes, that was a little tongue-in-cheek. Sometimes you’re sent a file and you just need to print and use the available CTB. But if you have the time, inclination, and desire to make things a little easier on yourself, understand it’s possible.
Do This Instead
The solution here is actually very simple. Follow these steps.
1.Set the line weight properly for the layer based on the regulatory body standard.
2.Use the out of the box monochrome.ctb file. This file prints all 256 Index colours in black.
How to print hat sanitary layer in red when the CTB file prints all colours black, you ask? Well, I didn’t say the CTB prints all colours black, just the 256 Index colours.
3.When colour is required set the layer colour, not to one of the 256 Index colours, but to one of the 16.7 million True Colours.
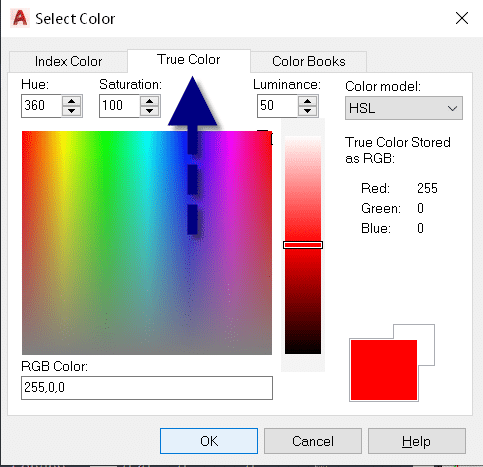
4.You need to print a grey shade? Again, choose a True Colour; just choose a colour at the very bottom. Use the slider on the right to control the shade.
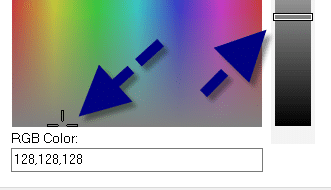
You see, the CTB file does not control the output of True Colours, only the 256 Index colours.
Autodesk has released the latest version of their Civil Engineering package, Civil 3D 2022, and its partner in crime, Infraworks. Click to peruse the Autodesk Documentation. Recap 2022 has also been given some new features. Read on for some notable features.
Civil 3D
Grading Optimization: Takes the parameters that you have specified and generates, very quickly, an optimal grading solution. After installing Civil 3D 2022, you’ll find sample files in the folder C:\Program Files\Autodesk\Grading Optimization 2022\samples.
Connected Alignments: Supports complex curve groups, offsets from parent alignments, curves larger than 180-degrees, and calculates the cross fall of the associated profiles.
Project Explorer: Pressure networks are now supported. Multiple languages are now supported.
Infraworks
Road Decorations: Allows users to add decorations to component roads or linked corridors from Civil 3D. The InfraWorks model will display the features more quickly compared to previous releases.
Decoration Library: Now users can create more realistic landscape environments to add to the model context.
Bridge: Provides for the definition of full-span complex parametric 3D bridge girders.
Model Builder: Enhanced with a new and streamlined interface to provide a more consistent experience and improve usability.
Recap
Scan to Mesh: Select all or a portion of a point cloud in ReCap Pro 2022 and have it create a low, medium, or high-quality mesh. This was included in a previous version as beta software, but it was removed. It is back!
It’s that time of year again folks; Autodesk has released their flagship Civil Engineering product in Civil 3D 2021. Here is an Autodesk article explaining the new changes. Here are my favorites from this release.
Format
There is no format change this year. Excellent! You may share your Civil 3D files with users back to 2018.
Pressure Networks
There has been significant development to this feature. If you have not been using pressure networks due to feature limitations, it is time to rethink your approach; these tools are good! We now have path-based pressure network Pipe Runs in both plan and profile. The image below shows a grip-edit to a pressure main. The bend was automatically swapped after the grip-edit.
Do you need your pressure network to maintain a 1.5m cover below your corridor surface? Here, the pipes are dynamically linked to the design profile at a 1.5m depth.
Infraworks Interoperability
More collaboration features have been introduced, such as:
Civil 3D corridors can now be mapped to Infraworks Component Roads and remain dynamic to the drawing when reimported.
Infraworks bridges are now supported within Civil 3D, stylized labeled in profile views. There is a new Bridges node in the Prospector.
Scripting
There are additional nodes and functionality related to Dynamo scripting.
There has been a significant change to Infraworks’ services.
1. It will no longer be possible to create new analyses such as Watershed, Traffic, Line Girder, Profile, and Corridor in 2018.2 and earlier versions of Infraworks. In addition, web and mobile views will need to be recreated.
Upgrading to Infraworks 2019 when it becomes available is required to use these features. This step was taken to improve the security of your data by meeting SOC2 standards, and to conform to new EU data protection regulations.
Autodesk has released the latest update for its Infraworks application. You will find information about the update in the team webcast found here. The update is not yet available as of January 2, 2018, but check your Desktop App or Autodesk Account for it in the very near future.
A brief look at the new features…
Reality Capture
Linear breakline extraction improvements.
Linear breakline editing tools.
Camera image lookup from point cloud scans.
Road Modeling
PI and Element based modeling.
Element editing improvements.
Quantities
Calculate drainage quantities by up to 4 depth ranges.
Utility and generic quantities by style.
QTO visualization.
Bridge Modeling
Manage parametric content.
Use inventor assemblies.
Export template for use in other models.
Automatic bridge creation over water has been removed.