• Infraworks: Custom Assemblies

    It’s relatively easy to create a custom component road assembly within an Infraworks model.  But how does one save that custom assembly for use later?  Read on to find out!

    The answer depends on how you’d like it to be shared:

    • Export for use in other existing models.
    • Save for use when new models are created.


    Saving the Assembly

    First, to save a custom assembly, simply right click the component road and choose Add to Library.  Choose a station to copy and give the new assembly a name.  The new assembly will appear in the style palette.

    Choose a station to copy and give the new assembly a name.  The new assembly will appear in the style palette.

    Export for Existing Models

    The individual assembly cannot be exported, but the catalog can.  Select the catalog, in this case, Custom, and click to export to a JSON file.

    The JSON file can then be imported into a different existing model using the import button.  The assembly will be available in the styles palette.

    Save for Future Models

    There is no “tool” for this, but if one copies the appropriate files from and to the correct locations, then it works just fine.  The custom assembly files can be found in the model’s folder path.

    …model.files\unver\Content\Styles\Component\  .  Possibly in a Custom sub-folder.

    There will be 2 files for each assembly.  A PNG image and a ACItem file.

    Copy these two files to the Infraworks standard folder.  Feel free to create a sub-folder here to place your custom assemblies.  This folder will appear within Infraworks.

    C:\ProgramData\Autodesk\InfraWorks\Resources\LocalLibrary\Styles\Component\

    The JSON file can then be imported into a different existing model using the import button.  The assembly will be available in the styles palette.


    CMAC-Thyssen

    Success Stories

    CMAC-Thyssen

    CMAC-Thyssen Mining Group is a contractor and mining equipment manufacturer offering a diverse range of fully integrated services with contracts carried out across multiple continents and over 850 employees worldwide. CMAC-Thyssen Mining Group makes the mining profession accessible through their unique training program, mechanized equipment, solid partnerships and innovations.

    They have been working with SolidCAD since 2015 and maintain a strong relationship to this day. Being such a prominent company in their industry, CMAC-Thyssen stays up to date with the most efficient software and training to help them succeed.

    Improving data flow with Vault, Inventor and AutoCAD!

    The Challenge

    Due to their vast international client base, CMAC-Thyssen accrued a tedious amount of paper data. The production team was unable to access drawings without help from their engineering department. This ultimately slowed down their workflow as their engineers became overwhelmed with the huge amount of information and lack of resources to efficiently store it.

    The Solution

    CMAC-Thyssen reached out to SolidCAD to streamline their processes and improve data management. Our team of industry professionals was able to assess their needs and implement AutoCAD, Vault and Inventor to help bring their data into the digital world. Rather than speeding up the processes they had in place, our technicians helped them rethink their processes altogether and streamline their entire workflow through organized and accessible data.

    The Results
    • Since implementing these solutions, CMAC-Thyssen has seen a huge leap in productivity.
    • The production team can now access the most up-to-date drawings independently.
    • Document retrieval for 3rd parties had improved by 100%.
    • They have improved document filing and now have more flexible archiving.
    • Documents can be easily accessed online without the need for physical records.

    Testimonial

    SolidCAD does their job very well, we have a good relationship with them. Their technicians helped us with implementation and are an integral part of the team. There has been a lot of collaboration and it is very appreciated on our part. I advise other companies who have the same challenges as we did to choose SolidCAD, a supplier with a long history of technical and problem-solving experience, communication, resources and a lot of knowledge. Their staff has a lot of lived experience. Instead of wasting time trying to search online and solve workflow problems on your own, call on the expertise of SolidCAD.

    -Normand Gauthier,
    IT Manager at CMAC-Thyssen Mining Group

    Products & Services Used

    Similar Projects

    D-Wave

    D-Wave Quantum Inc. (D-Wave) is the leader in the development and delivery of quantum computing systems, software, and services. It is the only quantum computing company building both annealing and gate model quantum computers and…

    3D-P

    3D-P consists of a team of mining and positioning technology experts. It was created to bring innovative thinking and new technologies to the mining industry. They have since evolved to bring this approach to several…

    Starline Windows

    Starline Windows is an industry leader in the design and manufacturing of architectural aluminum window systems, as well as residential vinyl windows and doors for over 50 years. They have completed thousands of contracts and…

    How Concrete Contractors Can Best Use Bluebeam Revu

    This story was originally published by Troy Degroot on the Bluebeam Blog.

    I’m a firm believer that every specialty contractor could benefit from implementing Bluebeam Revu in their everyday workflows. For this article, I’d like to highlight a concrete contractor’s position from bid to built.

    There are a few important objectives we find in any construction project. I’d like to walk through how Revu meets those requirements. If you’re interested in learning more about how these can be done in Revu, have a look at “5 Ways Concrete Contractors Get the Most Out of Bluebeam Revu.”

    Every company is different in how it approaches projects. In this article, I want to highlight the possibilities so you can see where Revu fits and what customizations may be required to make it fit your unique needs.

    Let’s look at those project objectives.

    From the first time you open the request for proposal (RFP), there are things a project manager starts to think about even before they open the drawings—and even more as the plans rollout.

    Project Location: Do we have crews in the project location, or do we need to accommodate for travel expenses? While Revu may not have a “location cost” built into the available tools, it is possible to develop these. Perhaps you want to have a pulldown menu with specific cities or areas where you perform work regularly. Along with the locations in a pulldown, you could also associate a percentage markup to account for that area based on historical project data.

    Pour Dates and Schedule: Do we have crews available to meet dates and project phases? For large development projects with phases, we can use the Spaces feature in Revu. Simply draw a Space shape around an area of work and name it “Phase II.” By doing so all the slabs, curbs, etc., will be categorized in the markups list under the Phase name. This makes it easier to allocate crews, materials and equipment based on the specific requirements of each phase. We can also track the progress using the built-in Status column where crews can mark each day’s progress on what slabs, walls or foundations were completed.

    Equipment Required: Just like labor availability, we need to consider equipment availability for things like forms, trucks, curb or cross pan machines. Creating custom tools in Revu, you can place a symbol within a “Phase” indicating what equipment is required. You can even allocate a rental price per day for the equipment cost estimate.

    Estimate: There are great measurement tools included in Revu allowing you to calculate area of slabs, volume of isolated pad footings or linear footage of strip footings. The versatility of Revu and our ability to customize tools opens the door to personalizing your markups and what data is generated. We can differentiate types of pours by color, linestyle and hatch patterns, or even add labels to display a description right on the drawing. We can also add parameters like design mix, hand vs. machine, or whether fiber mesh or WWF is required. In some cases, we could even estimate the rebar required or the number of trucks need to be scheduled based on cubic yards.

    Finish Requirements: We need a clear understanding of finishes like construction/control joint layouts, stamped design, smooth or broomed, color stained or saw cut requirements. Applying different colors or hatch patterns to the markups will clearly identify those areas in a clear and visual way for the estimator and the crew in the field. A custom line tool representing saw cuts allows you to trace them on plan and quickly apply labor and equipment costs based on a linear footage collected in the markups.

    QA/QC: As a final walk through you can do a punch list noting any damage cause by other trades. You can easily incorporate images or video documenting these damages and what it will cost to fix them.

    Revisions and Scope Changes: Every project has delays for weather, site and utility prep. Often projects have design changes as well and we need to not only stay current but also track and communicate scope changes. These can often change cost and pricing as the scope begins to creep after the original estimate. Revu also has tools called Document Compare and Overlay Pages that will look at two drawings and quickly point out the differences. Document Compare is going to automatically draw clouds around all the changes. Overlay Pages is like the old light tables we used to place physical drawings over one another and see what was different. After finding the changes, your takeoff markups can quickly be stretched or moved rather than starting over. At that point, you have tangible evidence of scope changes for cost updates.

    After reading these objectives and possibilities, you could have one of three responses. One, this article helped evaluate Bluebeam Revu as a solution. Two, you already use Revu, but the article sparked ideas on how your current use could improve. Or three, we confirmed you’re already getting the most out of your software investment.

    Civil 3D: PPK Extension

    Many of our customers desire the ability to transform Civil 3D data between coordinate systems.  This was challenging or impossible…until now!  Read on…

    It is available for Civil 3D 2019-2022.  Read more about this extension here.

    The Autodesk® PPK Survey Extension 2022 for Civil 3D® provides an interface for importing GPS data (in RINEX format) for analysis, reporting, and converting it to coordinate geometry points in an Autodesk Civil 3D drawing. Once installed, users can access the Autodesk PPK Survey Extension 2022 for Civil 3D commands via the Autodesk Civil 3D Toolbox.

    Under COGO Points Transformation Tools:

    • Coordinate System Transformation
    • Vertical Datum Transformation

    Under GNSS Data Processing:

    • Post Process Kinematic Survey

    Enabling The Navisworks Plug-In in Plant 3D

    In my previous blog, I explained how Navisworks can complement Plant 3D.

    Now I will show you how to enable some Navisworks features directly within Plant 3D, or any AutoCAD based products. With this feature enabled the user can export a Navisworks (NWC) file directly from within AutoCAD. They will also have the option to manage the Navisworks export settings.

    For this example, I will be using AutoCAD Plant 3D 2021 and Navisworks Manage 2021. If you do not have access to Navisworks you can download the Navisworks exporters from Autodesk directly.

    Here is the link: Navisworks 3D Viewer Free Download | Navisworks Freedom (autodesk.com)

    Loading the Plug-in in AutoCAD

    1) Open or create a new DWG in AutoCAD.

    2) In the Command line, type APPLOAD

    3) Navigate to: C:\ProgramData\Autodesk\ApplicationPlugins\autocad_exporter2021_x64.Addin.bundle\nwexport2021

    4) Select crx

    5) Click on Load

    6) It will inform you if the Plug-In was successfully loaded.

    7) To test it, start typing NW in the command line. A new set of Navisworks commands should be available.

    8) To export DWG contents, simply type NWCOUT and save the file.


    Adding the Navisworks Menu in AutoCAD

    With AutoCAD or a DWG open, type CUILOAD in the command line:

    1) Click on Browse

    2) Navigate to: C:\ProgramData\Autodesk\ApplicationPlugins\autocad_exporter2021_x64.Addin.bundle\nwexport2021\nwcreate_data18

    3) Change the File type to “Legacy Menu Files”

    4) Select mnu and click open.

    5) Click on Load

    6) Close the CUI dialog box. If you get a warning message, it is ok to proceed.


    If you would like to learn more, Navisworks training is available as a supplementary course to SolidCAD’s Plant 3D course curriculum. Please contact training@solidcad.ca

    What a “Free” Document Management Tool Costs Your Business

    Many free content management solutions are available in the market today, such as SharePoint, Box, Network Shares, and even USB external drives. Organizations recognize the need to capture their electronic documents online and use these tools to fill the need. While providing basic functionality, free applications can cost your business more money and time than a dedicated engineering document management system (EDMS). 

    While seeming to be a cost-effective solution, the reality is these “free” tools are missing a considerable amount of standard EDMS functionality. Here are just a few examples:

    • Document control
    • Workflow automation
    • Full change management

    This lack of features can cost money to your organization and cause lost knowledge with staffing turnover and retirement.

    Where “Free” Document Management Tools can work and their Limitations

    Some businesses can have success using document management solutions such as SharePoint, Box, and other file share applications if they fall into the following categories:

    • Only require basic document management functionality
    • Small or mid-sized organization
    • No need to collaborate across different departments or external sources

    These tools tend to work as sizeable digital filing cabinets, allowing groups to share and save documents in an accessible space and provide the following benefits for non-technical documents:

    • Provide users the ability to save, share, and search for files across the business
    • Cloud-based sync storage of files
    • Mobile device access to documents
    • Easy management of landing pages, libraries, and lists

    Where “Free” Document Management Tools Fail Engineering Requirements

    While these “free” tools fill a niche role, they do not provide a complete solution required by an Enterprise-class organization that requires structured, controllable document management.

    A “free” tool can assist organizations that utilize a basic linear workflow for generic documents, but technical documents and drawings require a malleable workflow. Technical documents usually are highly regulated with a control process in place.

    Technical documentation also comes with the following challenges:

    • Normally unstructured data set
    • Used across multiple systems and teams
    • Difficult to access due to change management locks and file type diversity

    These factors make engineering documentation tough to manage, access, and control. When you add in other systems, such as a CMMS tool, it is challenging to monitor this information within the limitations of a free tool.

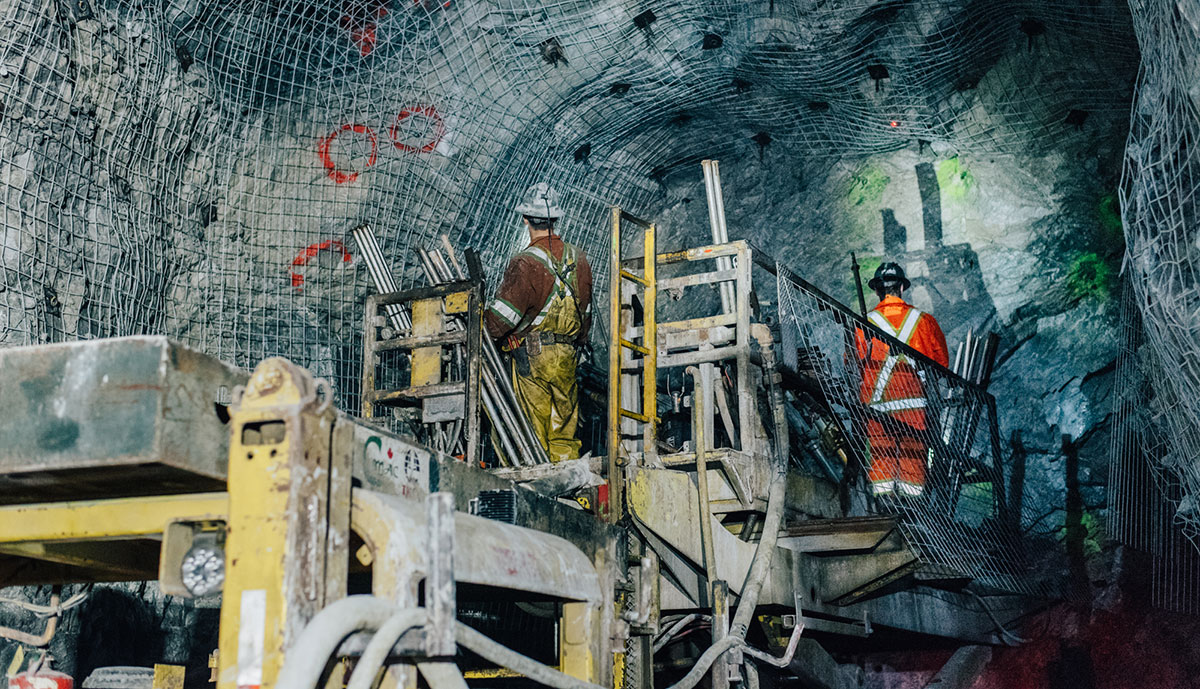
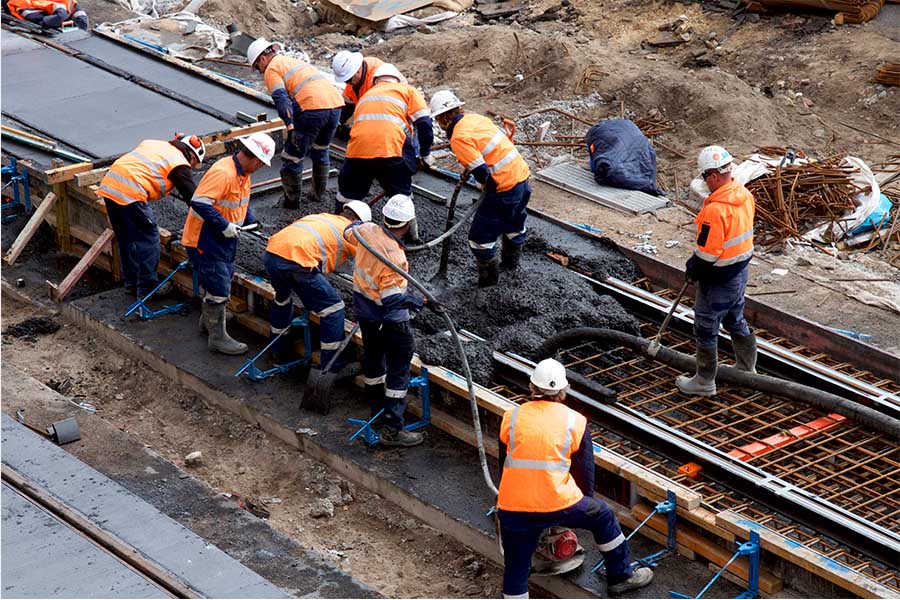
    Getting this wrong can have a significant impact and reverberating effects throughout multiple teams. In document-heavy facilities (i.e., power plants, factories, etc.), technical information must be accurate and available to avoid downtime and maintenance issues, leading to lost revenue. Businesses trying to shoehorn these free tools into their typically experience the following problems:

    • Increased costly downtime
    • No integration available between other systems such as CMMS
    • Increased complexity of change process management
    • Concurrent engineering challenges with technical documents
    • Lack of communication tools across multiple sites and departments
    • Lowered efficiency due to missing EDMS functionality

    The True Value of Meridian EDMS

    A robust engineering document management solution (EDMS) like Meridian is required to help organizations manage their technical data and avoid the pitfalls of “free” tools. While having an initial higher cost, EDMS solutions provide a considerable value when looking at the overall picture. Here are a few benefits gained by using a dedicated EDMS:

    1) Document Exchange

    Larger projects bring the challenge of sharing documents with multiple departments and teams. These documents can be lost or delayed when being pushed through the review cycle. An example of this is an AutoCAD file with external references. Drawings referenced by the target document can be ignored or lost during a typical workflow unless tightly tracked throughout the process.

    Meridian solves this issue by tracking these secondary technical documents with built-in functionality. Free tools such as network shares or Dropbox do not cover these scenarios, leading to lost or duplicated work.

    2) Extra IT Maintenance Costs

    While a “free” tool can seem cost-effective, it often strains IT resources assigned to manage them. Typically, the IT resource tasked with maintaining this tool is responsible for many other systems and lacks the proper training.

    The Meridian SaaS offering provides all maintenance, support, and upgrades which removes the added workload from your IT resources.

    3) Work Order Efficiency

    While “free” tools can help a smaller business execute on work orders, they become a hindrance to a larger organization with multiple teams and facilities. Work orders can be challenging to locate across multiple disparate systems with inadequate search tools, which can lead to the following:

    • Safety concerns
    • Multiple document copies spread over different systems
    • Technicians using obsolete document versions
    • Inaccurate data due to lack of document control tools

    With a dedicated EDMS like Meridian, your organization can refer to a single source of truth that features purpose-built document control. Technicians will gain access to the latest document version that is found easily using robust search capabilities. All technical documents related to an asset can be located quickly via a tag scanner or the surrounding metadata via the advanced search. Streamlining this process will have an immediate impact on work order costs and resource availability.

    4) Lower Operating Costs

    Using “free” tools alongside legacy pen and paper document solutions incur costs associated with printing and logistics. When you need to get a hard copy into the hands of a critical resource on time, this can impact your budget. Not only can this cost your business money, but it also wastes effort if the package does not contain all the required documents.

    The Meridian solution will allow your teams to move critical data into a single system with high online availability. Moving to an EDMS will allow your resources to access the latest complete document packages on many IoT platforms (i.e., mobile devices, tablets, PCs). Manual labor is heavily reduced via the automation capability of the tool, saving many hours in labor costs.

    Sometimes “Free” is Expensive

    The actual cost of a “free” or legacy tool can surprise an organization. By not using a purpose-built application to manage your technical documents, you can end up costing your business time, efficiency, and money in the big picture.

    If your business is interested in unlocking the power of a dedicated EDMS, don’t hesitate to get in touch with the SolidCAD Meridian team.

    Autodesk Desktop Connector Update

    We are excited to share with you the highlights of the latest Autodesk Desktop Connector update!

    Enhancements are:

    • Folders Shared using Autodesk Drive are now visible on the desktop when using Desktop Connector.
    • When using Autodesk Collaboration for Civil 3D, an XML configuration file can be used to prevent a drawing’s reference template file from being uploaded when saving or dragging and dropping the drawing to Autodesk Docs.
    • AutoCAD 2022.1 will no longer create bak, dwl, dwl2 files when the dwg was opened from the workspace. For AutoCAD releases prior to 2022.1, Desktop Connector will add dwl and dwl2 files to the ignore list so they will no longer be uploaded.
    • In Autodesk Drive web, ‘My Data’ cannot be renamed or deleted. To match that behavior, Desktop Connector has removed those commands when right clicking on ‘My Data’.
    • Unnecessary “Checking Latest Version” dialog showing up during AutoCAD dwg compare workflow.

    There have been significant changes to folder sharing.  If you have folders shared, it is recommended to educate yourself on the new behavior.

    The new behaviour is outlined here and here.

    For more information, visit this link.


    Previews… More like Pro-views: Professional Revit Family Previews the Easy Way Using the Free Family Preview Generator

    When you are looking at inserting a family, you will want to get the most amount of information about the family file in the shortest amount of time. Without tools like HIVE you are limited to 2 sources of information, the name of the family and the preview image.

    Figure 1. Multiple preview directions in the Door Family Folder on my computer

    You can control the family naming convention for your company, so why not do the same with the preview image.

    Do you know how the preview image for a Revit family is defined? Its very simple, it’s defined in the File Save Options for the family:

    Figure 2. Setting the thumbnail manually

    The default in the Generic Model Template is that the Active view/sheet is used for the Thumbnail. This means that anytime you save the file you need to make sure that the view is setup for the presentation you want to see, this takes time and if most often overlooked.

    The Family Preview Manager from CTC enables you to control the preview image for multiple files:

    Figure 3. Free tools have the lighter tool image

    It is also one of the Free tools within the CTC BIM Manager Suite.

    Settings for the tool are found within the Options.

    There are general settings for things like whether to create backup files as well as which item should be hidden, for example, text and reference planes.

    Then there are Appearance settings and here you can select the View direction, Style, Detail level and more. So here you can define that it will be in the Realistic graphic style from the 3D Left Front Top view with the Fine Detail level. You can define the Default Appearance which will be for any categories that do not have an Appearance Template defined.

    Appearance Templates are then used for any catalogs that will not use the Default Appearance, for example Tag categories would be best saved in a Plan View rather than a 3D Isometric view.To use an appearance template, setup the template then assign categories to it. Note that you can assign templates for different hosting methods of families, this is important when you think of the orientation of content when face or wall based.

    You can select between the Active Family Document or multiple family files with the Document Batch option, however, Active Family Document will of course require that you have a family as the current open file.

    Once you have selected the files to be processed you will have the option to overwrite the family or save to a new location, I recommend using the save to new location when you are testing the tool, once you are comfortable with the results then use the Overwrite Family option.

    The end result of this tool? Consistency in your family library, all with a free tool from CTC, here is the link to download the tool:

    https://www.ctcsoftware.com/bim-manager-suite-trial/

    CANDEVCON LIMITED

    Success Stories

    CANDEVCON LIMITED

    CANDEVCON LTD., is a Canadian-owned multi-disciplinary company of engineers, planners, and technologists. The company and its staff have diverse backgrounds with emphasis on all aspects of infrastructure development. With offices in Brampton and Whitby, Ontario, CANDEVCON provides a full range of services including consulting, planning, studies, design, environmental, and construction management to clients across Southern Ontario. Its team of engineers, planners and technologists work with governments, architects, and developers to engineer the built environment.

    Standardizing CAD Processes with Customized Training

    The Challenge

    CANDEVCON was looking to create a consistent appearance and internal structure for their drawings. Their goal was to standardize their entire engineering design workflow and improve its production of land development project deliverables.

    They specifically wanted a training program that would train employees on their standardized procedures, improve the quality of work, and find efficient ways to complete repetitive tasks while enhancing their users’ knowledge base of the capabilities of their existing Autodesk software, Civil 3D and InfraWorks.

    The Solution

    The first half of the training was exclusively focused on training new staff on their new standard procedures. SolidCAD used CANDEVCON’s existing methods as a basis and formed a curriculum that would show users the best practices on how to facilitate the exchange of CAD data, add intelligence to the CAD drafting process and provide tips and tricks to better manage and integrate project data into a 3D design models.

    The second half of the training was focused on teaching all users a variety of methods that would enhance their design workflow such as efficient ways to simplify profiling for road infrastructure, site plans, and subdivisions and how to apply these techniques to their existing projects.

    The training program also included advanced techniques for all employees that would improve the production of project deliverables by teaching them how to manipulate the point-cloud data, use it within the company’s network and convert it into InfraWorks to create effective and valuable design presentations for clients.

    The training program ended with customized sessions for their senior staff that provided an additional advanced knowledge of the capabilities of their existing Civil 3D software.

    The Outcome

    After undergoing the training, the CANDEVCON technical team significantly improved their skills. The design workflow was standardized, CAD drawing appearances and configuration became efficient which sped up design production while reducing the likelihood of errors. In addition, the use of added intelligence to the CAD drafting process reduced the effort and time spent on updating drawings as well.

    In addition, CANDEVCON was able to develop robust 3D design models that incorporated data from geospatial and civil infrastructure data sources, giving them a competitive advantage when putting together detailed proposals when bidding on new projects. With new skills and the ability to add visualization techniques with InfraWorks, CANDEVCON was able to provide detailed and accurate designs to their clients.

    Testimonial

    Over the course of years, CANDEVCON chose SolidCAD as it’s software and service training provider due to the strong trust and confidence in the level of support and expertise demonstrated. From planning out investments in software purchases to finding the best ways of tailoring and conducting trainings according to our needs, SolidCAD makes the process simple and smooth. The moment we contact their team, they make themselves accessible and we appreciate the one-to-one customer support experience

    -Lynn Orr,
    Finance & Administration at CANDEVCON LTD.

    Products & Services Used

    • Autodesk Civil 3D, (software already owned by CANDEVCON)
    • Autodesk InfraWorks (software already owned by CANDEVCON)
    • Training (Customized Training Program owned by CANDEVCON for 9 Days)
    • Support

    Similar Projects

    Équipe Laurence: Driving Growth and Efficiency with BIM

    Ian Robertson Design, renowned for luxury residential projects, partnered with SolidCAD to fully implement Building Information Modeling (BIM), enhancing client engagement through advanced visualization tools and streamlined workflows. [...]

    Ian Robertson Design Elevates Client Engagement with BIM

    Ian Robertson Design, renowned for luxury residential projects, partnered with SolidCAD to fully implement Building Information Modeling (BIM), enhancing client engagement through advanced visualization tools and streamlined workflows. [...]
    Rutherford 120

    Who is Strasman Architects?

    Architecture is not merely about designing structures; it's an intricate blend of art and science that shapes the built environment, reflecting the cultural, social, and technological nuances of its time. Most importantly, it’s a collaborative…

    Getting Started with Product Design Visualization

    Getting started with product design visualization is easy.

    Currently most engineering is accomplished using 3D modeling software’s. It can be done in solids, surfaces, meshesnurb curves etc. It can be done as freeform, sculpted, parametric design, AI driven even. The possibilities are endless. 

    Still, somehow, it’s a common misconception in the manufacturing community that product design visualization is a niche discipline and is out of reach. Many companies even think that their products don’t require any type of product rendition because they are not doing consumer products. The fact is, that technologies and 3D models are so common and easily available now a days, that it is assumed by consumers that products are available to view on demands. One would expect to go on a manufacturer’s web site and view catalog products. That goes for any type of products, even heavy-duty industrial machinery. Lacking in product showcases can leave a diminished and negative perception of quality and services by a typical buyer. If people buy with their eye’s, setup a digital photo studio and give them eye candy.

    As the title of this blog implies, getting started with product design visualization is easy. In all Autodesk Collection of software’s is included 3DS Max. 3DS Max is an industry standard for 3d modeling, animation, special effects and obviously rendering. It’s comprehensible that at first glance such a software can be intimidating with the thousands of tools and features. Many users opened it just to close it immediately in fright after seeing the user interface. But when it’s come to basic visualization you will only need a hand full of those features. The workflow for a basic Photo studio style visualization is as easy as this:

    1. Import your model​
    2. Adjust materials to taste ​
    3. Set up environment​
    4. render 

    1. Import your model

    3DS Max support lots of different file types. The list shown here cover lots of ground and enable easy and efficient importation from any provenance.

    2. Adjust materials to taste

    The simplified material editor (Compact mode) is simple to use. I strongly recommend using the physical material since these materials have built in templates for quick creation and those materials are compatible with most renderers.


    3. Setup Environment

    In the environment dialogue box, a high dynamic range image can be imported as the scenes background. Those HDRI images do not only

    act as the scene environment but also act as the lighting scheme for the scene. This makes lighting a scene with the desired look a breeze. The high dynamic range image can also be used only as light. The actual environment don’t have to be shown to light the scene so another image can be used as a background. Having real lighting with a backdrop type background creates an excellent studio photoshoot space. 3DS Max come bundled with dozens of High dynamic range images but these images can be easily found by the thousands on the web.


    Scene without lights
    Scene with HDRI environment lighting
    Same scene with Studio backdrop

    4. Render

    From there you can render from the viewport as a point and shoot type of work. Cameras can also be created for more control and repeatability. To prove my point, I have done more examples of studio photoshoot style render’s. We can clearly see that this type of rendering is very suitable for manufacturing and industrial products and won’t break the bank.

    The learning curve of achieving your first renders with 3DS Max is not steep at all!

    Basic software file management, navigation and manipulation are the same as any other software and those knowledges are transposed with no effort. Learning how to set the environment dialogue box, how to use the material editor and how to adjust cameras will require a little work, but not much.


    Ask your Sale’s representative at SolidCAD about our new 2 days training; 3DS Max – Photo Studio Rendering.

    Bring your 3D design to life with 3DS Max.